This is a detailed review of the Fuji X-Pro2
Originally Published: January 15, 2016
X-Pro2 Firmware Ver.1.31 (Pre-production firmware) and Ver.1.00
June, 2016: AF-L/AE-L commentary added to Handling. Minor text edits.
This ad and tracker-free site’s sole source of support is from you using the links below for all your online shopping needs. Thanks very much for your support!
Introduction
It’s been 4 long years since the original X-Pro1—Fuji’s first entry in the mirrorless interchangeable lens market—was unveiled. I italicize “long” because, really, 5 years is not that long for a single camera generation. It’s actually pretty typical in the high end DSLR realm.1 The difference with mirrorless is there has been so much advancement that a 4 year old camera in this class can feel hopelessly out of date in some respects. When it comes to photo quality, the X-Pro1 can hang with anything else Fuji has released since. Take a hard look at operation though, and the X-Pro1 immediately shows its age.
The X-Pro2 has been rumoured for almost as long as its predecessor has been around. Sadly, recent “leaks” have all but spoiled all the X-Pro2’s marquee features,2 but mockups, photos, and spec sheets don’t tell much of the story when it comes to actually using a camera.
The X-Pro2 comes with major improvements like weather sealing that will have an affect on when and where X-Pro shooters use their camera, and a hardware addition of deceptively little consequence in the “Focus Stick” that will improve operation of the camera in a big way. This little thing is actually a bit of a game changer, and will quickly become a top requested feature for future cameras.
My kind of X Box
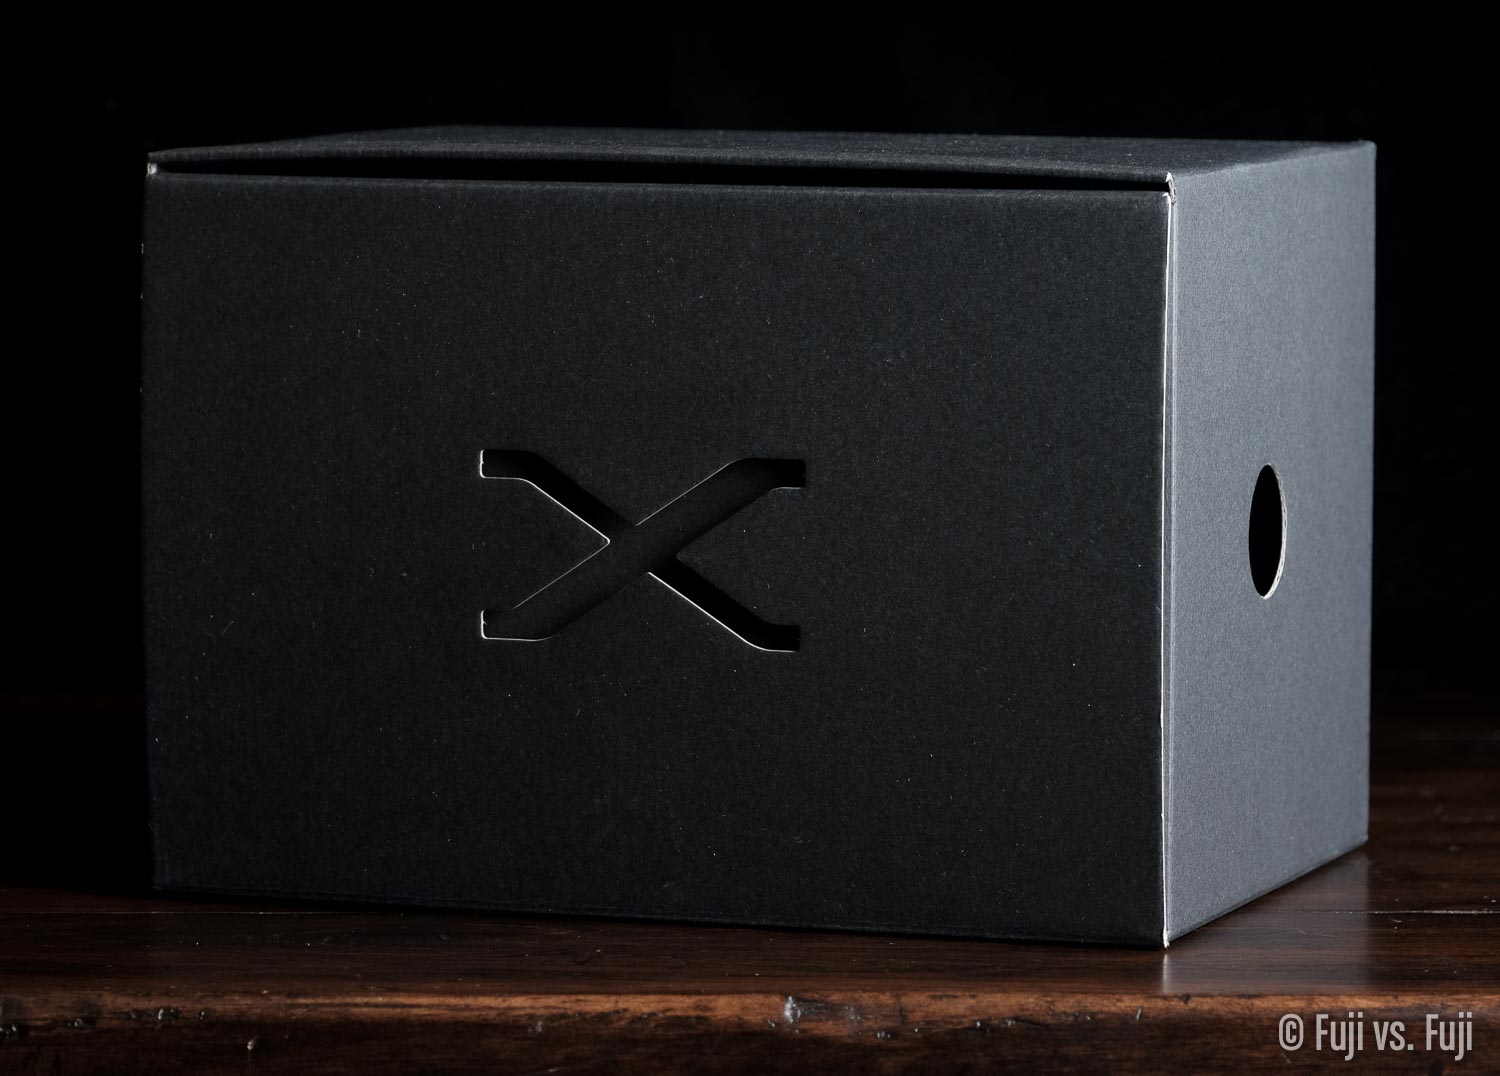
Unboxing
I have it on good authority that will unfortunately will not see Fuji return to the vastly superior unboxing experience of the X-Pro1, X100, XF 18mm f/2, XF 35mm f/1.4, XF 60mm f/2.4, and X100 converters. Pity. The black “X” box that slides out from the retail packaging seen above is pretty sweet looking though.
Supplied Accessories
Not much new to write about here. The X-Pro2 will ship with the usual NP-W126S battery, BC-W126 charger, body cap, strap clip attachment tool, metal strap clips, shoulder strap, and covers for the hot shoe and sync terminal. I do like this style of sync terminal cap more than the fiddly screw-on variety that comes with the X-T1. If I ever lose mine, I’ll replace it with the push-on version.
Set Up
Anyone who’s owned an electronic device in the last decade will be familiar with the initial set up process. You notice the improved menu design immediately. The “Start Menu” requires language selection, date format, and time input, then you’re ready to shoot.
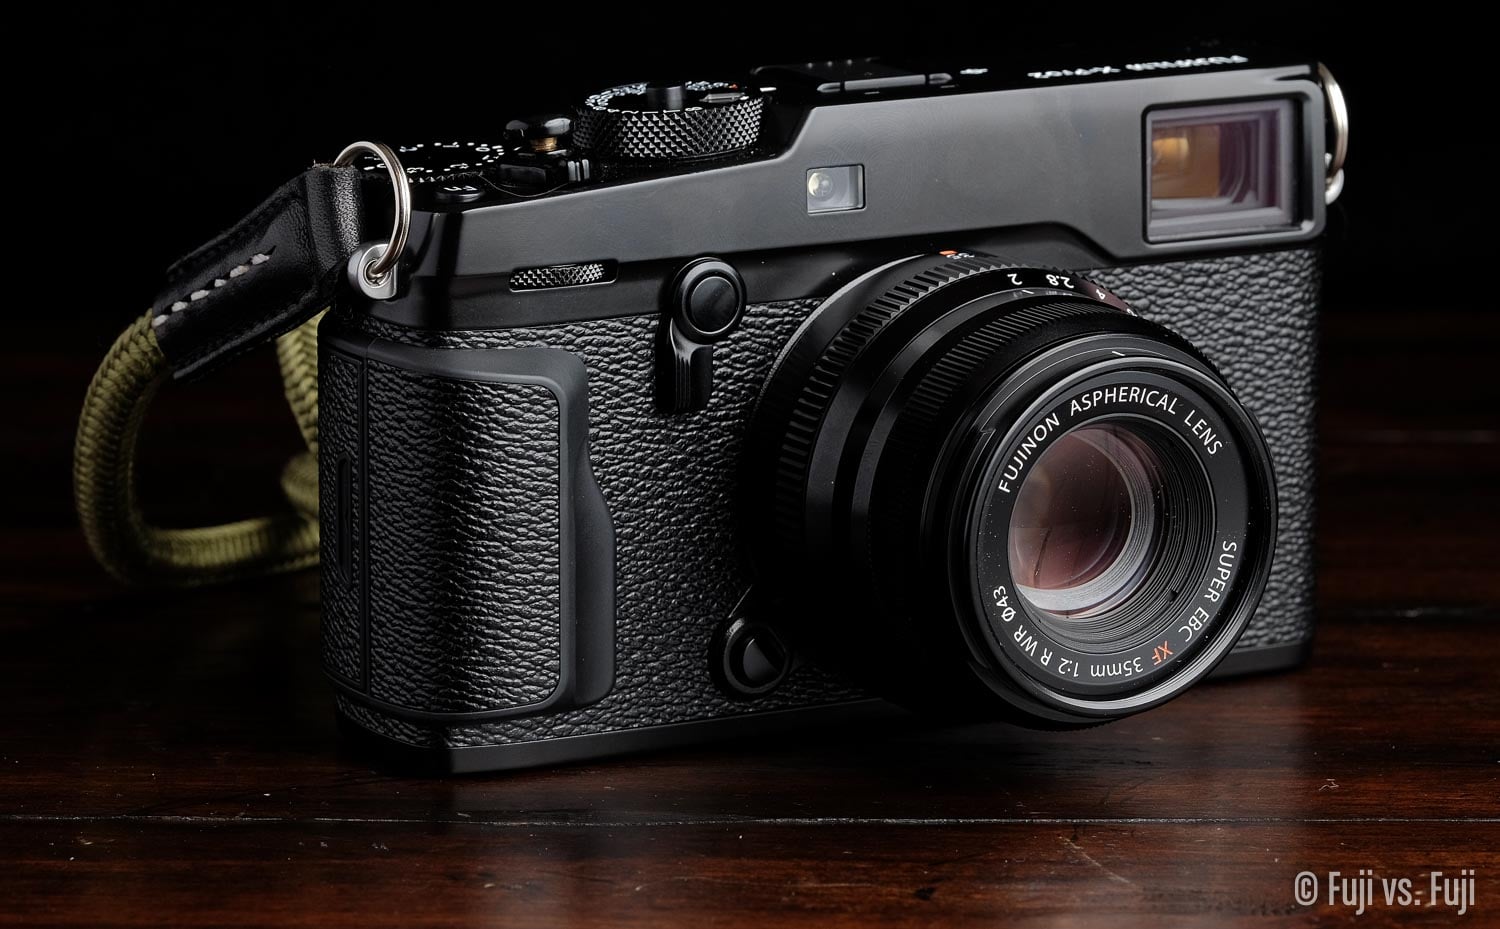
Build Quality
In general, Fuji has elevated the build of the X-Pro2. They’ve married the ruggedness of the X-T1 with the more utilitarian design of the X-Pro1, making improvements and refinements along the way.
Shutter Sound
This is sort of a weird place to start, but the shutter on the X-Pro2 sounds positively fantastic. You’re going to want to keep capturing images just to hear the sublime “ka-chunk” of the shutter. I can’t imagine wanting to hear one of the fake shutter sounds over the actual shutter, but then, I never could.
Below are some clips of the X-Pro2’s shutter. This is definitely one of those things that sounds better in person though.
For those moments when discretion is paramount, the electronic shutter is totally silent. There’s actually more noise produced by the EVF popping up to show me my beloved 0.5 second preview than there is from the actual shutter.
Shutter Speed
The shutter has also seen a speed increase, up to 1/8000 of a second, with 1/250 of a second flash sync. The former means one more stop wide open shooting with the mechanical shutter, which is nice. To be honest, your subject does need to be moving pretty quickly for the distortion of the electronic shutter to rear its head. The latter lets us blot out more ambient light an a studio environment. I have, on occasion, noticed that some specular highlights from ambient light are still visible at 1/180 of a second.
Weather Sealing
At long last, a “Pro” that doesn’t need sheltering from the elements. Fuji even managed to make a weather sealed threaded shutter release, part of the 61 points of weather sealing.
Magnesium
The X-Pro2 features a solid, all magnesium chassis. There’s something about magnesium, beyond just the weight, that improves upon a camera’s feel when compared to aluminum, or especially plastic. The X-Pro2 feels great, like a camera that will last you another 4 years.
Bottom Plate and Tripod Mount
I can think of at least one blogger who’s going to be awfully excited for this paragraph. No more seamed baseplate, just one solid mass of centred magnesium mount joy.
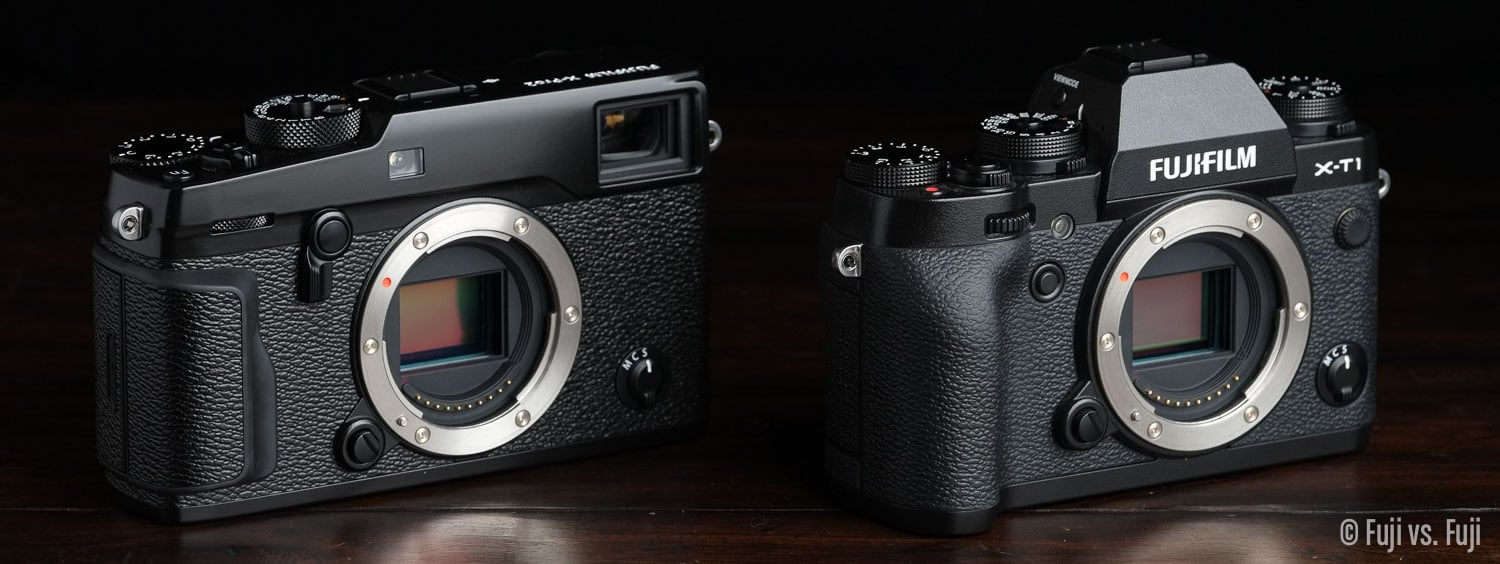
Size and Weight
When it comes to size, the dimensions have changed ever so slightly compared to the X-Pro1, but at a quick glance, you could easily mistake one for the other. The most significant size changes are in the depth of the camera at the viewfinder, and grip. Would you take a built-in diopter with a 3mm depth penalty over a fussy screw-in diopter?
With the addition of magnesium and weather sealing, the overall weight of the X-Pro has gone up to 435g naked, or just 5g shy of half a kilogram with the battery, all covers, and SD cards. It’s a difference of just 42g compared to the X-T1, and 40g compared to the X-Pro1. I’m a stickler for weight, but I’ll take 40 more grams for what the X-Pro2 offers over the other cameras all day long.
Memory Card and IO Covers
The memory card door is a huge improvement over the X-T1. It has yet to open in my hand without me wanting it to. I do hope Fuji opts to move all memory cards to the side of the body. I still have a hard time remembering they’re not in the battery compartment of the X-T1.
The connector cover looks the same as the weather sealed version on the X-T1, but it doesn’t open as easily, and closes way better. Those are both good things.


Sync Terminal
Maybe I was doing it wrong, but I couldn’t get the sync cable of my LP180 to stay in the X-Pro2 solidly. You’d need to knock the cable pretty directly, but it could be prompted out of its port.
General Fit and Finish
The X-Pro body has a more utilitarian feel to it. The only other camera Fuji sells that has a similar feel is the X30. I once criticized the weird slant on the shutter release side of the body, but as time goes on, and other companies design a little too much for form than they do function, I appreciate the ergonomic subtlety of the X-Pro’s off-kilter asymmetry.
All the bits that turn now have a consistent, cross-hatched grip to them which looks nice, and adds to the utility.
Buttons, Dials, and Switches
The quality, feel, and haptic feedback of all the ways I interact with a camera has always been extremely important. As is typical, I’ll take each of these items almost one by one.
Power Switch: No change in function from what you’re used to here on X-Pro, X-E, and X100 bodies, however the marking that indicates whether the camera is powered on or not has been engraved and painted white to make it easier to tell at a glance if your camera is ready to go or not.
Shutter Release: Queue angels singing. The threaded shutter release has made its triumphant return. Fuji has miraculously found a way to make the release weather sealed. I couldn’t get my soft release screwed in there fast enough.
Aside from the return to threaded glory, the shutter release feels exactly the same as all the threaded releases that came before it. I might have expected the weather sealing to have made it a little less wobbly, but it hasn’t.
Exposure Compensation Dial: It’s the same size as the X-T1 and X-T10 dials,—larger than the X-Pro1, X-E, or X100 bodies—but it doesn’t click quite as nicely. It’s also recessed more, making your index finger a little less useful for those used to holding either side of the dial. Place your index finger on top of the dial towards the middle, and it turns great, even better than the others. The finish is also a little different to match the smooth finish of the top plate.
The dial has full rotation, thanks to the “C” setting, which affords ±5EV via the rear Command Dial.

Shutter Speed Dial: A refinement from Shutter Speed dials of yore, the cross-hatched milling if the metal dial makes it more grippy, and easier to turn. The “Dial Lock Release” is quite a bit more spongy than it is on the X-Pro1, but feels pretty similar to the X-T1’s release. Finally, the dial features full rotation, and has “250X” marked for easy maximum flash sync speed selection.
ISO (Sensitivity) Dial: More angels singing. It’s an old school lift-and-rotate style combo dial that’s a bit fiddly, and it’s not quite as user-friendly as other dedicated ISO dials, but it’s there, and happily accessible with your right hand. It’s not going to be a dial you change on the fly during fast action much, but the more I use it, the more I like its deliberate operation.

Top Function Fn Button: I wouldn‘t typically single out a Function button, but it has a different feel to it than buttons that have been placed here before. It’s again a bit more spongy, but not necessarily in a bad way. It’s like the difference between the clicky shutter releases of consumer cameras and the softer releases of pro cameras. This is a good place to put a function you’ll use often.
Command Dials: More cross-hatched grippiness here, and the dials turn great. Both dials act as buttons as well. Whilst the rear dial won’t be pressed accidentally too often, those with larger thumbs are likely to find it tough to actually press without a lot of attention as it’s a bit recessed. This is a really tricky balance, but I definitely prefer Fuji erring on the side of harder to press with fewer accidental presses. The front dial should be out of the way of most peoples’ grip, and as been made easier to press thanks to it not being recessed at all.
Focus Stick (Focus Lever): It seems Fuji couldn’t decide how to either name this, or translate it. I like Focus Stick so I’ll be sticking with that. I’ll have lots more to say about this, but in terms of how it functions, I think it’s perfect. When I first thumbed it with the camera off, I was underwhelmed by the haptics, but as soon I actually used it, it became clear Fuji did it right. Directionally, it has subtle tactile feedback, but just enough to know it’s engaged, and as a press, the feedback is exaggerated. It’s just right because directionally, you’re sure to be making more nuanced adjustments, whereas with a press, you want definite immediacy.
D-Pad (Selector): Yet another D-pad. Layout and size-wise, it’s the same as the X-Pro1, but the presses are very different. I wish I had a better handle on engineering so I could articulate this properly, but it really comes down to clickiness. You always know when you’ve pressed one of these buttons. In fact, others around you might know when you’ve pressed them too. These buttons are borderline noisy. They’re excellent to use, but you won’t be playing with your new camera next to a significant other who’s trying to sleep. Brings back memories of when I got my PS Vita; no bedtime Persona 4 for me.

Rear Buttons: Not much to say here. They’re all more consistent in feel, and press nicely with the right amount of feedback. The “AF-L” and “Q Menu” buttons are a little clickier. This makes sense as they need to be recessed a little in an area that could be gripped.
Viewfinder Selector: This feels exactly the same as the X-Pro1. It’s nice and solid. Fuji also added a Fn button to the fulcrum, which was begging for a button before. This button almost feels like a shutter release. It’s soft and spongy, then clicks.

Focus Mode Selector: Nothing to say here. Same switch as we’ve had before. It’s pretty good, and it works.
Lens Release Button: Same as above.
Diopter Dial: Wait, what? You mean I don’t have to buy a separate diopter corrective lens? This dial feels about the same as diopter dials before it. I’m just pleased it’s there. Really pleased. There was something nice about having the potential to even correct for astigmatisms with the screw-in varity of diopter, but it’s a bit of a pain.
Autofocus
Fuji promises even faster autofocus speeds, thanks to their “X Processor Pro image processing engine.” Quite a mouthful. Details on exactly what is giving us the performance gains have been scarce so far, but I’ll endeavour to extract as much info on it as possible.
In my use, I haven’t noticed a huge difference in autofocus pace compared to the X-T1 when in the Phase Detect AF points. X-E2 owners will likely feel it a bit, and those still holding onto their X-E1 or even X-Pro1 are in for a treat.
I have noticed what feels like uncanny lowlight face detection. I was holding the camera up to test focus in a room lit only by a small lamp. My wife walked into frame and the X-Pro2 grabbed onto her face almost immediately.
Another area of improvement is in the outer contrast only AF points, which seem to move lenses like the XF 35mm f/1.4 back and forth through it’s focus range a little quicker.
The biggest improvement to autofocus comes with the addition of much more phase detect AF points, which I’ll talk about more in Handling, below.
Handling
Handling, for me, is what matters most when it comes to the actual act of photography. The less resistance there is from the camera in creating the image I want, the better. Handling is also where things get really interesting with the X-Pro2. What I feel are the two most important improvements work together to affect handling in dramatic ways.
Focus Stick (Focus Lever)
The first big feature. I mentioned in the intro that this bit of hardware will have a big impact on how you use the camera.

The Focus Stick gives you immediate, and blazing fast access to the position of your focus point or zone. I can’t express enough how much this helps with grabbing spontaneous and/or candid moments. It will help you blend in with a crowd, and can also help conserve battery life.

You could probably pull this move off with the X-Pro2’s Focus Stick
Now, you might be thinking, “But Fuji already gave us that on the X-T1 and X100T.” It’s true that you can set the D-Pad to behave partially the same way as the Focus Stick does, but it comes with the obvious caveat of losing three Fn buttons. Putting that massive drawback aside, the D-Pad is, well, a D-Pad, and the Focus Stick is like a joystick. The latter is exponentially faster thanks to the magic of diagonal movement. Where the D-Pad requires two clicks and the movement of your thumb to move the AF point one point diagonally, the Focus Stick takes just one click. Drawing from past experience, the best comparison I can make is trying to execute a Shoryuken (昇龍拳) on your SNES vs. at the arcade.
The Focus Stick also comes in handy for preemptively setting your camera’s focus area, especially when you’re not sure where you last left it. Click the Focus Stick twice to reset your AF point to the centre, then move it one way or the other X number of clicks. You’ll soon be able to set your focus point without looking at the camera at all, which can really draw attention when you’re trying to blend with the crowd during street photography, especially when you have the View Mode set to “Viewfinder Only.” You’ll never be that weirdo peering through their viewfinder at the sidewalk as you adjust your focus point again,3 or have to waste precious battery life by having your camera on Eye-Sensor, which lights up the LCD while you adjust settings, draining your battery, and drawing attention in low light situations.
The Focus Stick can be configured within Set Up > Button/Dial Settings to only activate after pressing the middle button, or deactivate (Lock) it altogether.
This little stick is what has helped the X-Pro2 capture the same magic the X100S, had for me. For my daily carry camera, I don’t want to use a camera without one again.
More In Phase
My second big feature; a full ⅔ of the frame is now covered by fast phase detect autofocus points. Would I have liked the whole sensor to be phase? Absolutely, but I’ll take a big increase over the same 9 points we had before. Now, a 7 × 7 grid, or 49 single AF points are available for selection with 77 focus points selected, and for the masochists, a 13 × 13 grid, or 169 single AF points.
I have noticed a bit of a slow down in lower light with a single AF point selected on the outer edge of the phase detect portion of the sensor, but that could be pre-production firmware thing. Otherwise, focus is quick and accurate. Move to the outer reaches of the frame and contrast AF takes over. It’s slower, but feels snappier than previous cameras.
Grip
While not as pronounced as the X-T1, the grip on the X-Pro2 has been enhanced, and made significantly more grippy. Rather than trying to fill the hand of some people, a rubber contour provides an excellent rest for the middle and ring fingers, allowing them to secure the camera more easily. On the back of the camera, a second piece of contoured rubber allows the thumb to grip the other side without any danger of accidentally pressing buttons. The D-pad sits under the arch created between the two knuckles of the thumb, and the Q and AF-L buttons sit right between the thumb and the index finger. I dare say that for a camera this size, Fuji are treading awfully close to grip perfection.

Less pronounced than the X-T1, but the most grippy grip Fuji has made.

More grippy goodness for your thumb on the back
If you do happen to hit the Q button accidentally too often, if can be “locked” by pressing and holding the Menu button until you see a little yellow lock icon.
Weighting
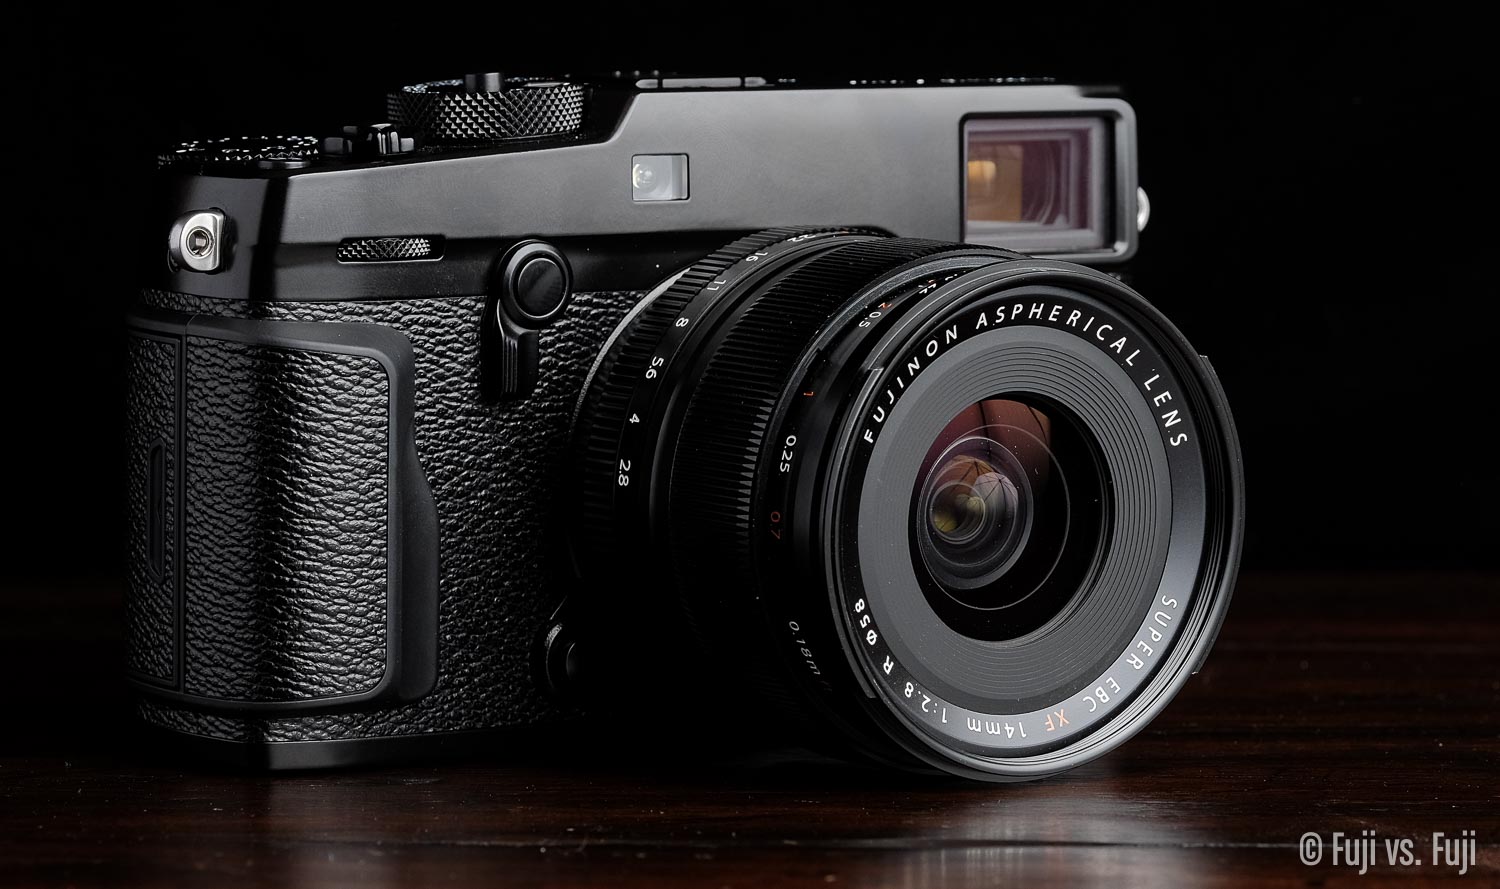
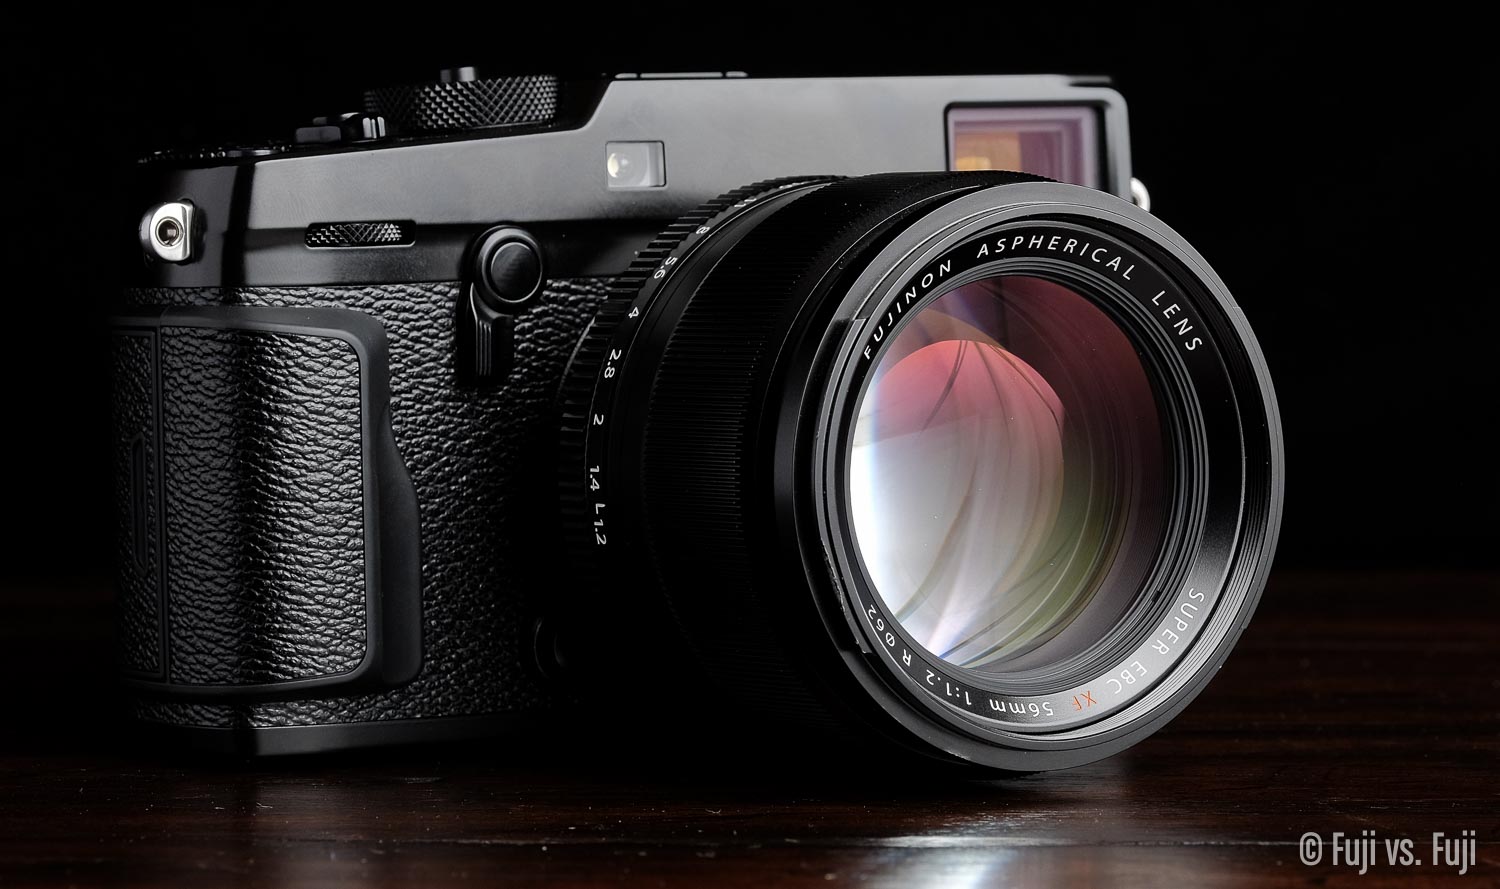
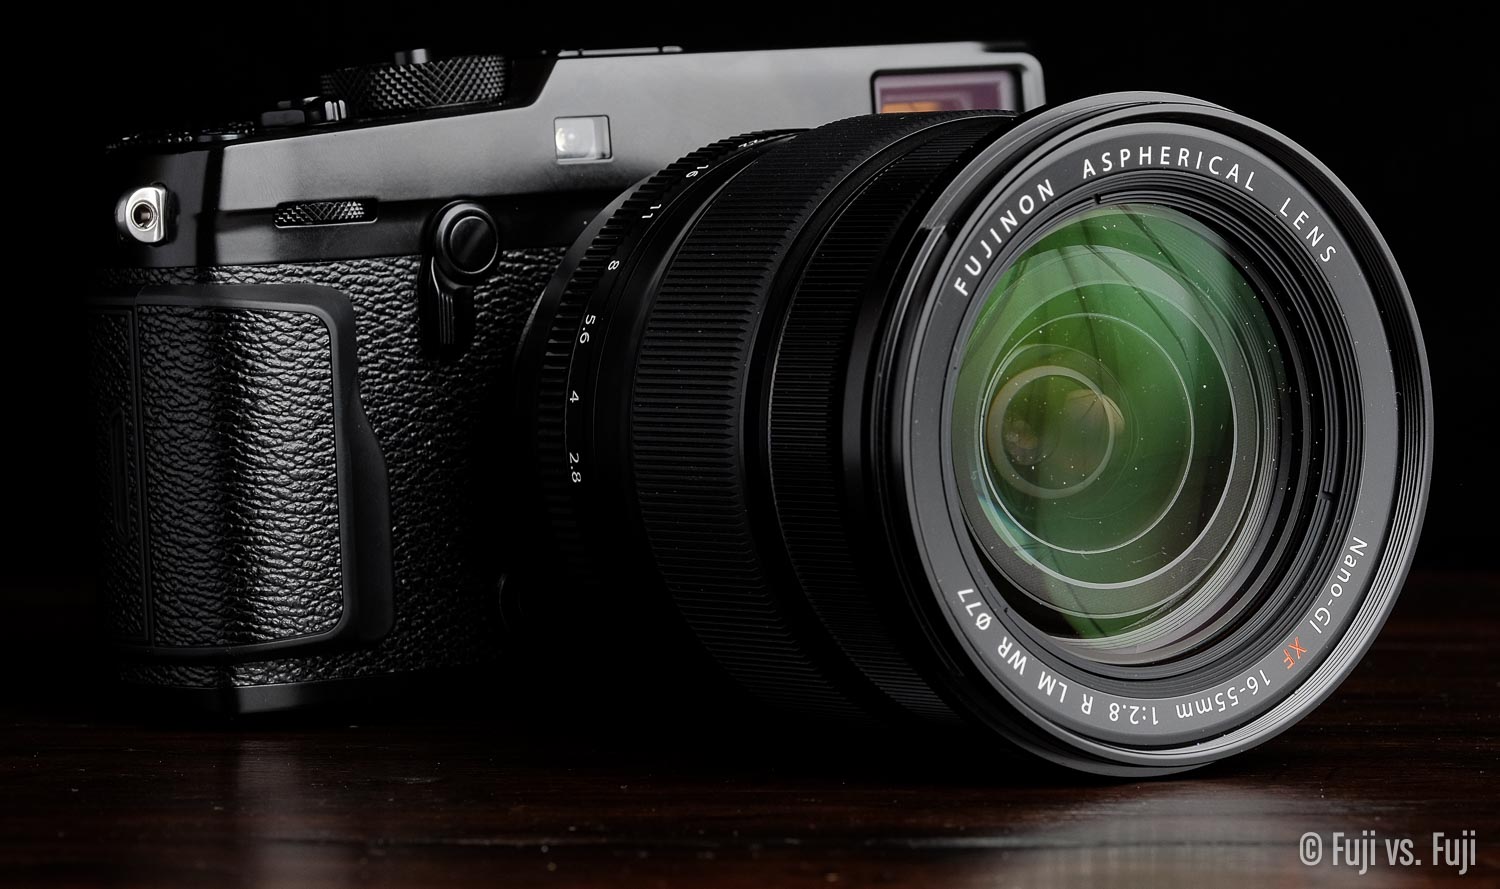
One benefit of a body that’s slightly heavier is allows you to mount a lens that’s also a little heavier without things feeling front heavy or unsteady. Any Fuji XF prime can be mounted save for the XF 90mm f/2 WR can be mounted on the X-Pro2 without it feeling unbalanced, even then, the 90mm doesn’t feel too awkward.
Here’s how a few lenses look on the X-Pro2. Click to enlarge.


Command Dials
Clever use has been made of dials for navigating menus. Not the same as Nikon in that the front dial allows you to drill down into menus, with the X-Pro2, the front dial allows for quick navigation between menu sections.
Bizarrely, the front dial can’t be used for Q Menu selection as it can on the X-T1, as both versions of the firmware I’ve tested, which still isn’t quite final. This is unfortunate as selecting items with the front dial is much quicker as you aren’t moving your thumb to and from the rear dial. Hopefully Fuji will correct this in an upcoming update, as I doubt it will happen in time for the sales launch.
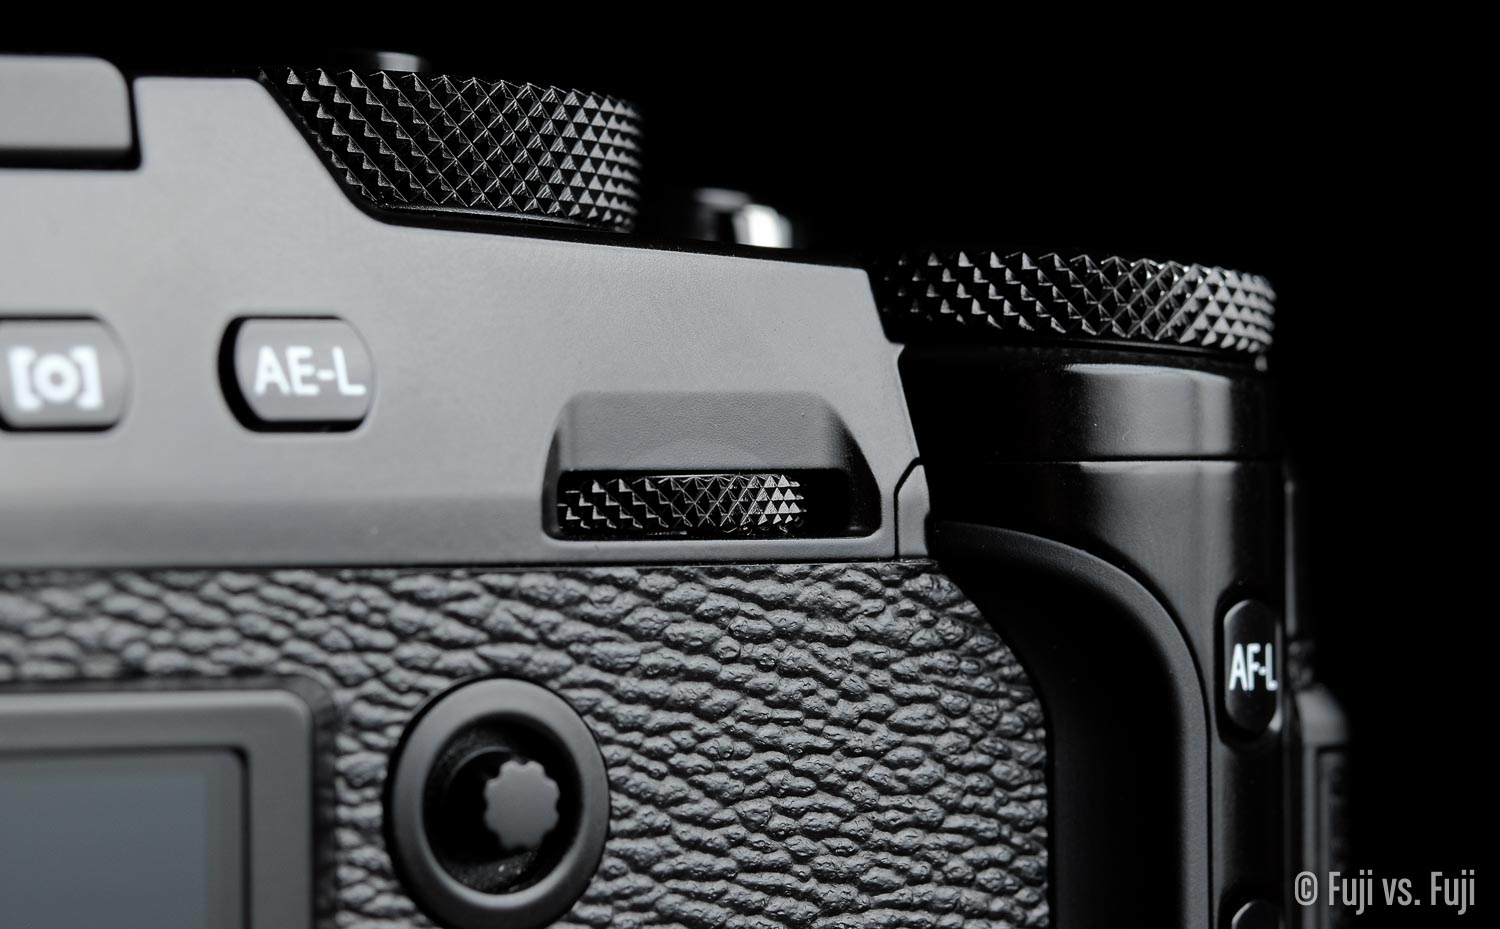
Consistent cross-hatched grip on all the dials
Exposure Compensation
Two additional stops of exposure compensation are accessible by spinning the Exposure Compensation Dial to the C position, and spinning the front dial to control how much, or little exposure is compensated. What would be awesome is if the dial was intelligent enough to pick up where you left off in spinning the dial. So if you get to -3EV and want to go darker, switching to C would pickup from -3. Instead, you start back at zero, and spin the wheel a few times.
For P Mode users, pressing the front dial button will switch between controlling exposure and exposure compensation.
Expanded Setting Adjustments
Despite not currently being able to use my preferred front dial for adjustment in the Q Menu, Noise Reduction and Sharpening can now be adjusted to ±4 while Highlight and Shadow Tone can be adjust from −2 to +4. My preliminary testing indicates that the Shadows, for instance, are being pushed darker, as opposed to the extra increments offering more fine grain control.
Button Arrangement
I’ve chirped Fuji in the past for their erroneously placed “Playback” button, saying it’s always meant to be at the top left of the LCD. Well I’m having to eat my words a little now because where they’ve placed it on the X-Pro2, for me, is now where it should go. In my defence, my previous argument was applicable to cameras that featured multiple buttons down the left hand side of the LCD. I absolutely love that Fuji has managed to get all the buttons they have within thumb reach on the right side. With larger lenses attached, the left hand is always free to cradle the camera while you make changes, review and delete images, it’s great.
AF-L and AE-L
As I use my X-Pro2 more, I appreciate the problem other owners have with the placement of the AF-L button. Because it’s off towards the edge of the camera, physics makes the camera tougher to hold one-handed. As an example, I can shoot one-handed even with an XF 16-55mm f/2.8 WR mounted, but if I want to lock my focus point with the AF-L button mode set to “on when pressing,” I pretty much have to cradle the lens with my left hand.
Fortunately, we have a number of customizations to play with. First, swapping the AE-L and AF-L buttons can help immensely. The default AE-L button is in a position that helps with one-handed holding. Second, you can choose to set the lock mode to “Switch,” which allows you to remove your thumb from the button, and results in focus being locked until the button is pressed again. I prefer “on when pressing,” but I’ll play with these settings a bit more to see which works best for me.
Fn (Function) Buttons
The final insult, the Fn button next to the shutter release is set to, you guessed it, accidentally record video. I’m not sure if Fuji is trolling me here or what. Of course I’m half kidding around. With the improvements to video, there’s a good chance you’ll actually want quick access to the record button.
In addition to the labelled Fn button, all but one (Drive) of the D-Pad’s buttons are programmable to almost anything you want.
Dual SD Cards
Slot 1 is fast UHS-II ready, Slot 2 is UHS-I.
This is apparently an oft-requested feature. I haven’t been dying to have a second card to copy files from, but I do appreciate the flexibility. Fuji has provided a number of options under the Set Up Menu > Save Data Set-up:
- Sequential: Once card 1 is filled to capacity, the X-Pro2 will write to the card in slot 2.
- Backup: This provides redundancy of all your captures.
- RAW/JPEG: Larger RAFs are written to the fast, UHS-II-capable slot one, while smaller JPEGs are written to the slower, UHS-I slot.
I typically select RAW/JPEG so I can copy JPEGs to my iOS devices, and both JPEGs and RAFS to my Mac, but I choose backup when on a big trip.
Viewfinders
Electronic Viewfinder (EVF)
The Electronic Viewfinder on the X-Pro2 is a bit of a mixed bag. While it’s slightly larger than it’s predecessor, it’s smaller than most other X-Series cameras available today, including the X-T1, X-E2, and X100T.
What it lacks in size and magnification, it makes up for in refresh rate at 85 frames per second in good light, and low light capability. It has to get awfully dark before you notice a hint of lost frames.
Optical Viewfinder (OVF)
I had a theory that it was the optical viewfinder that was holding the X100T back from having the same AF improvements we saw in the X-T1. I also wondered if maybe Fuji didn’t want to spoil the surprise of the X-Pro2. It’s seems at least the latter is correct as Fuji have demonstrated Zone AF is indeed possible in the OVF, and it works great.
The same numbers of points are available for selection, unlike X100 bodies, however they aren’t visible while selecting them. A yellow box appears though, to let you know which area of the frame is in phase detection.
Now we’re just left wondering how long before the X100T gets updated.
Electronic Rangefinder (ERF)
X100T owners will be familiar with this feature. I’ve personally never fussed with manual focus through the OVF, but it’s there if you need it. I question whether the ERF is a worthwhile inclusion. It’s incredible tech, but for me, it’s borderline gimmicky, and it likely isn’t an inexpensive feature to add.
The ERF found in the X-Pro2 does include one improvement, instead of always being locked to a zoomed view of where your focus point is set, ther eare 3 levels of magnification. The whole frame, which results in a really tiny represenation of everything within the parallax-corrected frame, a zoomed view similar to the X100T, and a really zoomed view for pinpoint focus accuracy.
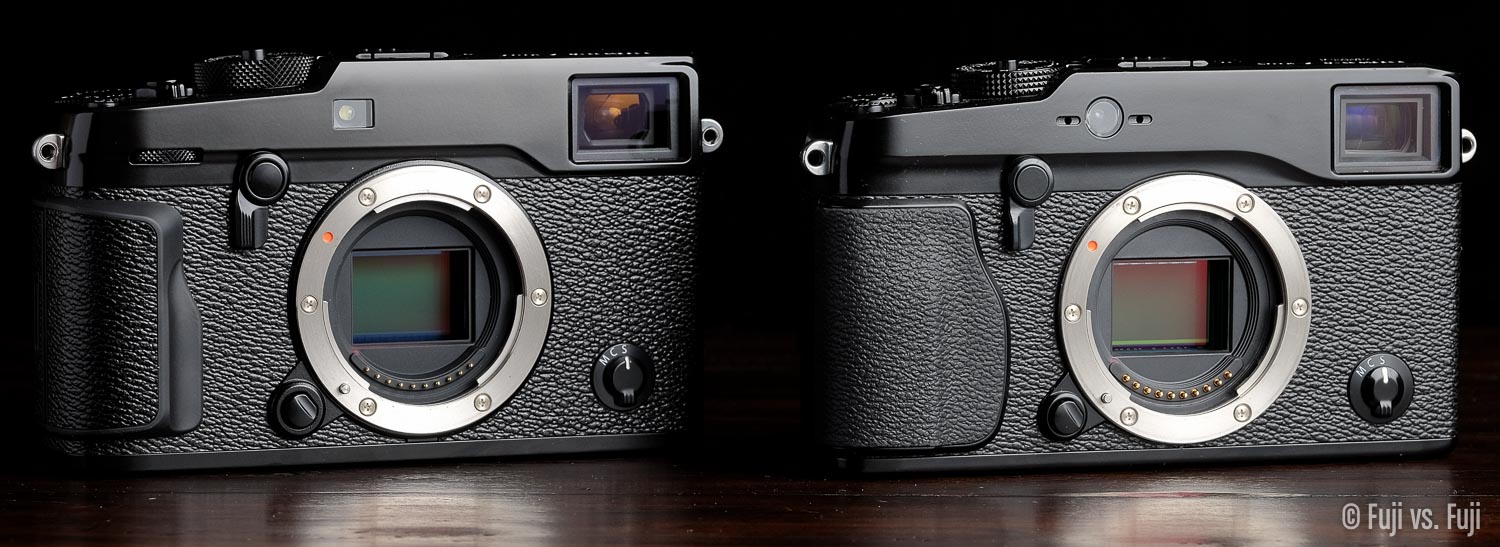
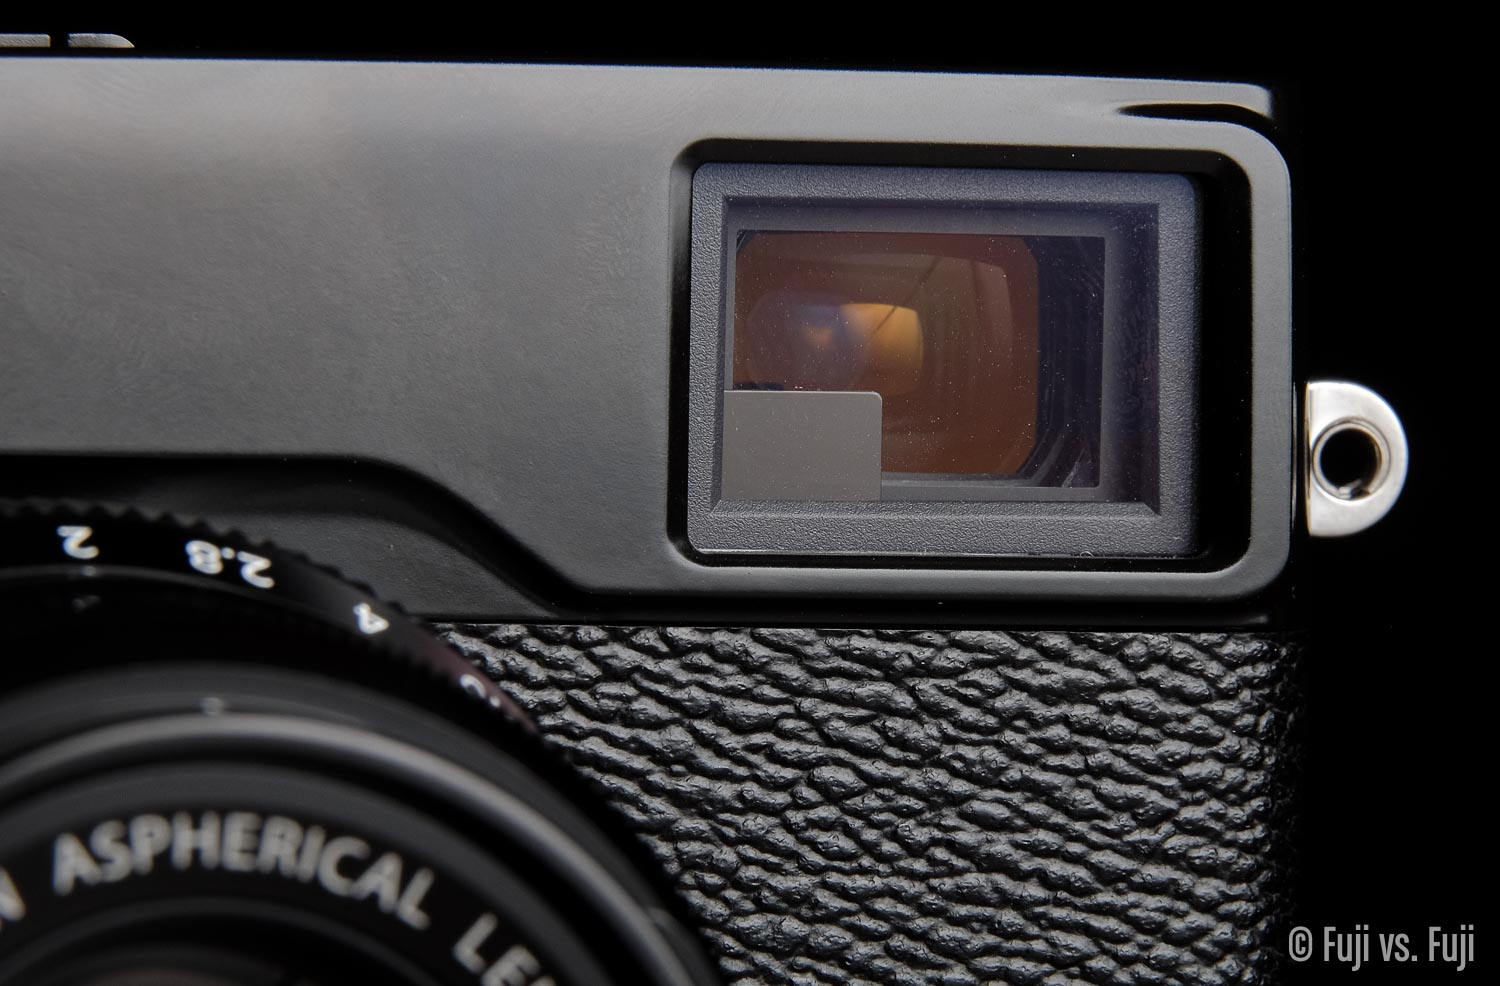
Interesting, the EVF mechanism is quite different from the X100 bodies, which is quite a bit more towards the front of the camera, as can be seen in my X100 comparison about ¾ of the way down the page.
Bright Frame Simulation
The OVF of the X-Pro2 includes what Fuji calls a “Bright Frame Simulation,” which “shows the area covered by the bright frame at different focal lengths.” If I’m honest, I was hoping for a better explanation of this feature, and what its intended use is, especially given it is set to Fn2 (the button on the viewfinder toggle) by default. It could come in handy for scouting a shot, or determining which lens to change to, but I changed that Fn button to something else (currently deciding between “Preview Pic Effect” and “Face/Eye Detection,” but I’d have this set to “Spot Meter When Pressed” in a second if that was an option.


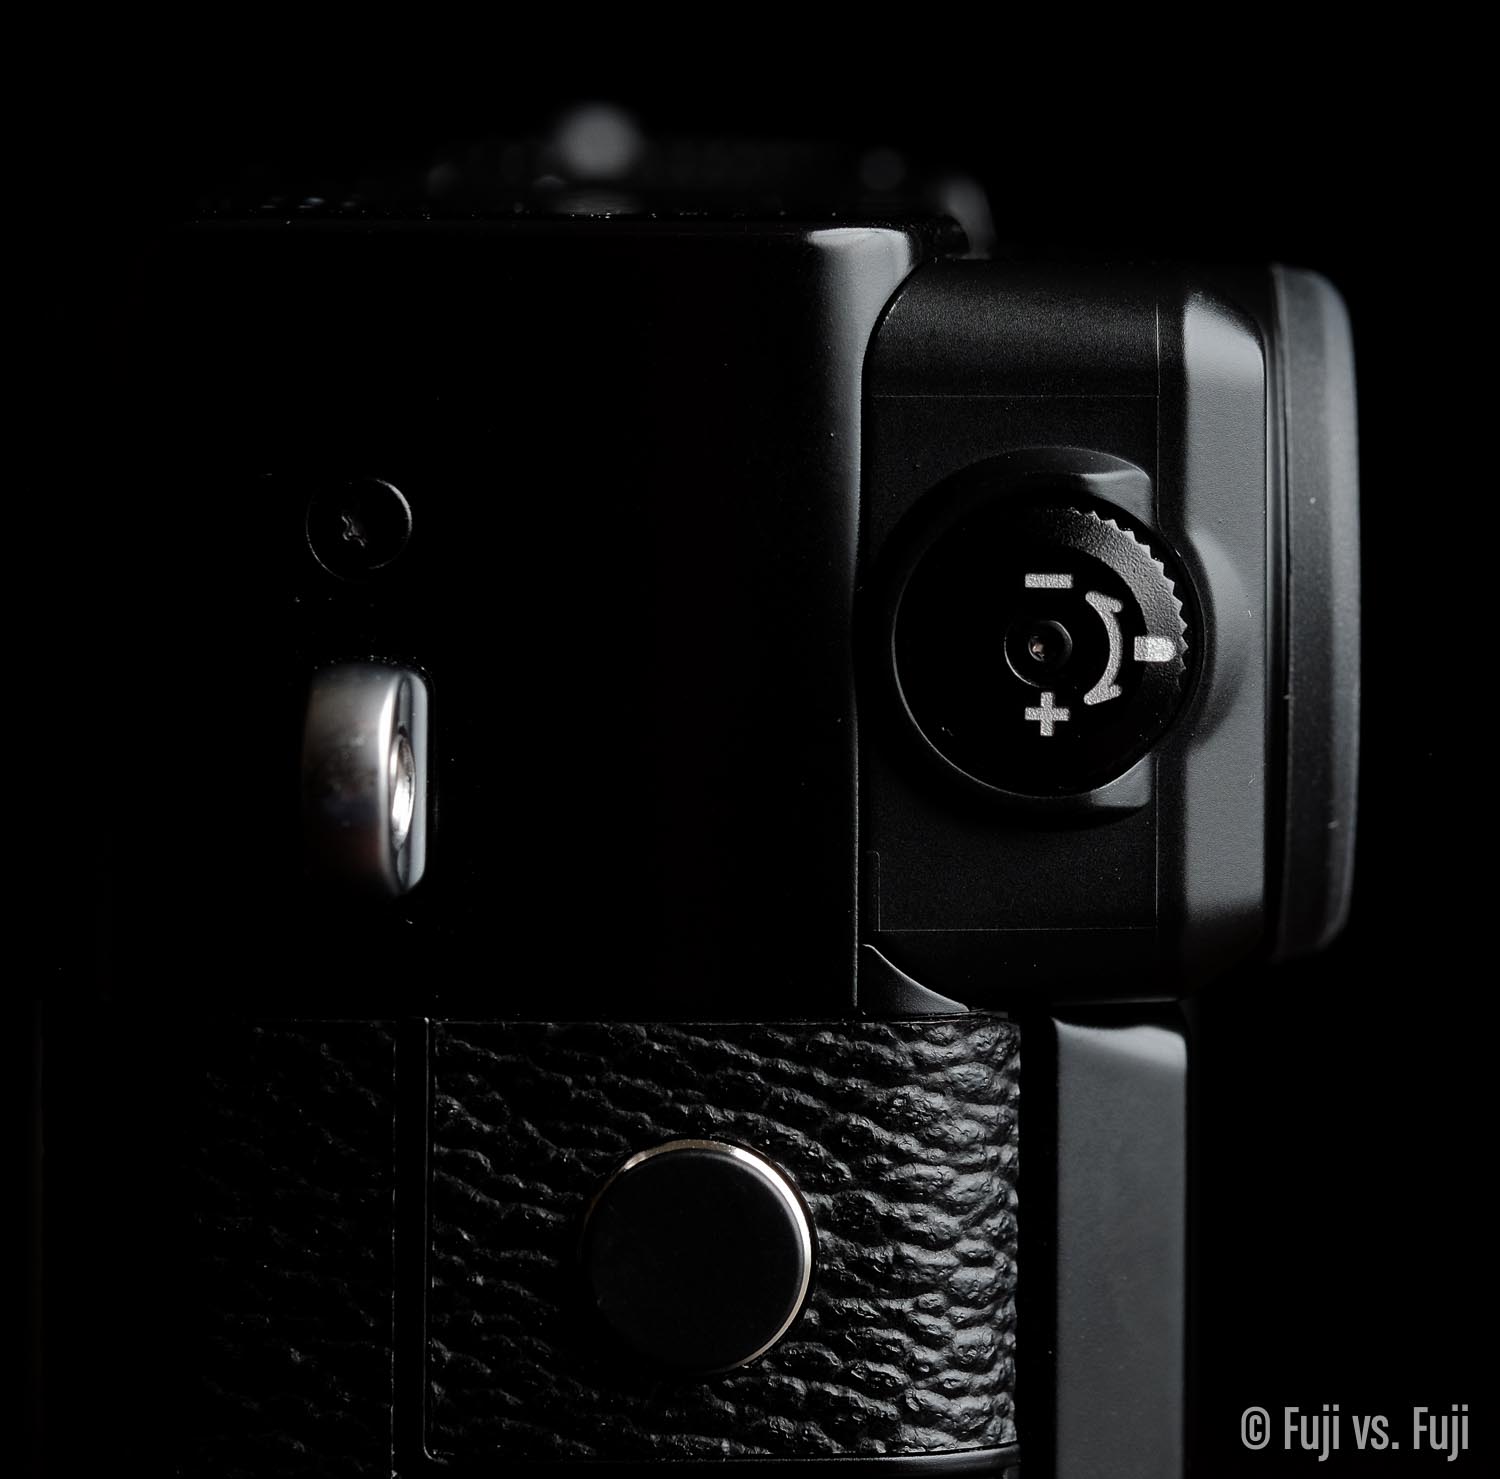
Eye Point (Eye Relief)
This is subject that has mattered to me in the past, but I always neglected to note it in my reviews and comparisons. The Eye Point of the X-Pro2 is unfortunately not outstanding. At 16mm, it’s slightly better than it’s predecessor and the X100T, but worse than the X-T1, X-T10, and X-E2. Eyeglass wearers will want to take that into consideration.
Image Quality
The camera I have was generously provided by Fujifilm Canada, and is a pre-production unit with close to, but not final firmware. Because of this, Fujifilm has asked all reviewers to not post 1:1 images before the final firmware ships with production units. As ever, I’ll honour that request,4 and will wait until my very own X-Pro2 arrives before getting into serious pixel peeping.
With that out of the way…
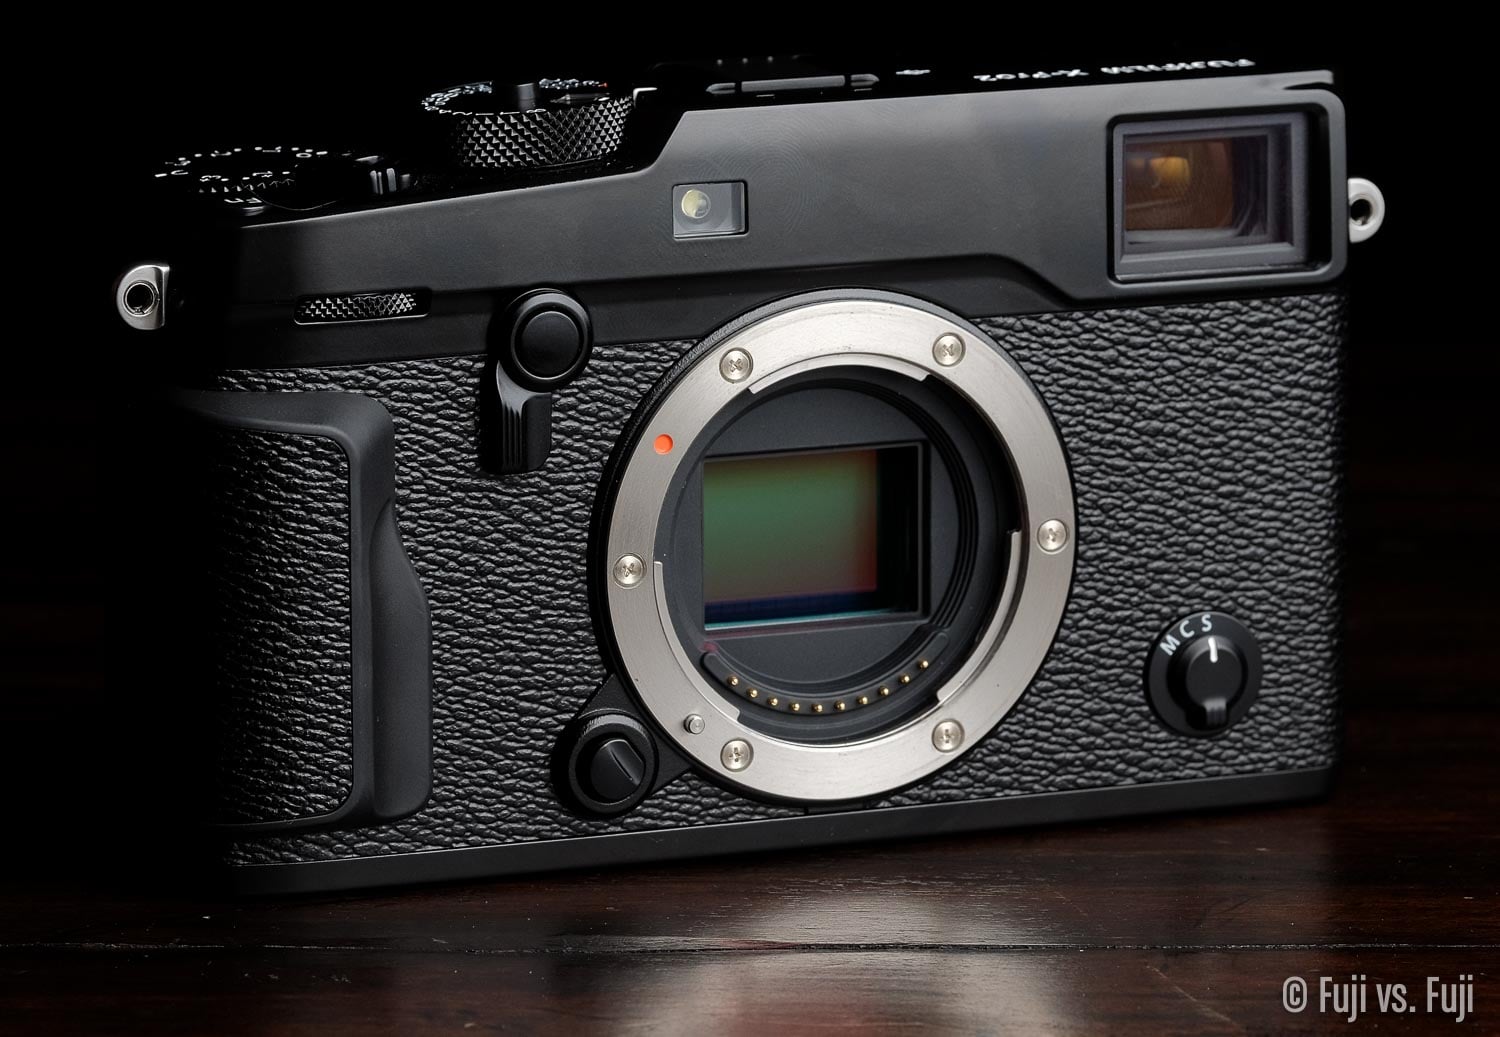
New Sensor
Hot damn it’s been a long time coming. 24.3MP APS-C CMOS III, 8 more megapixels of X-Trans goodness, and promises less moiré, fewer “false colours,” and a dramatic improvement to to image quality. I’m actually pretty surprised to see Fuji acknowledge “false colours,” as blatantly as this, but it once again goes to show this is a company that listens, and wants to improve in areas we want them to when possible.
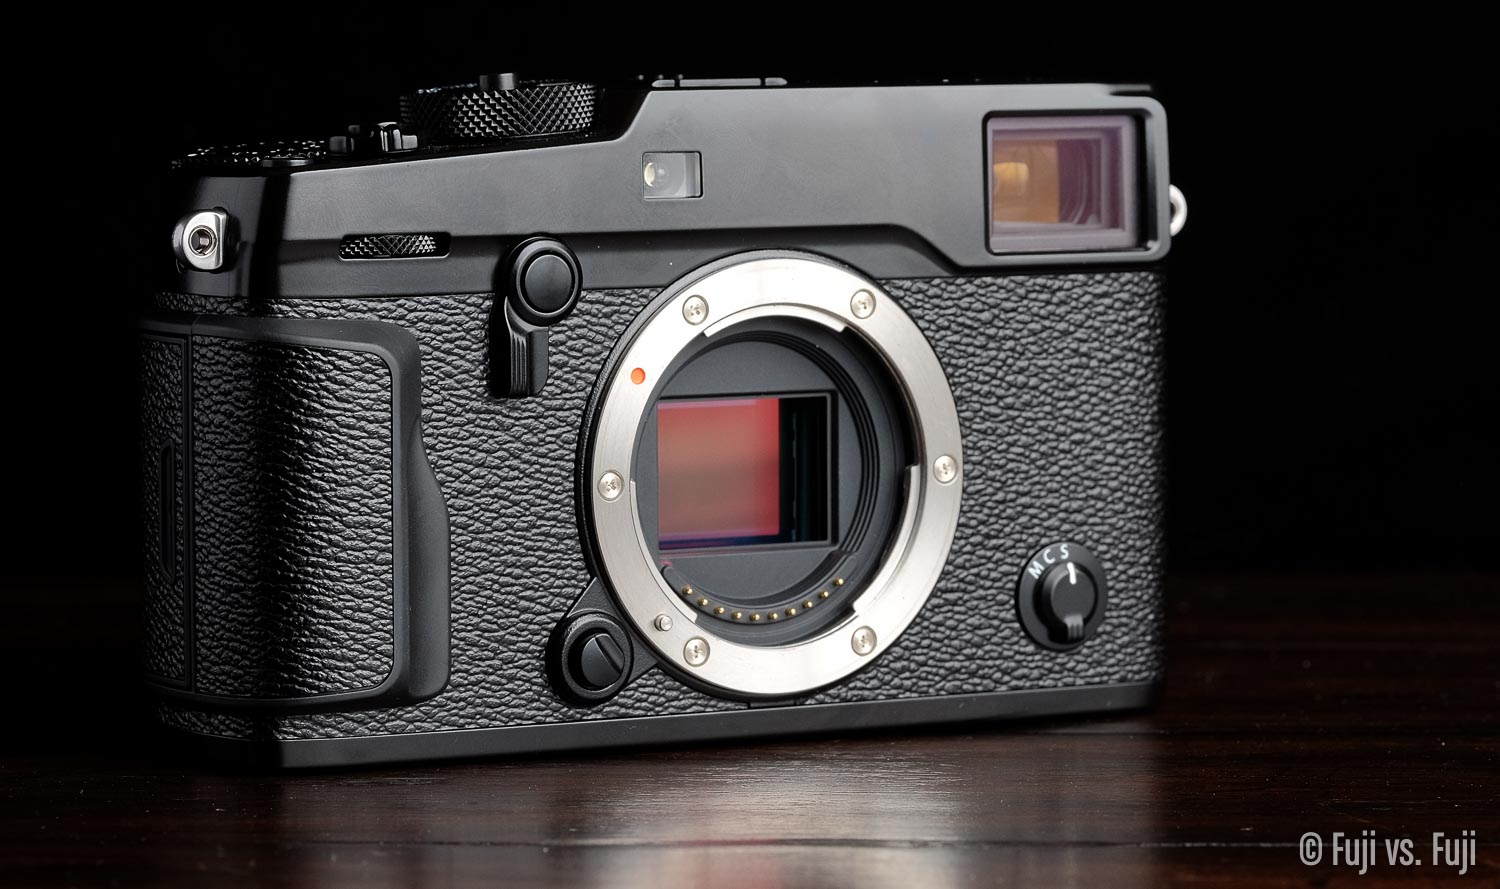
24.3MP of X-Trans goodness
ISO Sensitivity
Perhaps a bit modest compared to 6 digit native ISOs we’re seeing elsewhere, the new sensor delivers an ISO sensitivity bump, bringing native ISO up to 12,800. We should see “smoother gradations, deeper blacks, and vastly improved low light shooting.” With regard to the deeper blacks, I’m assuming and hoping that means a boost in dynamic range, something Fuji hasn’t mentioned officially yet.

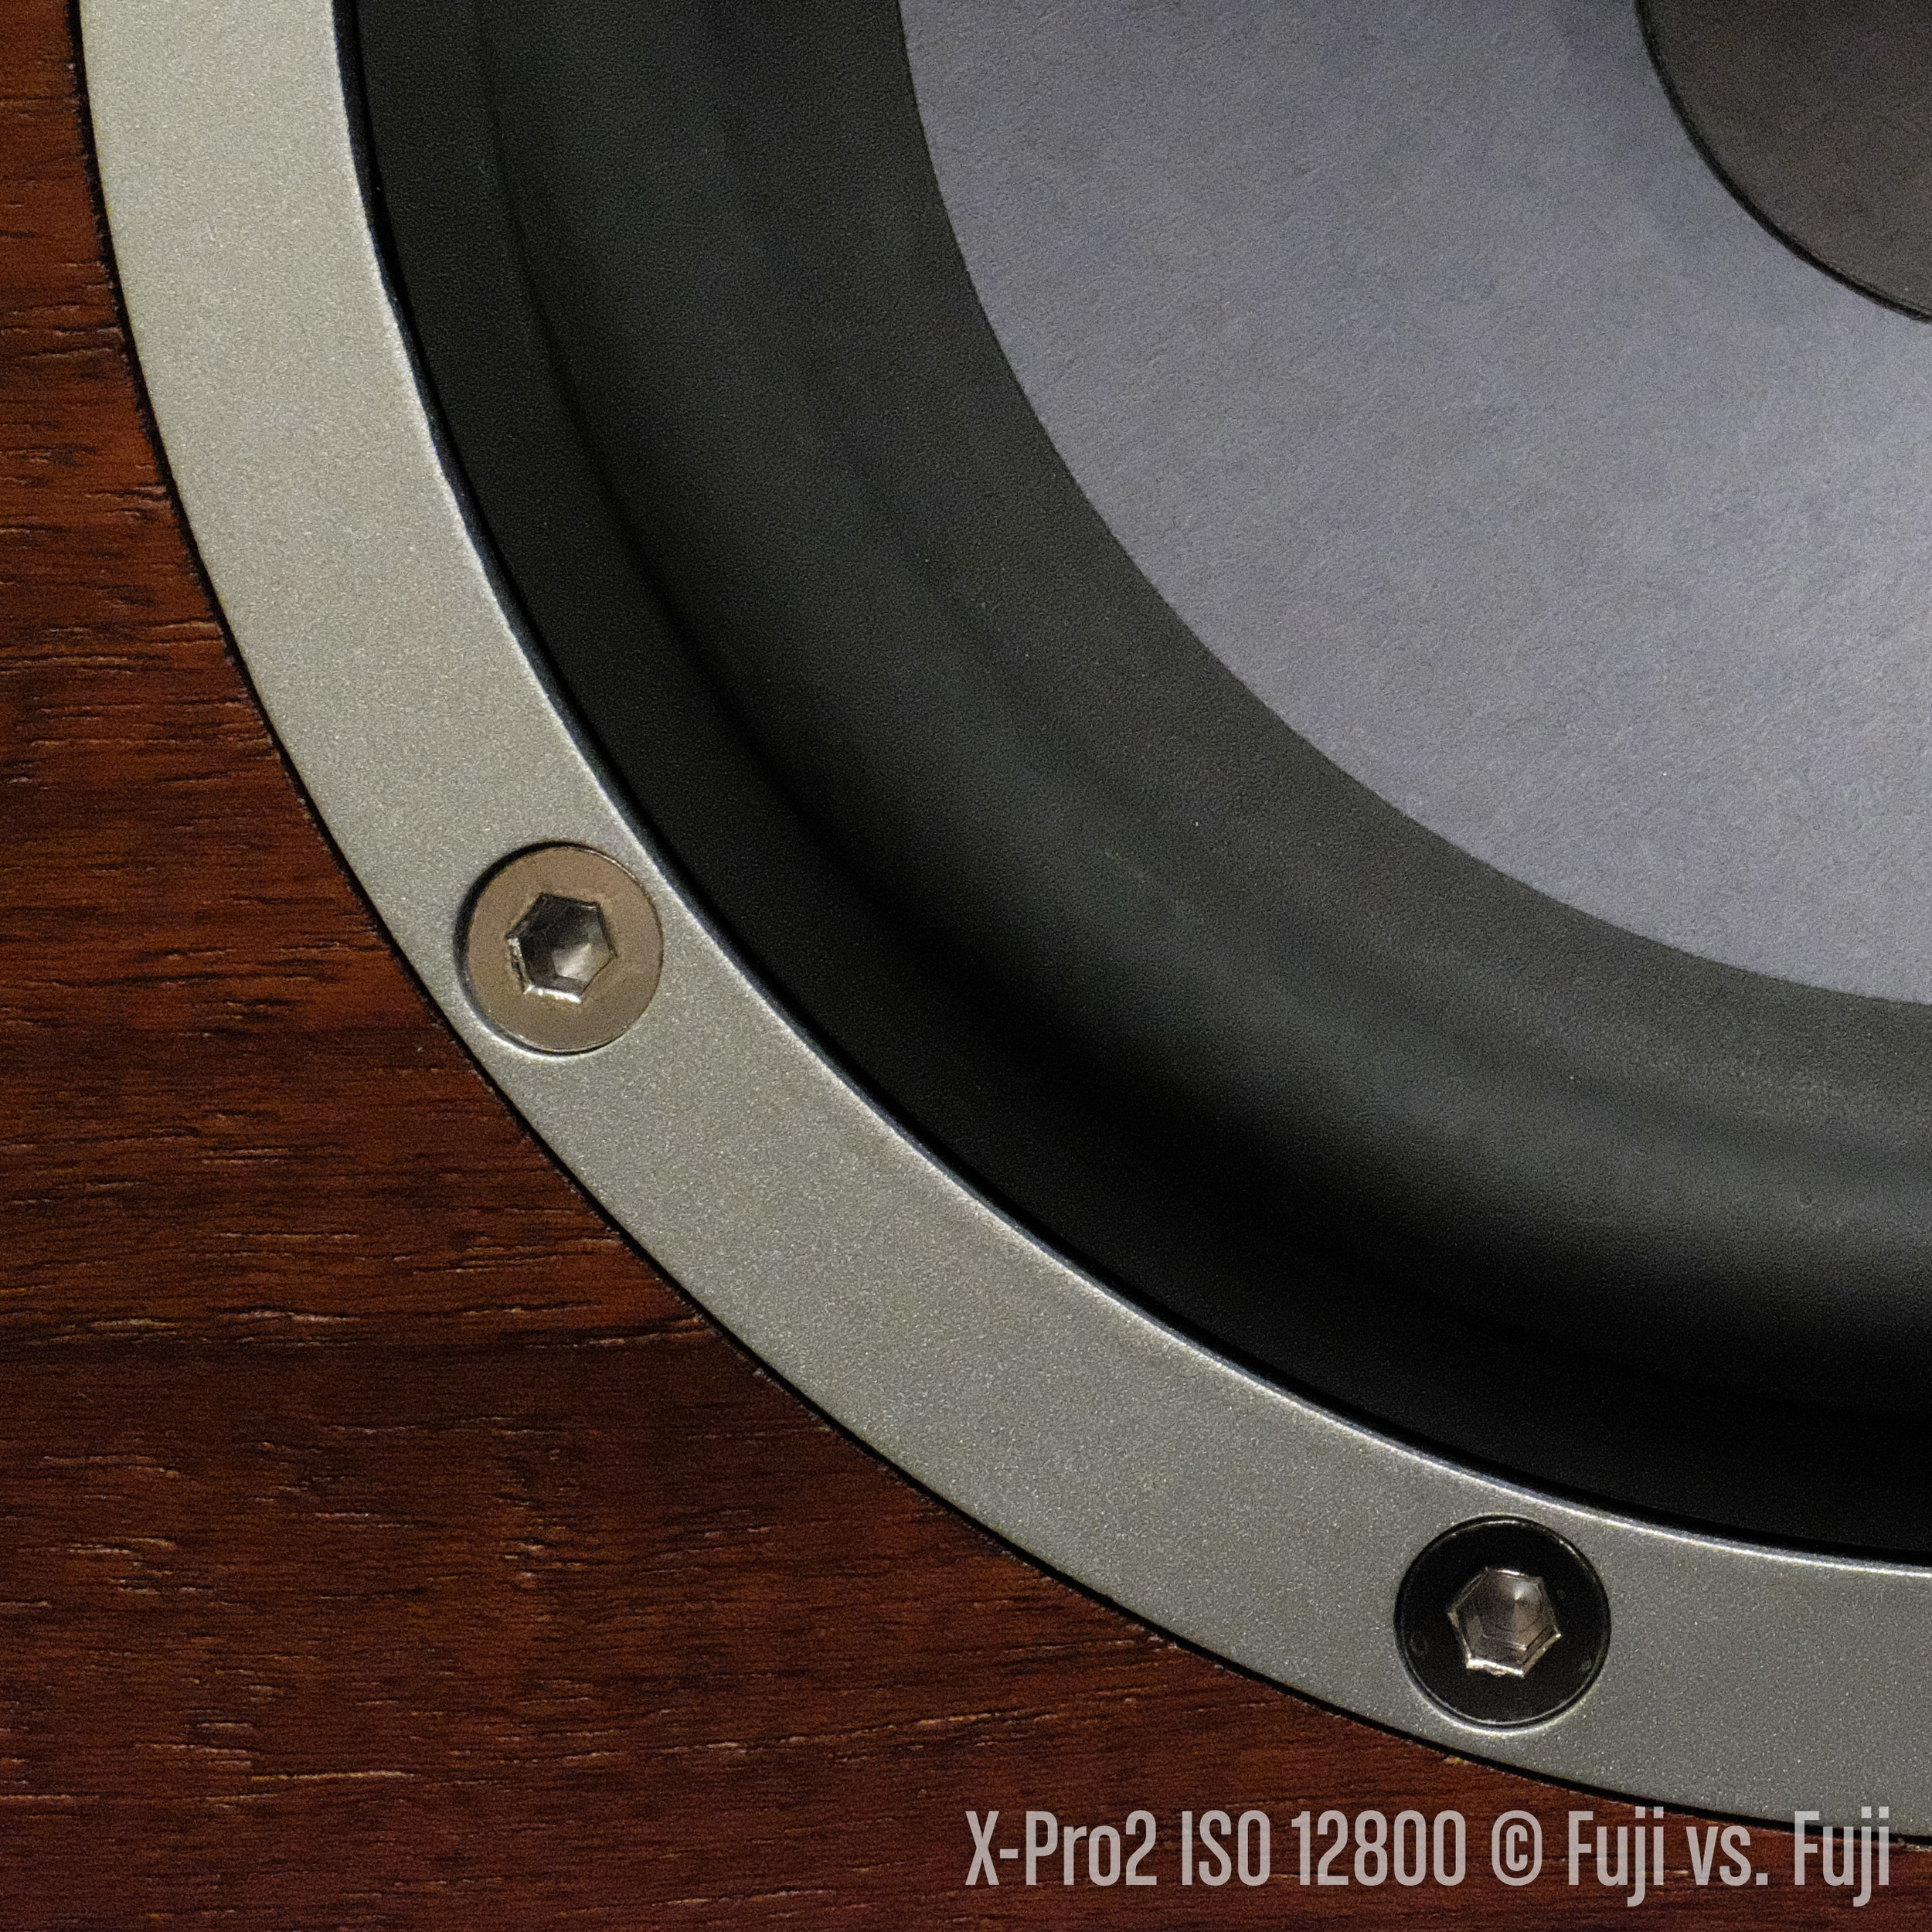

The above images aren’t even close to 100% crops, but they give you an idea of the colour shift, and what kind of noise you can expect to see when viewing your images on a screen. I’m seeing at least a stop of improvement over what the X-T1 can do. If you refer back to my X-T1 review, you can clearly see how much less colour noise there is at ISO 25,600. There’s still a bit shift in colour when you push the ISO past it’s native max of 12,800, and it increases substantially at 51,200, but I wouldn’t have any problem shooting all the way up to 12,800 in a pinch, especially during nighttime street shooting, and especially, especially when you have Film Grain Effect turned on to mask the digital noise.
Compressed RAFs
I’ve been waiting for this since I got my first Fuji camera. RAFs have been quite bloated for far too long, and with the bump in resolution, lossless compression is even more welcome. Uncompressed RAFs weigh in at around 50.5 MB and compressed RAFs have been anywhere from 17.7 MB to 32.3 MB. That’s quite a savings, and impressive considering FINE JPEGs can run anywhere from 10 to 17 MB. What I would give to have proper Fuji RAF demosaicing and rendering on my Mac or iPad. I’d shoot compressed RAF only for just about everything.
Image Size
Maximum image size has been bumped from the 16.3 MP and 4896 × 3264 to 24.3 MP and a nice round 6000 × 4000. Those images ought to look pretty spectacular on a 5K iMac, or 4K TV.
Film Simulations Mode, “ACROS”
Film Simulation Modes are one that is that is still very fertile territory for Fuji. Film and colour is sort of their thing, and to date, they’ve done an excellent job of providing film simulation modes that provide an excellent amount of nuanced variety without feeling too gimmicky. Fuji describes actual Neopan Acros film as:
- Finest grain quality ISO 100 black-and-white film
- Excellent processing characteristics
- Rich gradation and outstanding sharpness
- Wide range of photographic applications
- Available in 35mm and 120 formats
I plan to do more head to head shooting of the standard Monochrome and the new ACROS, but so far I like what I see from the new black and white.
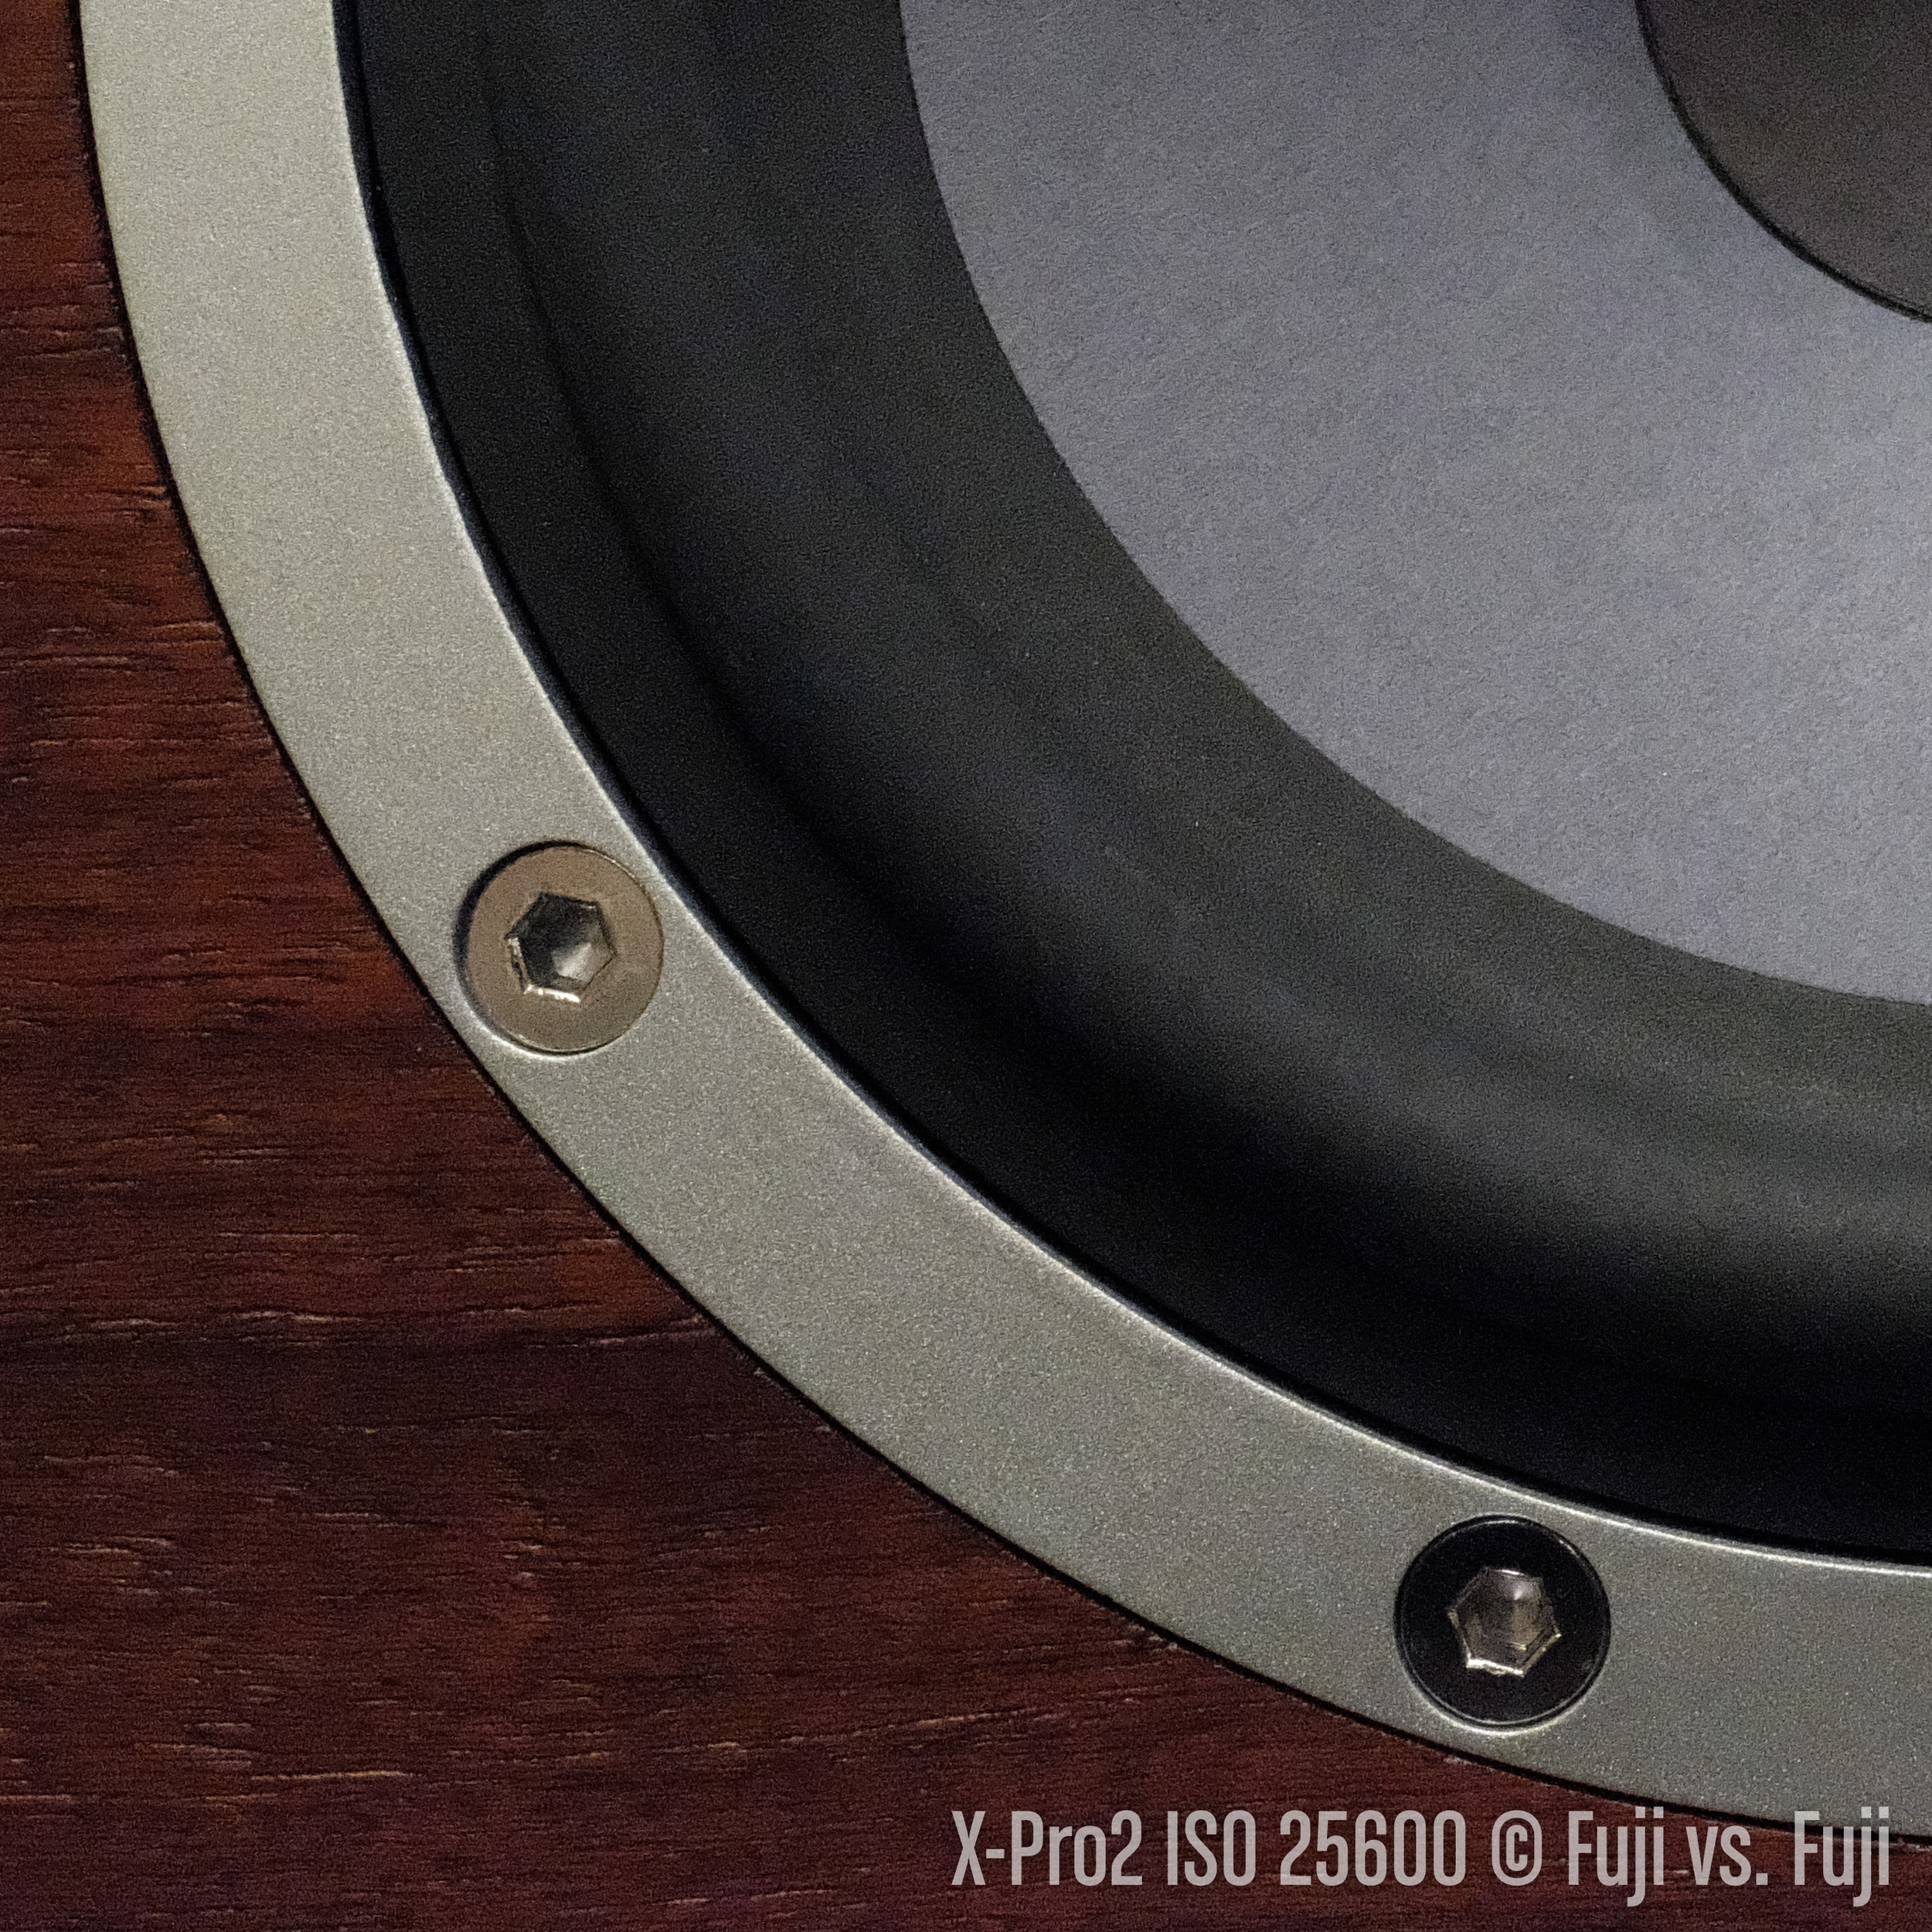
Film Grain Effect
For those who like a grainy look to their photos, Fuji offers a “Grain Effect.” In my testing, the grain quality does appear to be quite good. I’m hesitant to destructively add grain to my images in camera so perhaps this calls for another bracket type, Film Grain Effect Off, Weak, and Strong.
Again, these images are heavily downsampled, but this should give you an idea of how much you can mask the effect of digital noise at the highest native ISO of 12,800 with el fako Grain Effect. You can forget ultra fine details like the fibres in the speaker cone, but otherwise, it’s not too shabby. Click to enlarge these.


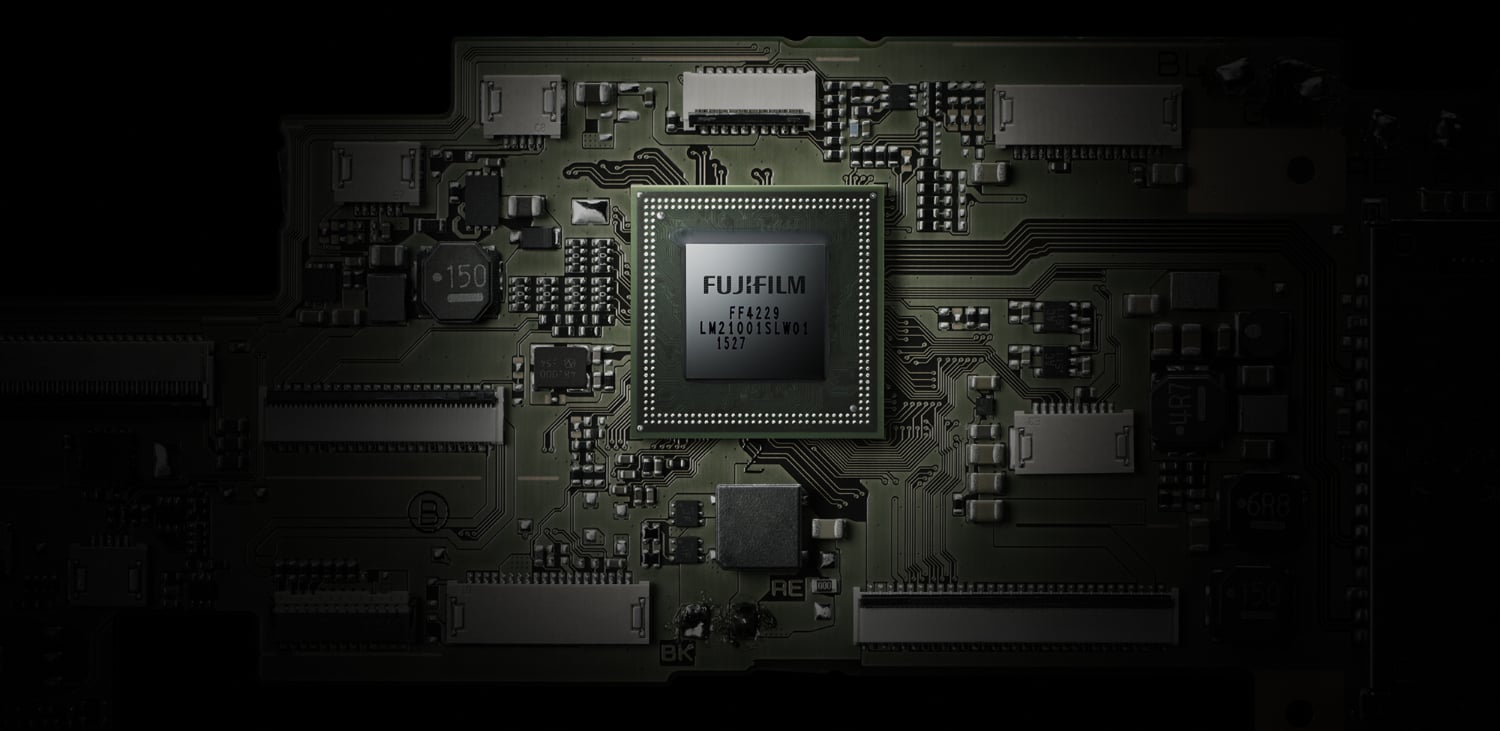
Image courtesy of Fujifilm
My suspicion that the first two can be chalked up to a beefier CPU has been confirmed by Fuji who cite a 4 × speed increase over the processor found in the X-T1. The second two, I’d bet are improved noise reduction algorithms, and possibly further refinement to Film Simulation Modes respectively, as we did with the transition from CMOS/EXR I to II.
Menus
The entire menu system has received a much-needed overhaul, and it’s a dramatic improvement. The menu system as been broken up into clear sections: I.Q., AF/MF, Shooting, Flash, Movie, Set Up, and MY. More on that last one in a minute.
Within in section, there are one to 3 “pages” of settings. Pages are clearly marked, providing a sense of place. The old menus were ok for camera menus, but never good. These one are.
You can switch between sections using the rear dial, or up and down buttons on the D-Pad, and section pages via the front dial. No touch though.
MY Menu
Ever wish you could have your own menu that contains only the menu items you access frequently? That’s exactly what MY Menu is. Once items have been added, pressing the Menu button will take you directly to those items first. There’s some overlap with the Q (Quick) Menu, but an item like Film Simulation Bracket can get you faster access to switching which three film simulations are captured. Sadly, “Format” can’t be added to MY Menu.
One minor quibble is on the initial setup. MY Menu is greyed out when you first start the camera. You have navigate to Setup (Wrench) User Settings > MY Menu where items can be added.
I’d have loved it if when first selecting MY Menu, it presented a UI for me to add items.
Q (Quick) Menu Improvements
I haven’t done a one-to-one comparison yet, but it looks as though just about every items that could be selected in the Q Menu, can be set as an option. I tend to avoid customizing the Quick Menu because of how often I bounce from camera to camera and reset settings (life of a tester I suppose), but if I was a one camera to rule them all sort of fellow (which the X-Pro2 could certainly be) I’d tweak the heck out of these menus. It would be pretty awesome if there was some way of backing up and restoring user settings.
Video
Video has been improved. I don’t really care to shoot video on my Fuji cameras for the most part, but Fuji has promised less moire, specifically, and more options for recording. No 4K though.
Until Fuji makes a real go at video and challenges Panasonic’s GH for the smaller-than-full-frame-video crown, there isn’t much to write about. I’ll still use my iPhone for the rare occasion I want to capture video, but in a pinch, it’s nice to have the flexibility, I guess.
Battery
I was really hoping for an improved battery that still uses the same BC-W126 charger, but I’d have taken an all-new battery and charging system over the same old relatively low capacity NP-W126. At least all those extras we've already purchased will still work.
Fuji are pretty vague with how the three Power Management modes impact the X-Pro2 when it comes overall camera performance.
| Power Management Mode | AF Speed | LCD/EVF Display Performance | Battery Endurance |
|---|---|---|---|
| High Performance | Fast | Very High | Low |
| Standard | Fast | High | Normal |
| Economy | Normal | Normal | High |
On the other hand, they’ve gone to greater lengths than usual to let us know how many pictures we can expect to capture per charge with each performance mode.
| Power Management Mode | LCD | EVF | OVF |
|---|---|---|---|
| High Performance | 250 | 210 | 350 |
| Standard | 280 | 250 | 350 |
| Economy | 330 | 330 | 380 |
If you were looking for more reasons to use the OVF, you just found at least 50 of them. Use of all those frames per second in the EVF also does not come cheap. Incredibly, you can expect fewer frames per charge when composing through the EVF than if you use the LCD to compose.
Do keep in mind that battery life will be affected by temperature. In particular, when shooting last winter in -15˚C, batteries I neglected to keep in my warm pocket died after just a couple of frames.
Conclusion
When the X-Pro1 came out in 2012, it could be argued that Fuji delivered on Nikon’s promise of “Pure Photography” better than Nikon did. With the advent of the X-Pro2, there is no longer any argument. This camera is much more of a “Digital Fusion” in just about every way.
When it comes down to specs, speeds and feeds, the X-Pro2 hasn’t revolutionized the mirrorless camera space. In fact, it’s actually done little more than play catch up for the most part. I’m really quite thankful for that because what Fuji has done is devote their efforts to the shooting experience. There are still some firmware quibbles, but in terms of hardware, the X-Pro2 is the most focused (no pun intended) camera I’ve ever used.
Would I Buy One?
This body along with the XF 35mm f/2 WR would be my desert island camera. I truly love it, and will have my own as soon as possible. If I didn’t have this site to run and justify the expense, I would sell off gear to cover it without hesitation. For instance, if I owned the X-T1 and X100T, I would sell both to cover the cost of the X-Pro2 because I now have the autofocus niceties of the X-T1, and the OVF of the X100T in a single body. I also prefer 50mm over 35mm.
Should You Buy One?
I’ll have plenty more to say about this in my forthcoming Versus articles, but realistically, enough of you have been waiting for this camera so long, you probably have your preorder in.
For those still on the fence, if you’re after the best shooting and handling experience from Fuji possible, yes, you should. Probably.
Some Things to Consider
- More megapixels means more data and more computation effort when processing RAFs. If your computer is on its last legs, bear that in mind.
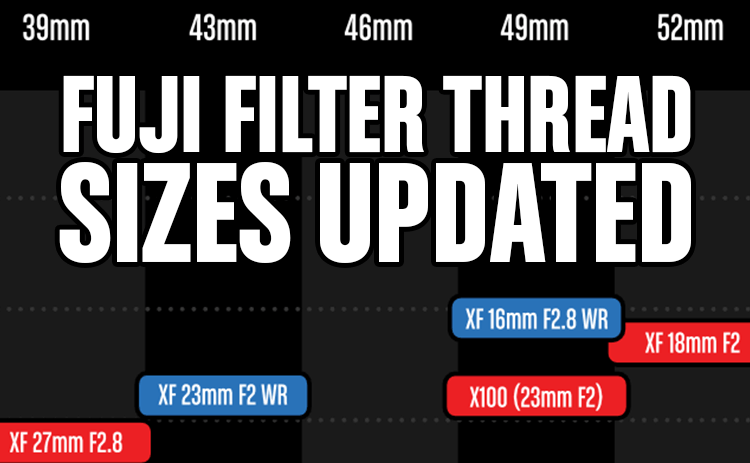
- The OVF does not favour angles wider than 18mm. If you habitually shoot with either the XF 10-24mm F/4 OIS or XF 16mm F/1.4 WR, the OVF may be wasted on you. Likewise, reaching to 90mm or further will give you a smallish frame to compose with.
- The LCD does not tilt. If you’ve formed habits around one that does, the X-Pro2 could be a step backwards. I said above that if I had to, I’d sell my X-T1. Well fortunately I don’t have to, and I won't because for my product shots and landscape imagery, my spine would reject the notion of straining to see a screen that doesn’t tilt.
That’s All For Now
I’ve got a couple Versus pages that are getting close to being ready for posting, so check back for those. In the meantime, if you’re planning to preorder of the X-Pro2 like I am, consider using one of the links below. The price for you doesn’t change, but it makes a huge difference in my ability to keep testing. Thanks!
- How long was it between the D300S and D500 again? About 6 and a half years. D4 to D5? Also 4 years. ↩︎
For the record, I don’t begrudge rumour sites, specifically. They have their place, deserve kudos for their hard work, and play a role in the hype machine of new cameras. It’s the sources I have a problem with. Knowing every last detail about a camera months before its announcement is not fun.
I’d rather more room for speculation, more fan-made mock-ups crafted from imagination as opposed to confirmed specs, etc. It won’t happen, but that is why I actively avoid the rumour sites, and don’t ever comment on them. ↩
- I know, I know, Zone Focus. Sometimes though, man, I don’t want the depth of field of f/8 or higher.↩︎
- Although I’m sure you won’t have much difficulty finding 1:1 images posted by the kind of less scrupulous individuals that break NDAs and post complete specs online. ↩︎