This is a detailed review of the Fuji X-T2
Originally Published February, 2017
X-T2 Firmware Ver.1.10
Introduction // Unboxing and Set Up // Build Quality // Buttons, Dials, and Switches // Autofocus // Handling // Viewfinding // Image Quality // Conclusion // VPB-XT2 Grip
This ad and tracker-free site is made possible by the support its readers. If you enjoy the content, you can help by using any of the links below. Thanks!
Introduction
It’s hard to believe that it’s already been a year and half since the earliest X-Pro2 units were getting in the hands of photographers. It truly was the first major overhaul to the guts Fuji’s interchangeable lens camera bodies. New sensor, new processor, it actually was “all-new.”
The X-T1 was a major departure in form factor for Fuji, but acted as a firmware stepping stone between the X-Pro1 and X-Pro2. Major features like the EVF and autofocus moved from questionable to pretty incredible. The X-T1 is still a fantastic camera, and will continue to be my primary studio workhorse for this site. The X-T2, however, takes all the advancements of the X-T1, the new guts of the X-Pro2 (save for the OVF, of course), and “boosts” things up another notch. This is my long overdue review.
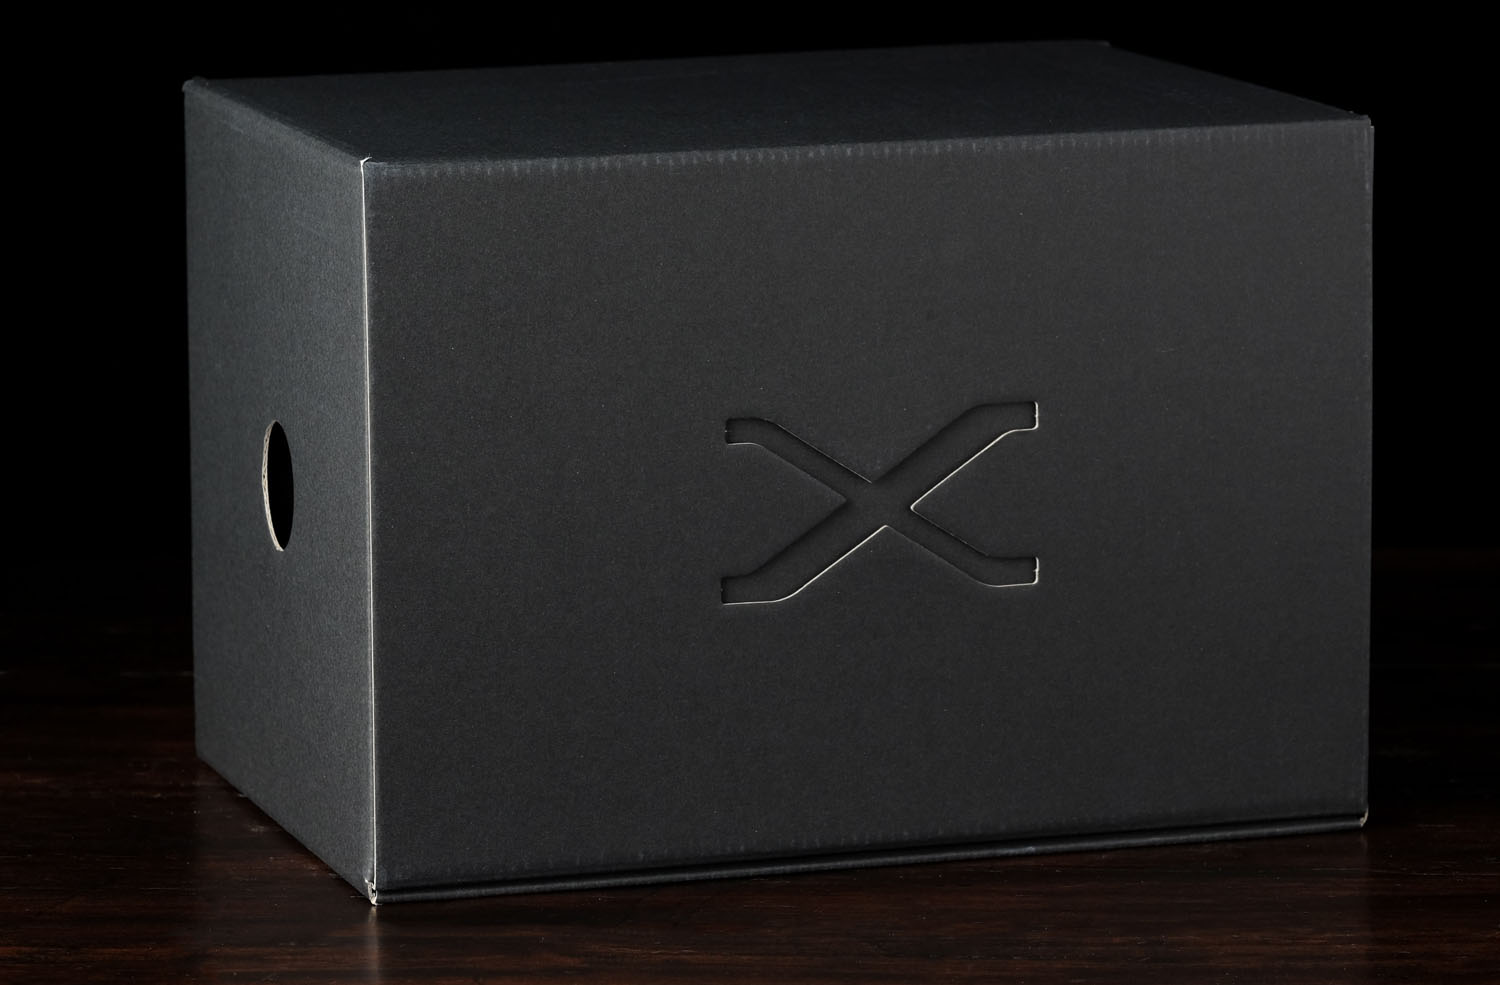
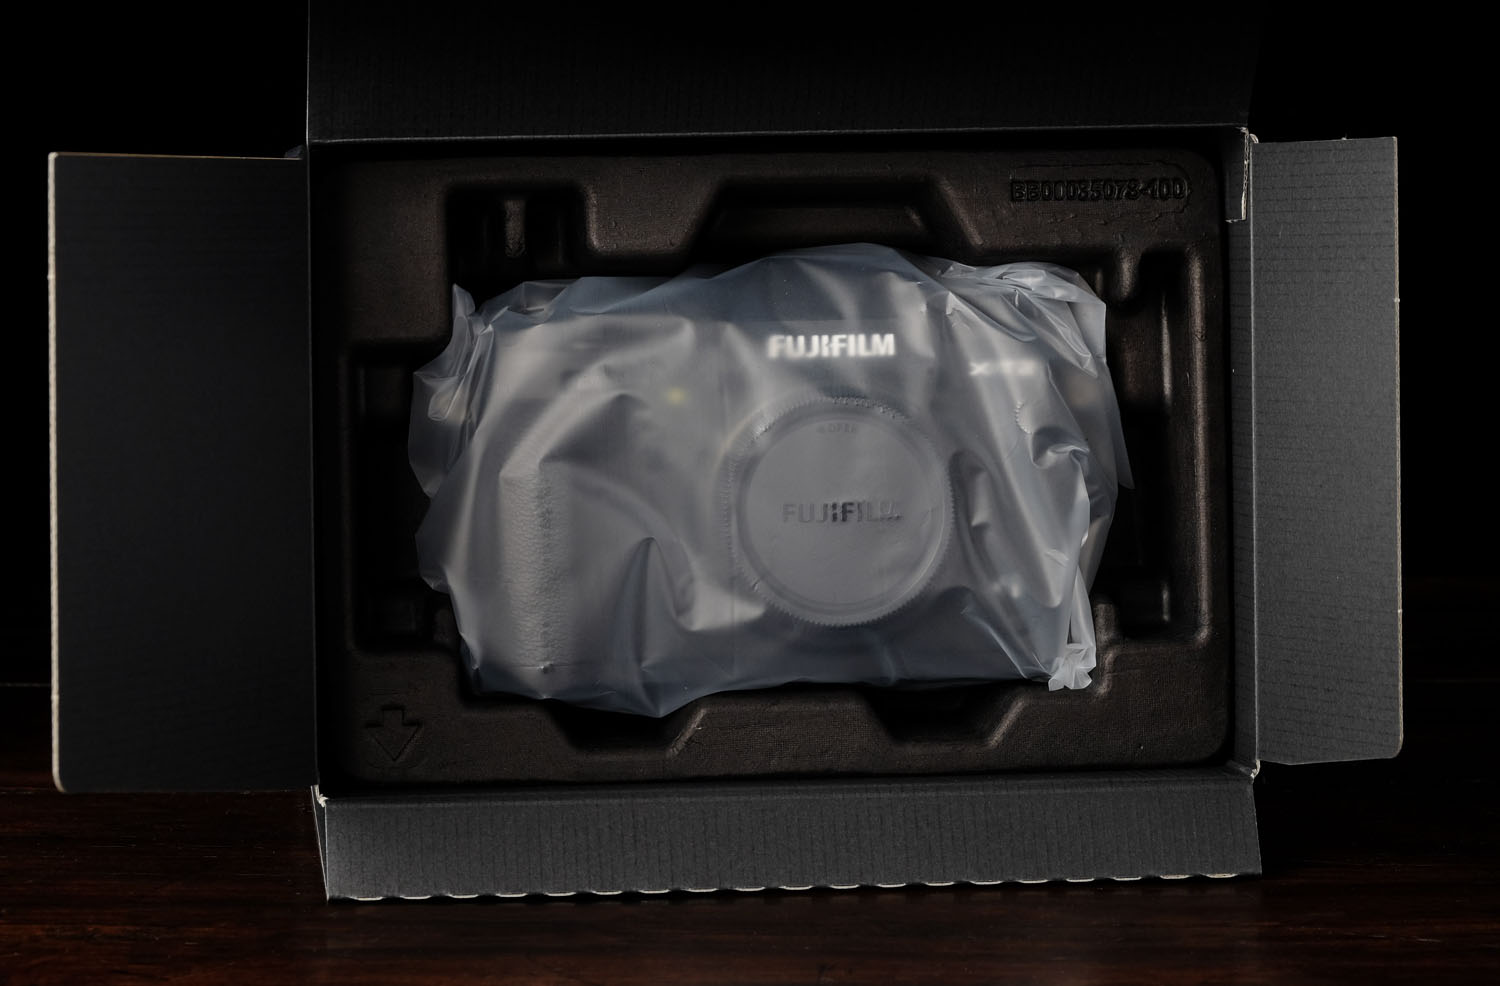
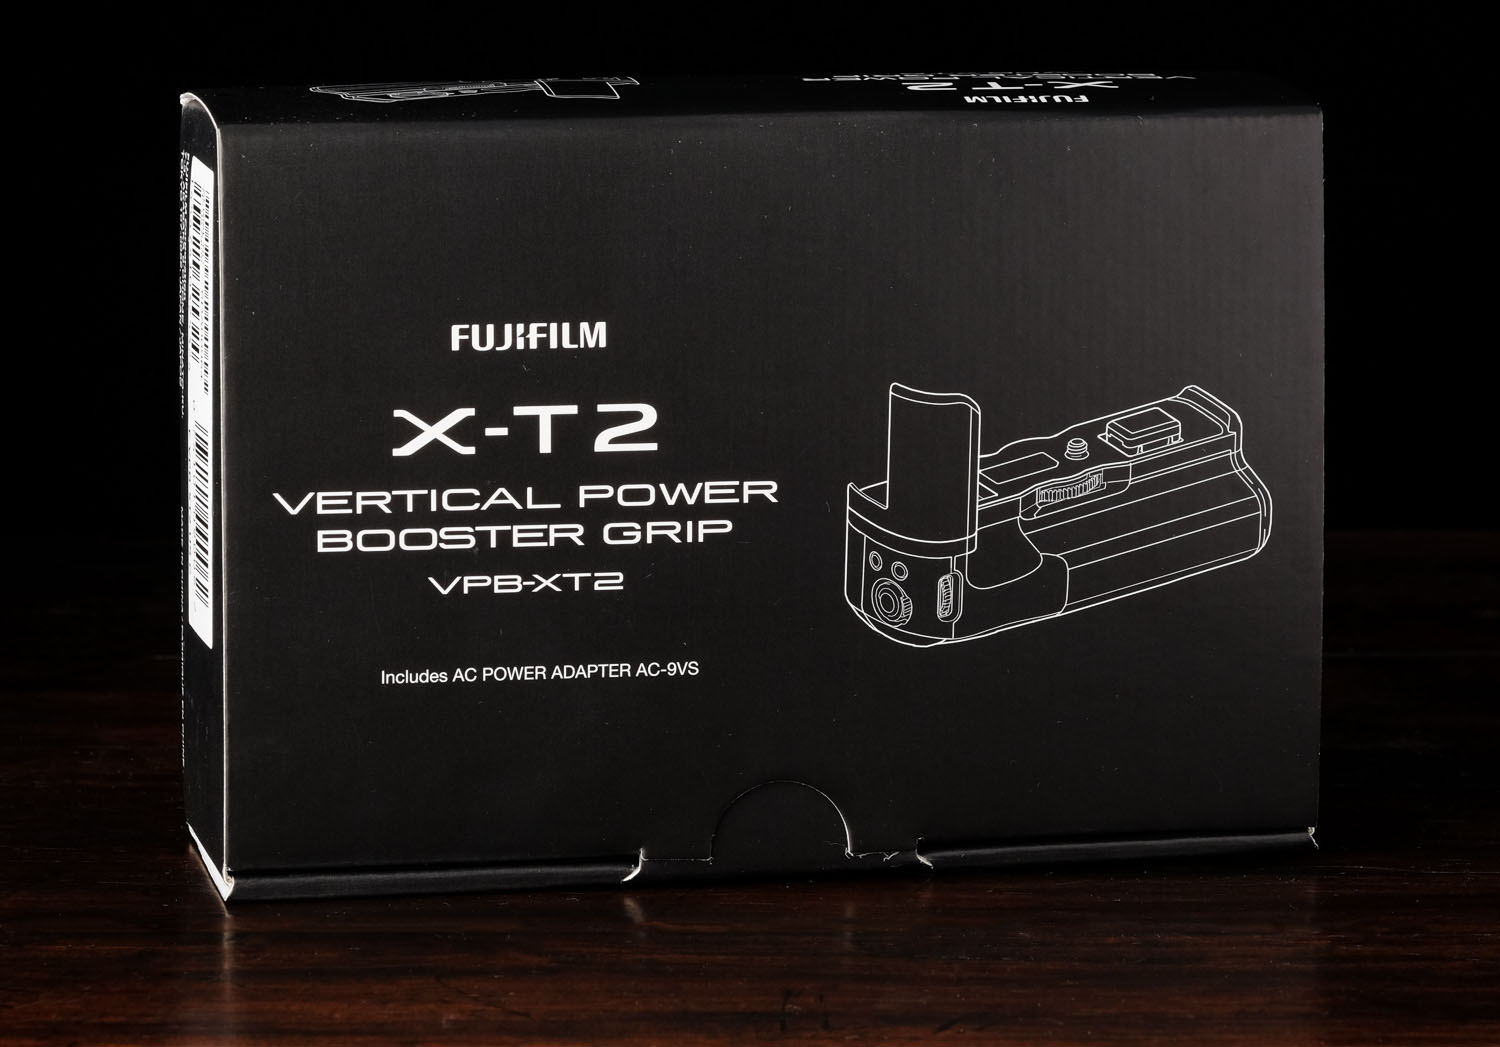
Unboxing
Not much new to see here. Pretty standard Fuji box affair.
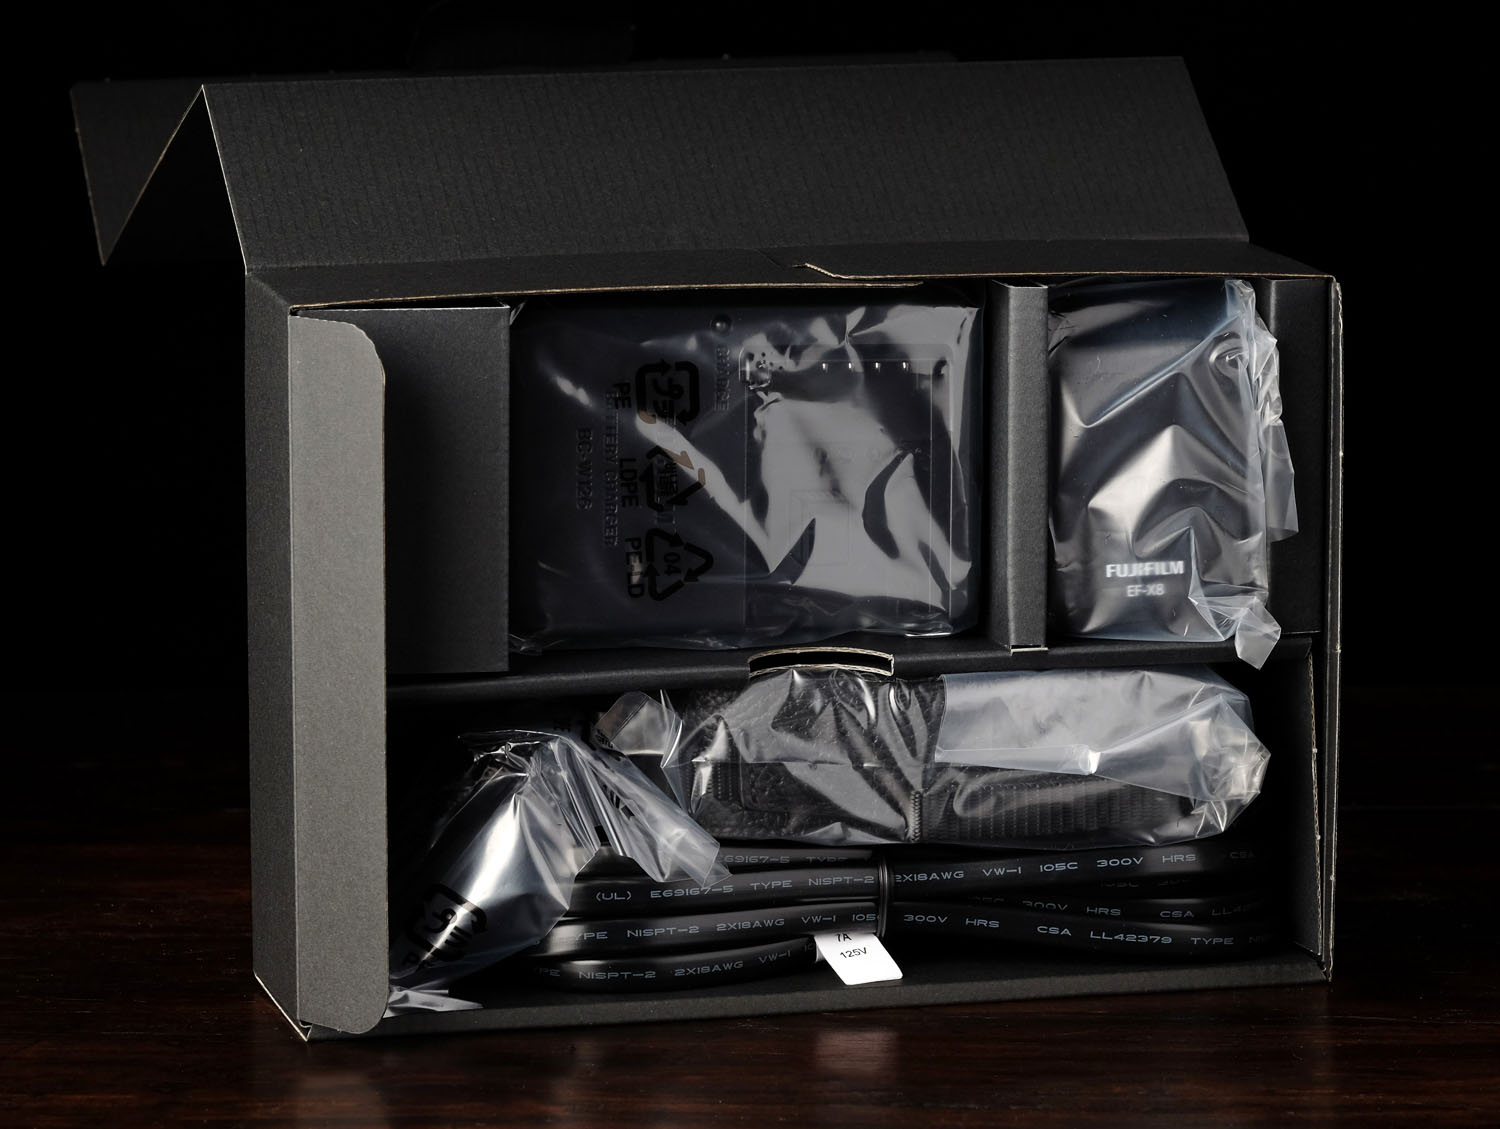
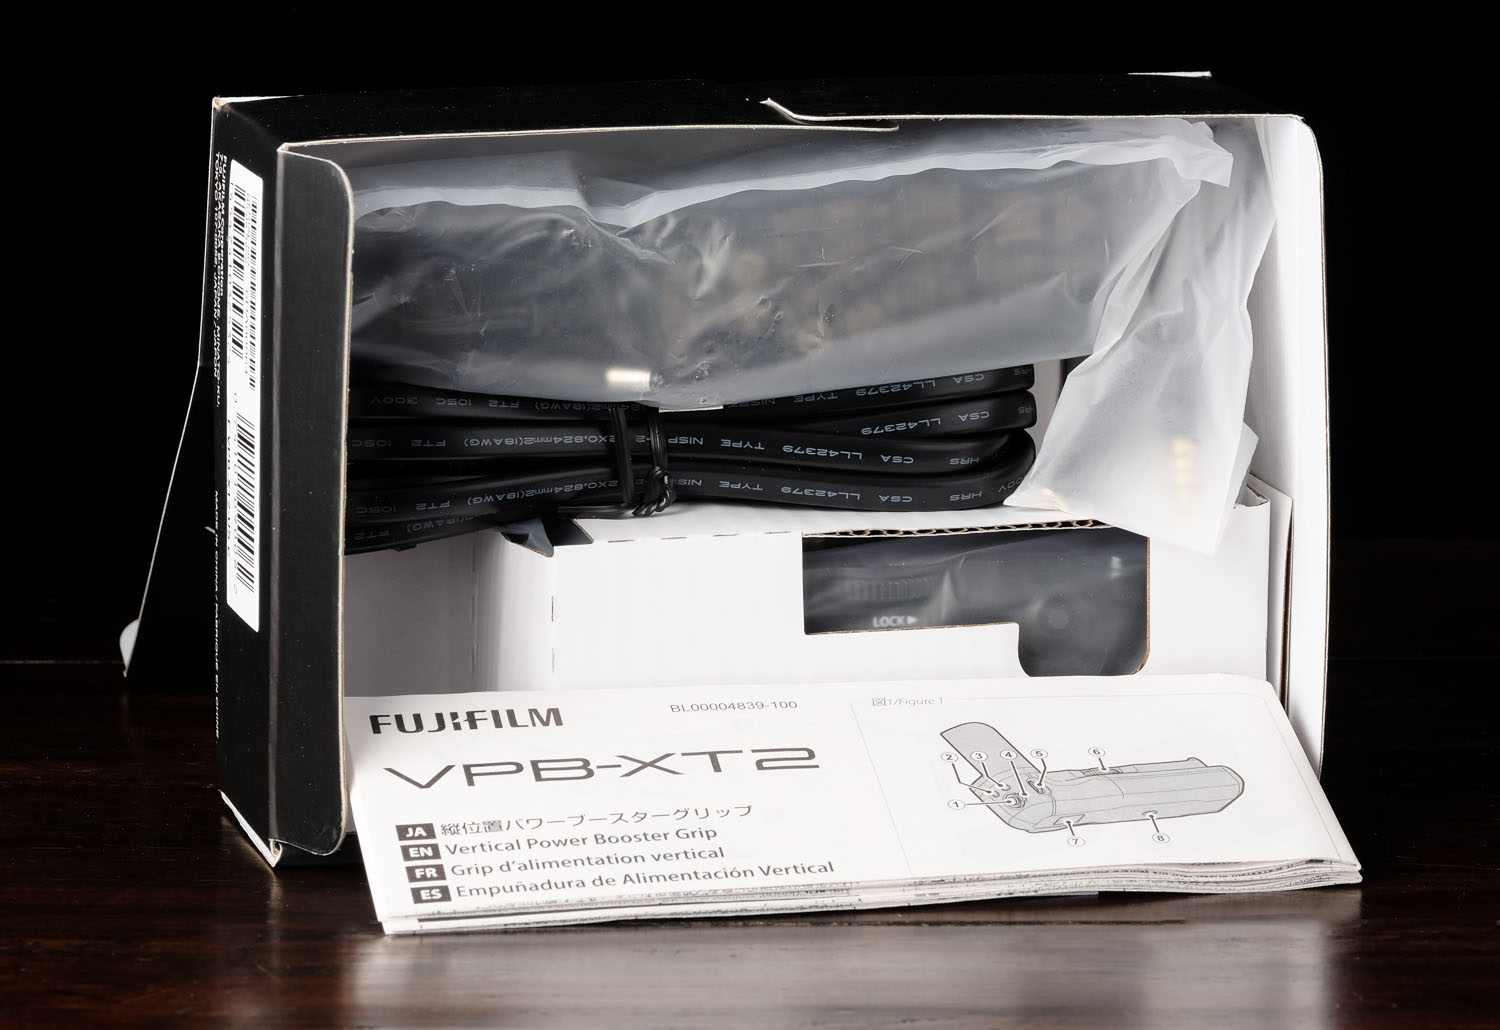
Supplied Accessories
Not much new to write about here either. The X-T2 will ship with the usual NP-W126 battery, BC-W126 charger, body cap, strap clip attachment tool, metal strap clips, shoulder strap, and covers for the hot shoe and sync terminal.
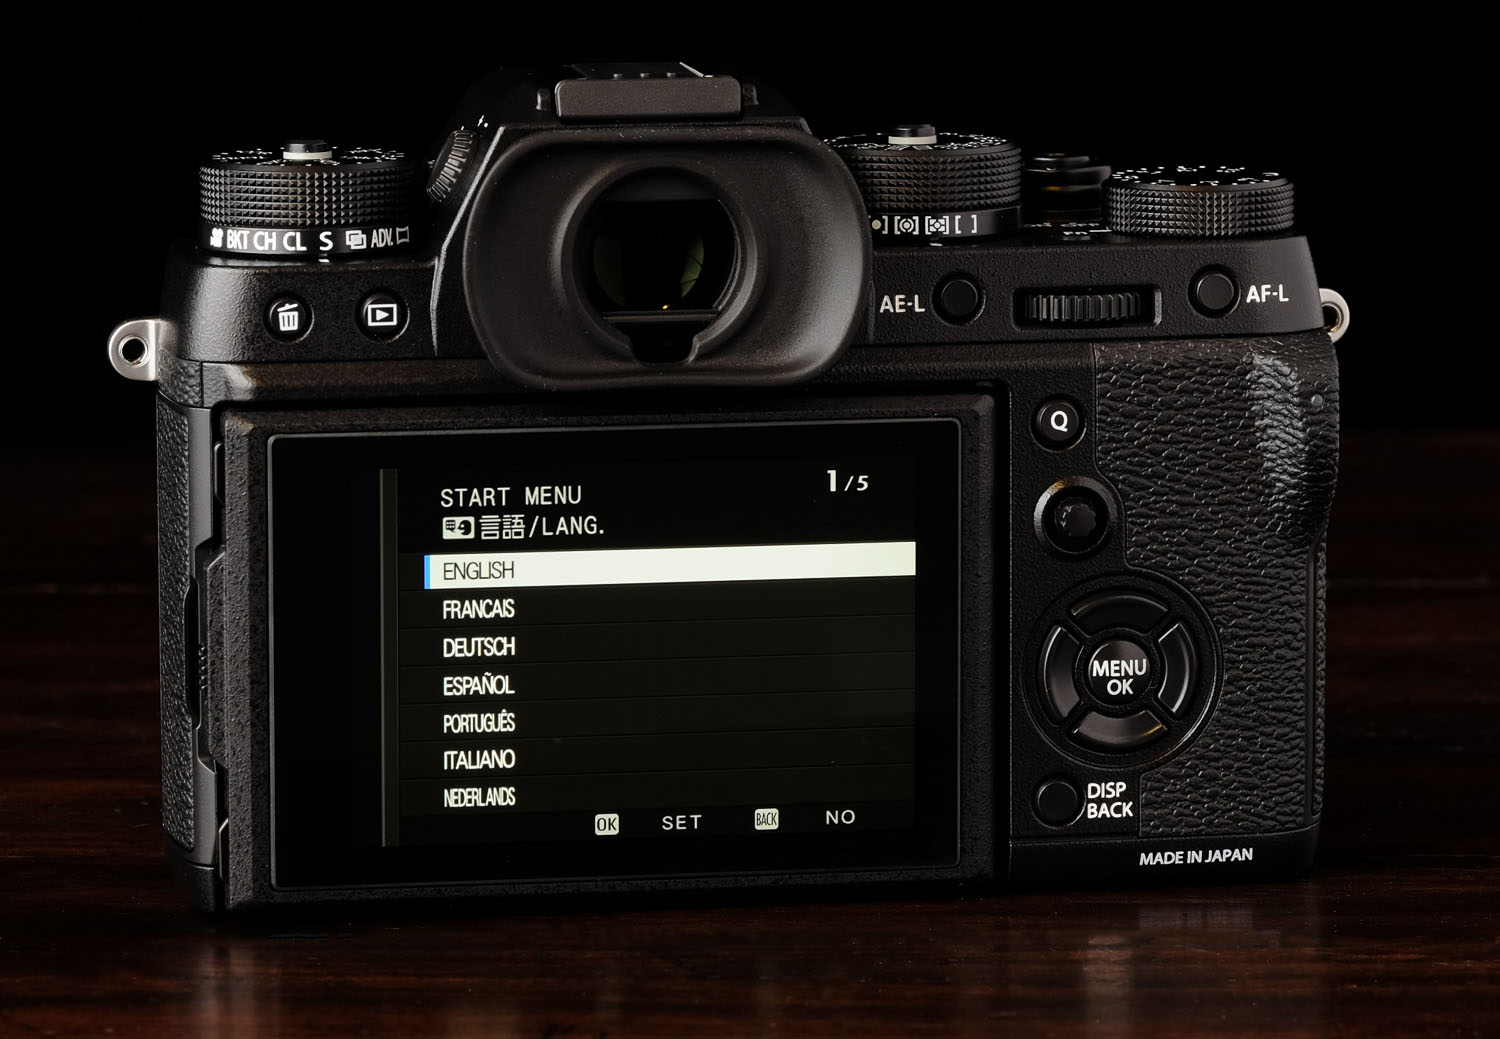
Set Up
Anyone who’s owned an electronic device in the last decade will be familiar with the initial set up process. You notice Fuji’s new menu design immediately. The “Start Menu” requires language selection, date format, and time input, then you’re ready to shoot.
Build Quality
The build of the first X-T body was already excellent. The X-T2 matches or exceeds it in almost every way. A couple points of debate could be the rubber compound used on the body, and the dials.
Body Finish
The compound of the rubber used on the X-T2 is different from the X-T1. It’s a fair bit less tacky. This could be an effort to reduce how quickly the rubber wears from the body. The finish on the X-T2 feels like it will stand the test of time quite a bit better, but I prefer the grippier compound.
Shutter
The X-T2 is another camera from Fuji that has a great shutter sound. It sounds a lot like the X-Pro2’s that I loved so much, only a little bit lower in tone.
The X-T2, like all recent Fuji cameras, features a silent electronic shutter for when things need to be quiet, or, in the case of the X-T2, frame rates need to go from the crazy 11 fps limit of the mechanical shutter, insane at 14 fps.
The shutter has also seen similar bump in speed as the X-Pro2, up to 1/8000 of a second, with 1/250 of a second flash sync. The former means one more stop wide open shooting with the mechanical shutter to avoid the distortion associated with the electronic shutter and fast-moving subjects. The latter lets us blot out more ambient light an a studio environment. I have, on occasion, noticed that some specular highlights from ambient light are still visible at 1/180 of a second.
Weather Sealing
No surprise here. Given the original X-T was the first in Fuji’s line-up of weather sealed cameras, a weather sealed successor was to be expected.
Magnesium
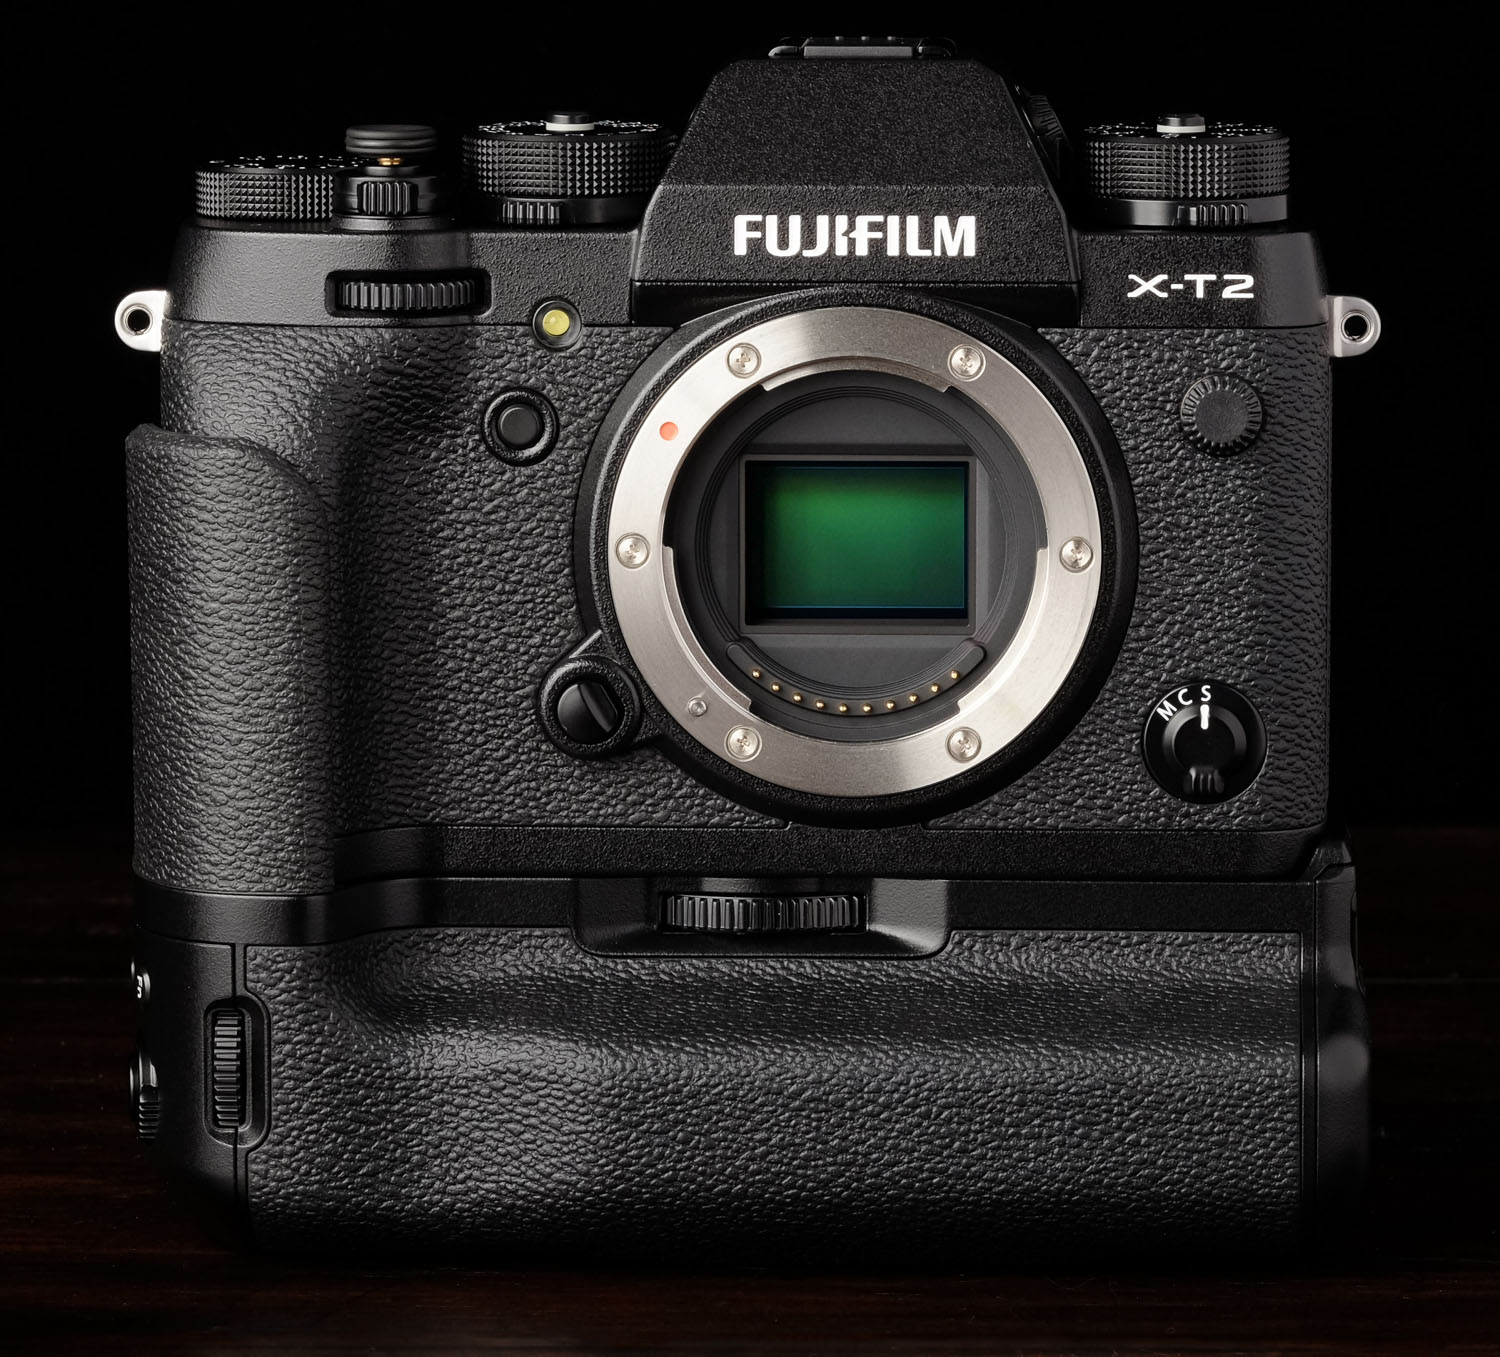
The X-T2 features a solid, all magnesium chassis in line with the X-Pro2 and X-T1.
Bottom Plate and Tripod Mount
We’ve regressed back to a seamed baseplate on the X-T2, which is a bit of a surprise. I suppose with the contacts for the vertical grip there were too many things to machine around in order to achieve a seamless baseplate.
Size and Weight
Once again we have a bit of an increase in both size and weight on the second iteration of a camera body.
The X-T2 is a little bit than the X-T1 on every axis, but it’s still a very compact camera, and close enough that I still find myself double checking the badge on the front to verify which camera I’m holding.
The increase in weight is just 50g, a little bit more than the 40g increase we saw going from the X-Pro1 to X-Pro2, but it’s still not a difference worth worrying.
Memory Card and IO Covers
Like the X-Pro2, the memory card door is a huge improvement over the X-T1. It has yet to open in my hand without me wanting it to thanks to it not being a slide to release mechanism. Instead, there is a switch release.
The IO cover is similar to the weather sealed version on the X-T1, but it doesn’t open as easily, and closes way better.
General Fit and Finish
Overall, the X-T2 is an incremental step up from the X-T1. Nothing extraordinary, but that’s because the X-T1 was already so good.
Buttons, Dials, and Switches
Here we have my usual button by button, dial by dial, and switch by switch notes on all the ways one might interface with their X-T2. This section will focus on operation quality, with handling notes thrown in for good measure where I can’t help myself.
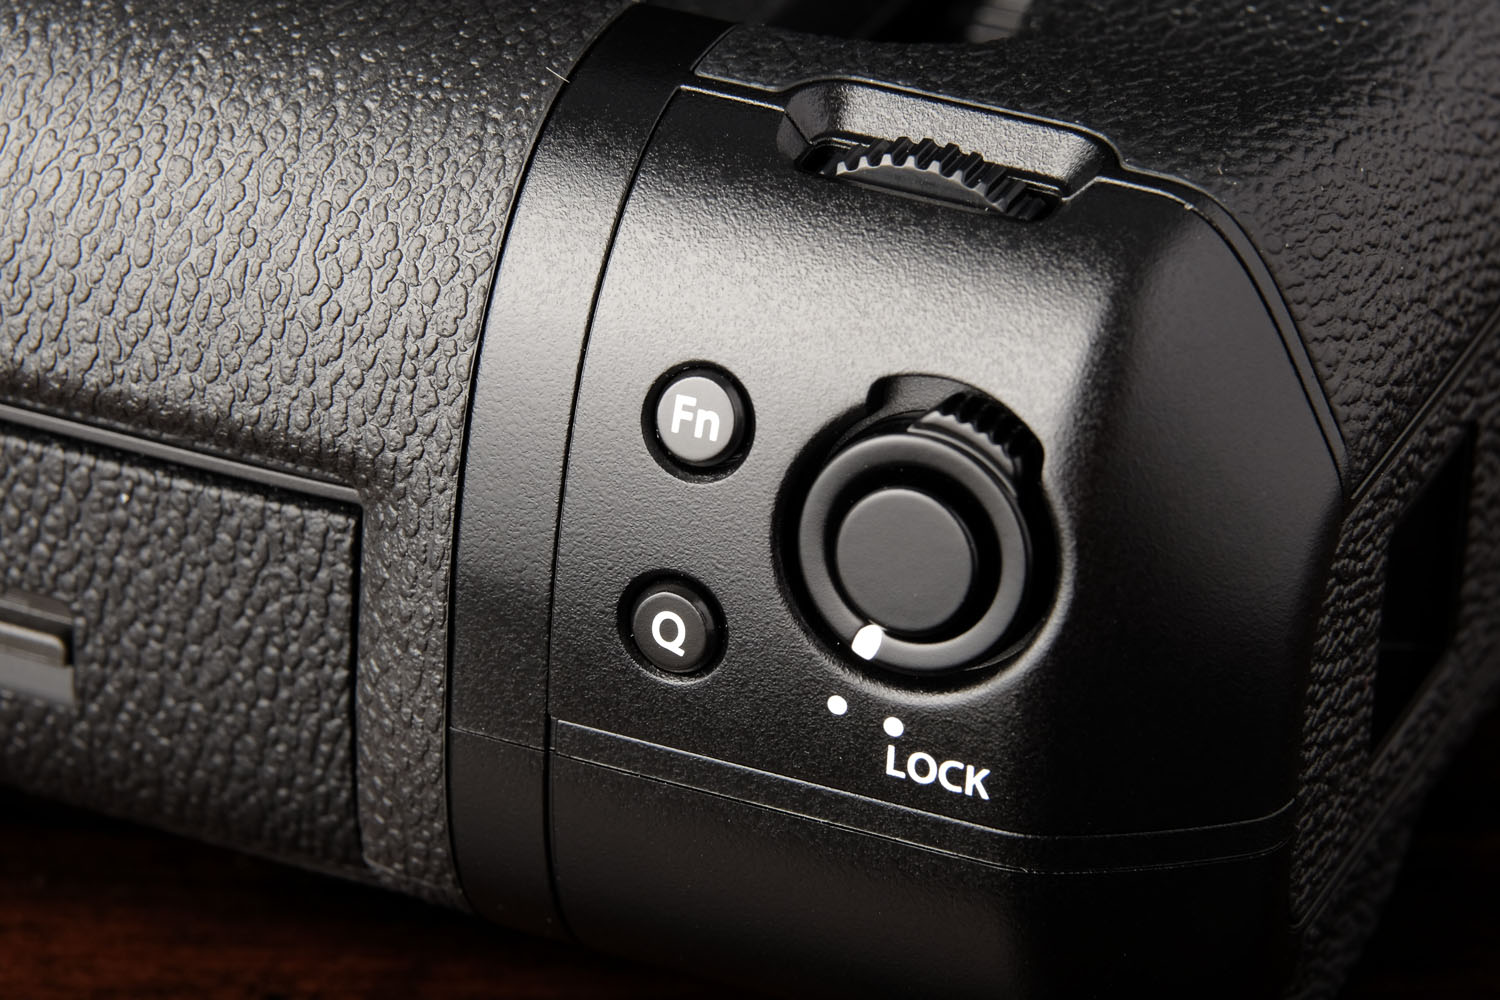
Power Switch: Similar to the X-T1, with a quieter click when engaged. The switch and shutter release casing is taller than any camera before it to compensate for the taller dials. I haven’t found it set to “on” when I wasn’t expecting it to be yet, so that’s good.
Shutter Release: Fuji seems to have their sights set squarely on pro DSLR users with how they’ve made the shutter release feel. Much like my old Nikons, focus acquisition is not accompanied by a distinct click. Instead, the shutter release has a softer trigger-like feel to it. This might be something to consider trying before purchase as it‘s a button you are likely to use quite a bit. The release is threaded, thankfully. I like to add a soft shutter release to my cameras, and now the X-T-line will feel that much more similar.
Exposure Compensation Dial: Same size an finish as the X-T1, but a good deal taller. I’m not a fan of how this one turns. The dial is so tight, it’s tough to turn it just a single click. I understand why—I find the exposure compensation dial on my X-T1 turned to places I hadn’t left it on occasion—but I prefer the feel of how the other dials turn much more, something I’ll have more to say about.
Shutter Speed Dial: I love the way this dial turns. The “Dial Lock Release” is a little bit spongy when depressed to prevent accidental presses, and releases with a satisfying click. This dial is also taller than the X-T1 for easier turning. The dial features full rotation, and has “250X” marked for easy maximum flash sync speed selection.
Metering (Photometry) Dial: Not a fan of this one either. The knurled lever is pretty tough to get at when the switch is set to “Spot” and the lever is jammed up against the viewfinder. Likewise when set to “Average,” but to a lesser degree. Otherwise it turns well with good clicks.
ISO (Sensitivity) Dial: Great, just like the Shutter Speed Dial.
Drive Dial: While functionally identical to the Metering Dial, the Drive Dial is more accessible because of where it is positioned, except for when it is set to “Panorama,” which likely won’t be often, if ever.
Top Function Fn Button: Thanks to the taller dials, this spongy button that used to click on the X-T1 is even harder to get at with your index finger. What I’ve discovered is that, if your hands are small enough, this button can be accessed pretty easily with your thumb, instead of your index finger.
Diopter Dial: Same as the X-T1, it’s a good dial, nice and clicky making it easy “dial in” your preferred setting. I wish the dials were lockable though. Pull out to adjust, then press in to lock, for instance.
Command Dials: With a slotted grip instead of knurls, these dials now act as buttons. The rear dial replaces the now absent “Focus Assist,” and the front dial does nothing on press unless you are another level deep in the UI, like accessing your focus point, where pressing either command dial will reset your focus point to centre, or enabling/disabling exposure compensation adjustment via the front dial when set to “C.” I’m not too sure why you’d want to do that though.
Focus Stick (Focus Lever): Fuji still can’t seem to decide what to call this thing. Ah well. Mine feels a little different than the one on my X-Pro2. Not better or worse, just a little different. On pre-production sample, the Focus Stick clicked nicer going one direction than it did the other, but it probably had more stress-testing done on it than would be typical, and all the of production samples I’ve handled have been consistent.
D-Pad (Selector): More refinement here. Still the same size with ridged selector buttons, the D-Pad on the X-T2 isn’t nearly as clicky as the second version of the X-T1’s was, but it is less recessed as well, making it easier to use. I’d love the best of both worlds here, clicky and accessible.
Rear Buttons: These are mostly the same as the previous generation, except the Q-Menu button and Display/Back aren’t flush to the camera’s body anymore, making them easier to find without looking.
LCD Tilt Release: This tiny slider will determine whether the LCD tilts just horizontally, or horizontally and vertically. It works ok, but isn’t terribly discoverable, and if I didn’t already know the X-T2’s LCD tilted both ways, I might not have found it. A touch of orange on the inner section of this button would help.
Focus Mode Selector: Nothing to say here. Same switch as we’ve had before. It’s good, and it works.
Front Function Button: Really like this button. Perfectly positioned, great clickiness.
Lens Release Button: Same as always. Spongy, and I have yet to engage this one accidentally on any Fuji camera ever.
Autofocus
If I had to choose one feature as the marquee feature for the X-T2, it would be Autofocus performance, and Continuous Autofocus, specifically. There is a ton to dig into here, but the gist of it is if you have been at all frustrated by the lack of customization in Continuous Autofocus performance with Fujifilm cameras, you are sure to be satisfied with the X-T2. Now, whether the camera’s AF performance meets your needs is another story, and will depend what you are accustomed to.
All X-Trans III/X-Processor Pro have the same autofocus engine Autofocus performance will depend on your lens selection a lot.
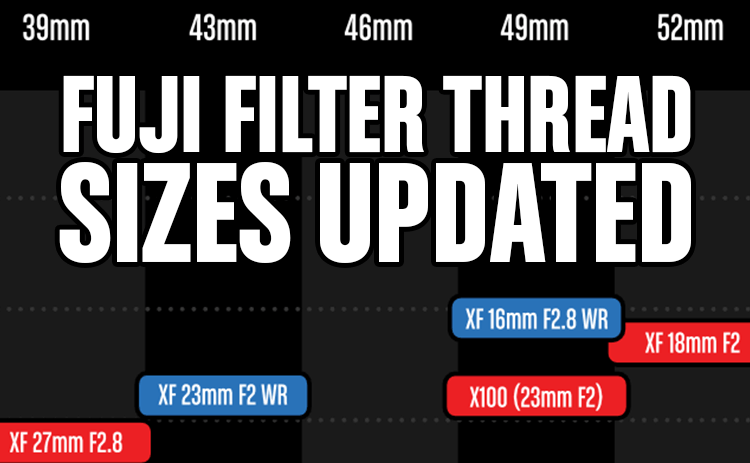
Continuous AF, and the X-T2’s Custom Settings are tailor-made for “Red Badge” lenses like the XF 16-55mm F2.8 WR, XF 50-140mm F2.8 WR, and XF 100-400mm F4.5-5.6 WR.
I’m not seeing huge gains in autofocus pace with slower lenses like the XF 56mm F1.2, and the old XF 60mm F2.4 Macro, and that’s to be expected. Those lenses aren’t intended to, nor are they built to perform autofocus miracles. Make your lens selections accordingly.
AF-C Custom Settings
Fuji has done an excellent job of making something that will be extremely complex to write about remarkably simple in execution, once you’ve wrapped you head around it. Here’s a bit of a primer.
Three settings are available for adjustment in the X-T2’s AF-C Custom Settings:
- Tracking Sensitivity: Affects how strong a hold the camera will have on a subject once it has acquired focus.
- Speed Tracking Sensitivity: Tells the camera whether your subject will be moving at a regular, or sporadic pace.
- Zone Area Switching: Tells the camera whether you want it to focus on something else other than what you’ve already focused on, should it come into frame.
AF-C Custom Presets
The X-T2 ships with 5 preloaded custom settings for you to get started with while you get a handle on what each setting does, and how the camera will behave as a result. The images used to depict each preset will help your understanding of them if you imagine them moving.1 For readers who don’t yet own an X-T2 yet, here’s a brief interpretation:
- 1. Multi-Purpose: This is the default. After pushing the settings to their extremes, I think Fuji did a good job striking a balance, but once you get the hang of things, you will run into undesirable averages in the settings.
- Ignore Obstacles & Continue to Track Subject: Imagine you have the opportunity to photograph a cheetah running, you probably don’t want the camera even thinking about focusing on something else after it has acquired focus on the cheetah. I have to wonder why this preset has Tracking Sensitivity set to 3 as opposed to the maximum 4.
- For Accelerating/Decelerating Subject(s): If you imagine how quickly Go-Karts or perhaps Formula 1 race cars slow down and then accelerate around corners, you can get a good idea of what this setting is meant for.
- For Suddenly Appearing Subject(s): Imagine a snowy hill a skier is about to jump over. You could prefocus at the distance of the crest of the hill, or I suppose just keep the camera focusing, and it will grab the skier as they appear and they track their movement.
- For Erratically Moving & Accelerating/Decelerating Subject(s): Think tennis or soccer.
Really, REALLY Custom
Now we’re going deep. Serious continuous buffs won’t be able to escape the draw of the 6th setting for some CUSTOM Custom Setting action.
- Select 6 then left on the D-pad.
- Use the D-pad or rotate the front dial to adjust the settings, or press OK or the rear Command Dial to get more detail on each setting.
- In Detail view, use the D-pad’s up and down arrows or the rear Command Dial to switch between the 3 settings. The D-pad’s left and right arrows or the front Command Dial will change the settings.
- Pressing BACK or the rear Command Dial again will exit you to the main Custom Menu, and a half-press of the shutter release brings the camera back to being ready to take a photo.
To add further written complexity, your AF “Mode” (Single Point, Zone, Wide/Tracking) will also affect how each of these settings behaves.
Yeah, Yeah, Yeah. Does It Work?
In my testing so far, I’m having a lot of success with the new AF-C Custom Settings. With my camera set to Wide/Tracking, and my Custom Settings at 0/2/Front, I can keep a high contrast section of a subject in focus until it is about to leave the frame of my viewfinder, or track the eye of my black cat as she is walking towards me, or a pool ball after it’s been struck.
Trust Your Eyeballs
The biggest criticism I have of the new AF-C features in the X-T2 is that often the UI and what my eye sees just don’t line up. As the green boxes travel across the viewfinder, they often are not on top of what appears to be (and is as verified by taking a picture) actually in focus.
That means you really still need to trust what your eyes are showing you, vs. Having blind faith in the green boxes, as they will lie to you. This could be a problem for photographers with eyesight that can’t be fully corrected via the diopter and would rather be able to push the shutter based on what the camera says than wear eye-glasses.
Custom Settings Samples
If you want to have the camera change focus from the subject immediately under a single AF point or a selected Zone, set your AF-C Custom Settings to 0/2/Front. Note that a larger Zone could result in the camera focusing off your intended subject.
If you want to lock focus on one particular part of a subject, like say, they eyes, and have some flexibility in reframing and the freedom of your subject to move, use the same settings above with your AF Mode set to Wide/Tracking.
If you want to let the camera make decisions about everything, set your AF Mode to Wide/Tracking and set your AF-C Custom Settings to 1/1/Auto.
Handling
By the time Fuji had released the X-T1, they were already pretty far ahead in their handling game, and the X-T2 makes some solid refinements. There may be a few refinements yet to go. We’ll start with the Fuji’s biggest change in their camera’s interface, the “Focus Stick”

Focus Stick (Focus Lever)
I really wish the position and the Focus Stick and Q-Menu buttons were swapped. For my shooting, it would be quicker to make adjustments to my focus point if it was higher up, and I use the Focus Stick more regularly than the Q-Menu.
I suspect those with larger hands will feel even stronger about this. Even when not using the camera, I thumb for it where the Q-Menu button is. In addition, the Q-Menu button actually was in this position on the X-T1. This could make switching back and forth between cameras tough.
That said, I would take a Focus Stick that’s a little lower than my preference over no Focus Stick any day. This was one of my two favourite new handling features of the X-Pro2, and we all knew it had to be coming to every other body Fuji makes with their next release.
Fujifilm was kind enough to include the X-T1’s Selector Button Setting setting of adjust your focus point instead of the Focus Stick, but I have no idea why you’d want to do that. If you’re in the habit, you should probably work on breaking it.
One option that occurred to me that is currently impossible on two fronts is setting the Focus Stick Press to access the Q Menu (front 1), then changing the Q Menu section highlight with the Focus Stick, and adjusting the setting with the front Command Dial (front 2). There is definitely some room for customization refinement in this cameras.
Anyhow, you can read much more about how much I love this little lever here, in my X-Pro2 review.
Metering Switch
While I appreciate dedicated access to metering mode (Photometry), this switch is really tough to get at. You probably won’t be changing this one on the fly, and you can forget about adjusting it with gloves on. That’s the reality of adding metering modes to a body that’s so compact.
Having video on the Drive Dial as opposed to being a dedicated button is a hugely welcome change, and just makes sense. I never understood why video wasn’t on the Drive Dial on the X-T1.
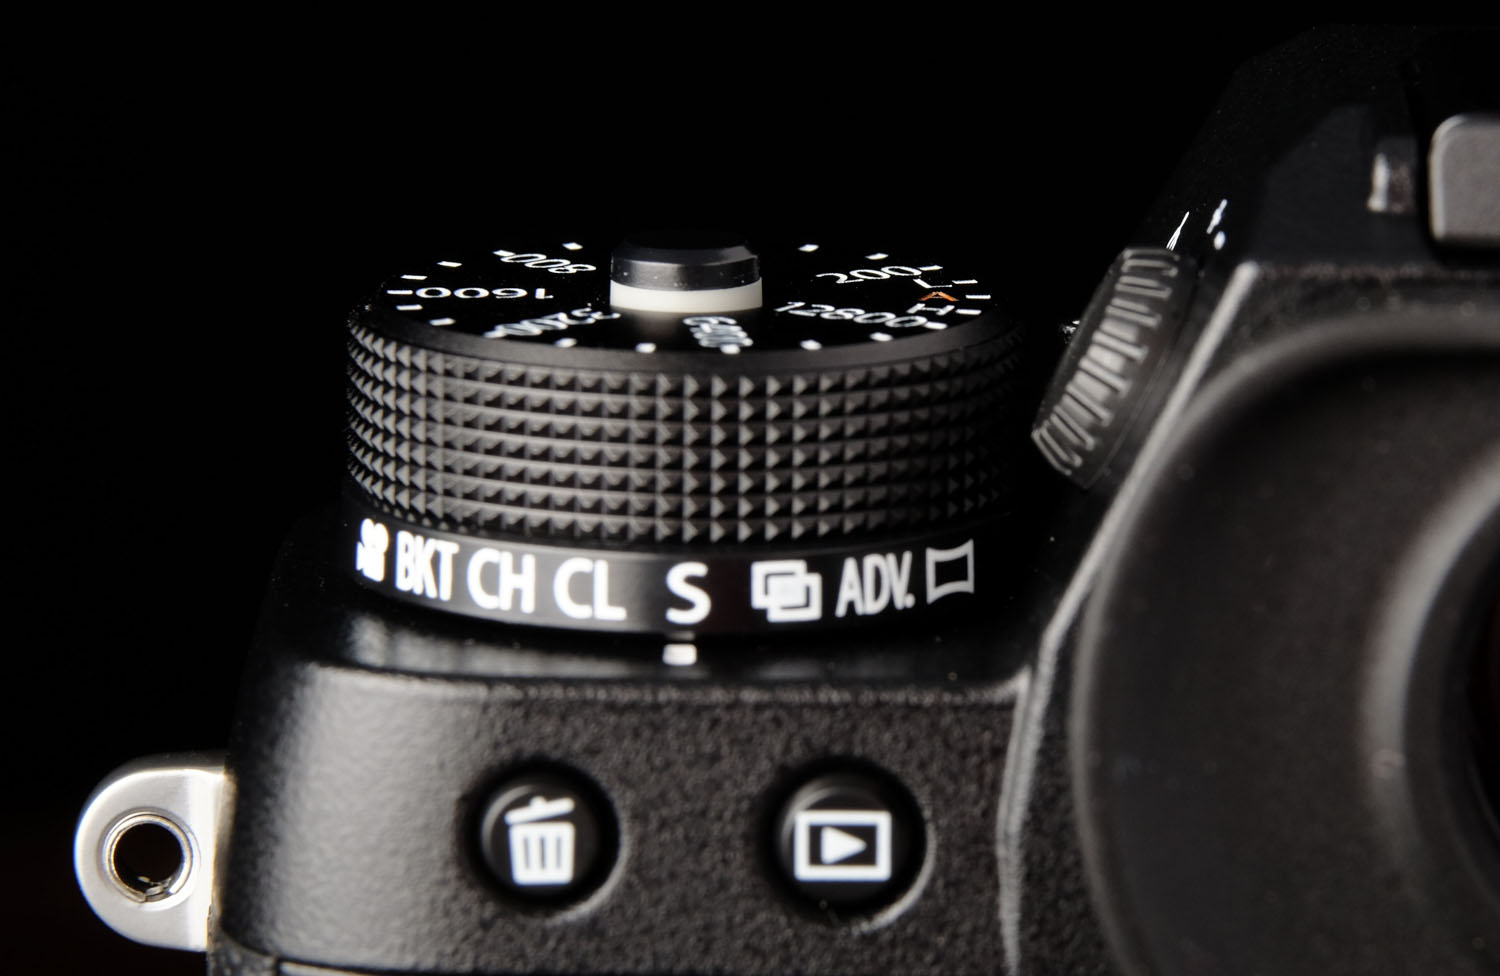
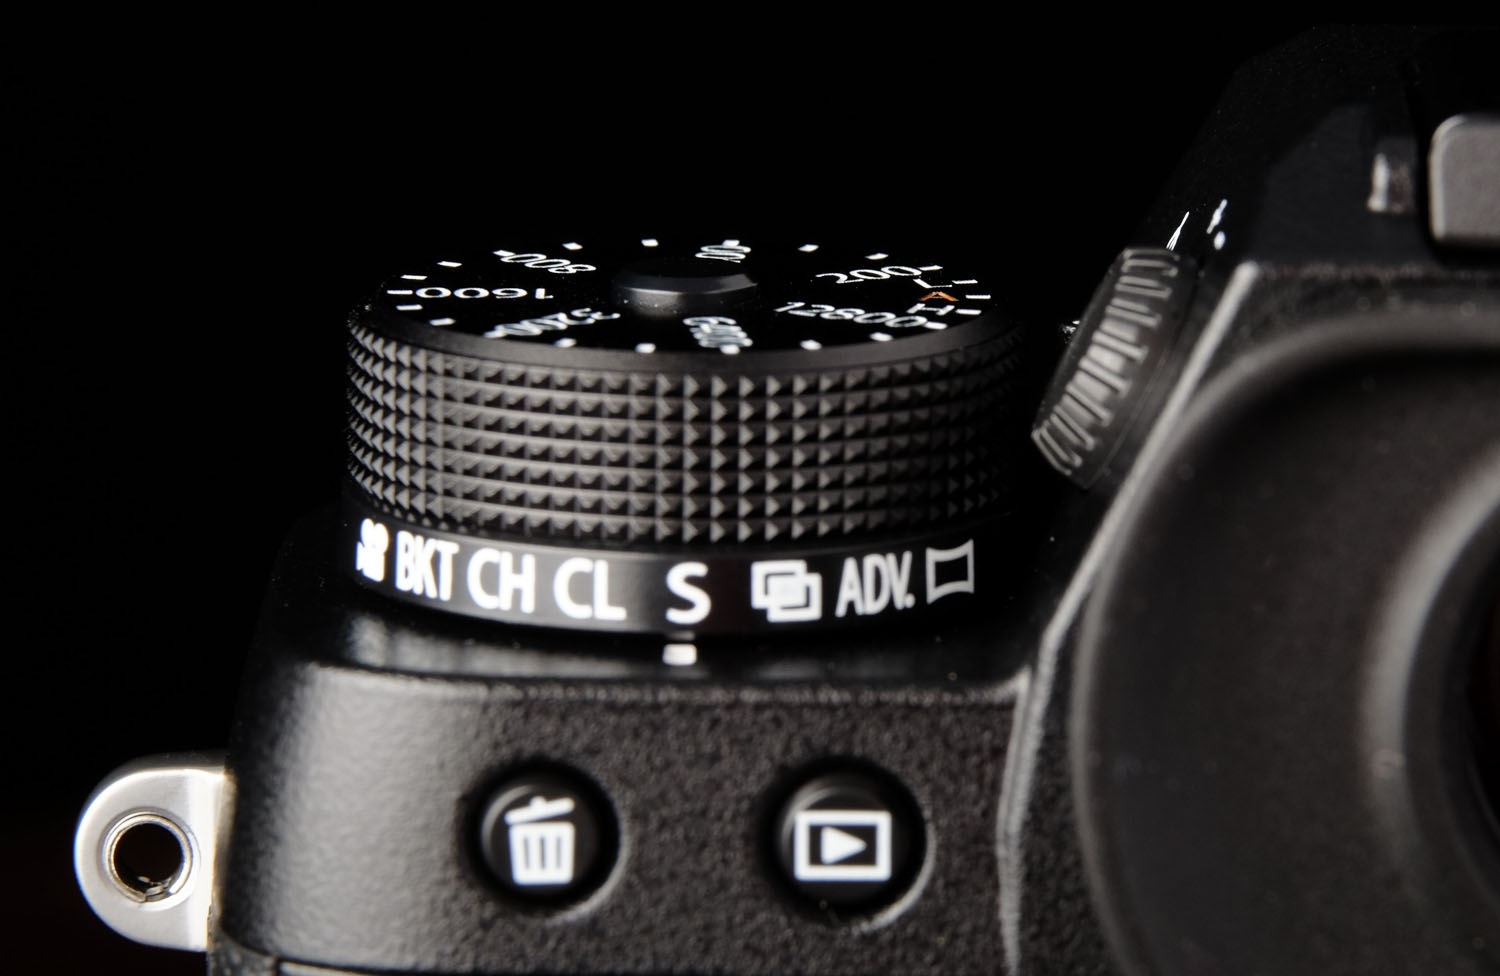
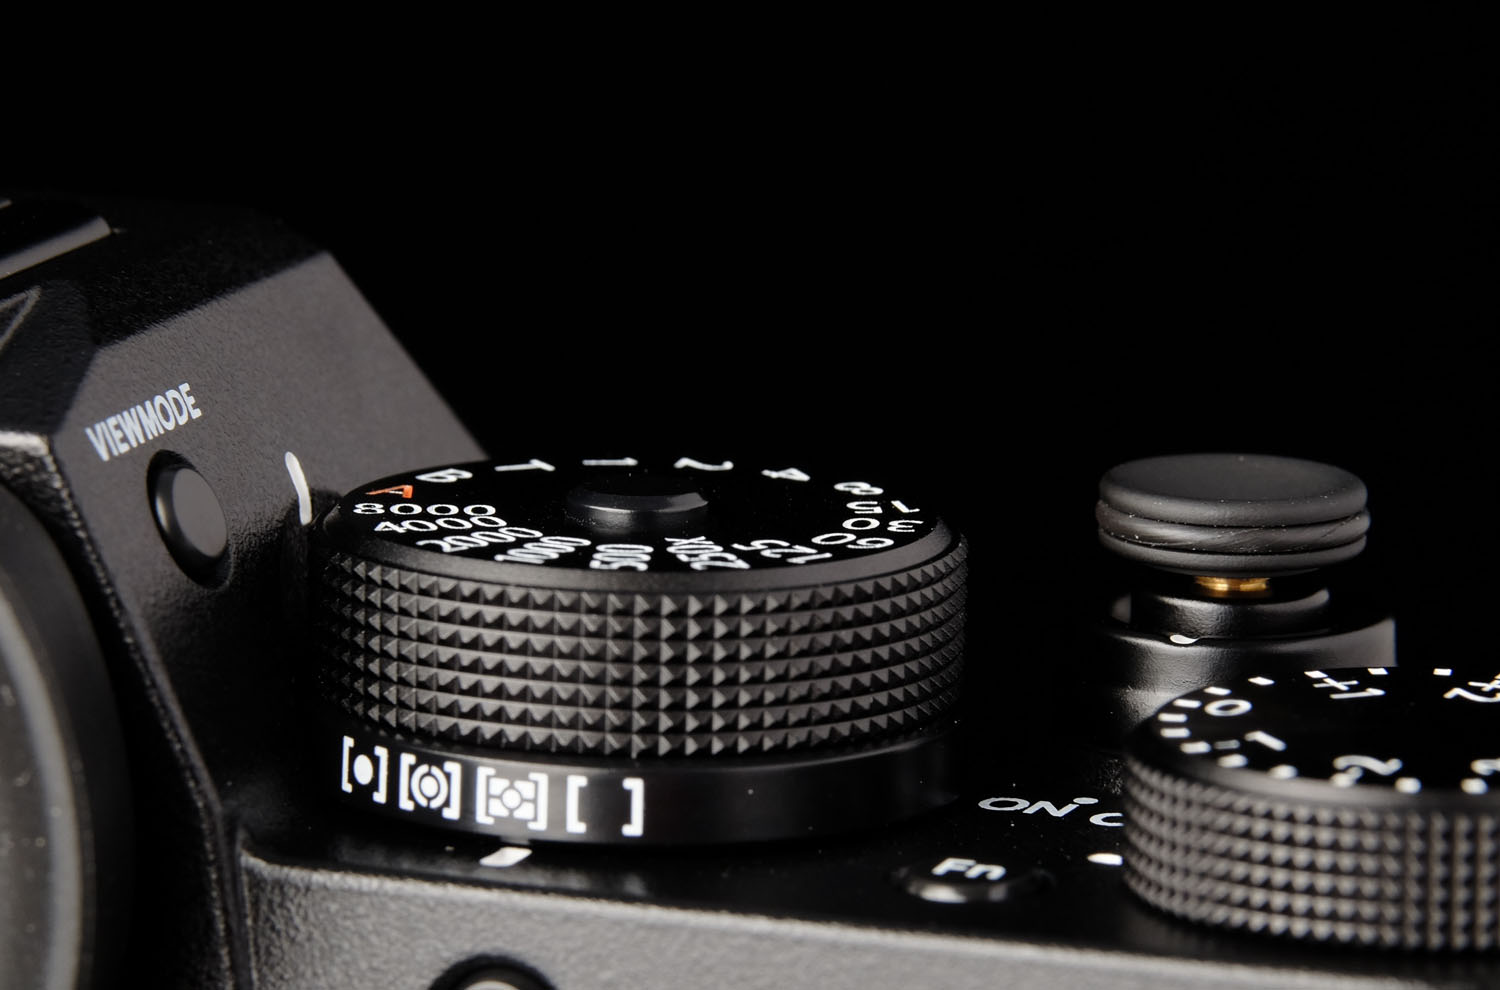
Dial Lock Releases
Another great addition to handling. The biggest issue I have with the dials on the X-T1 is the consistency. Adjusting the ISO Dial always required a button press whereas the Shutter Speed Dial only required a button press to exit Automatic/Aperture Priority. Now, if the dial release is engaged, the dial doesn’t turn, no matter the setting, likewise, if it’s locked, it’s locked.
I can’t help but wonder whether the Exposure Compensation dial should join “Dial Lock Release” party, and share their superior rotation.
More In Phase
As with the X-Pro2, a full ⅔ of the frame in either a 7 × 7 or 13 × 13 grid is now covered by fast phase detect autofocus points. I guess we’ll need to wait for X-Trans IV to see the whole sensor covered in phase detection.
Grip
The grip on the X-T2 is every so slightly deeper than the X-T1, but the shape is very close, with a little less of an indent on the inside front portion. As mentioned above, and worth repeating, Fuji seems to have tweaked the compound of the rubber on the body be a little less tacky, which means it should wear a little better. I’ve smoothed out the rubber on my X-T1 quite a bit, and it wasn’t my primary camera for very long. These two adjustments combined make it so that I can no longer dangle the camera from just my three fingers.
Weighting
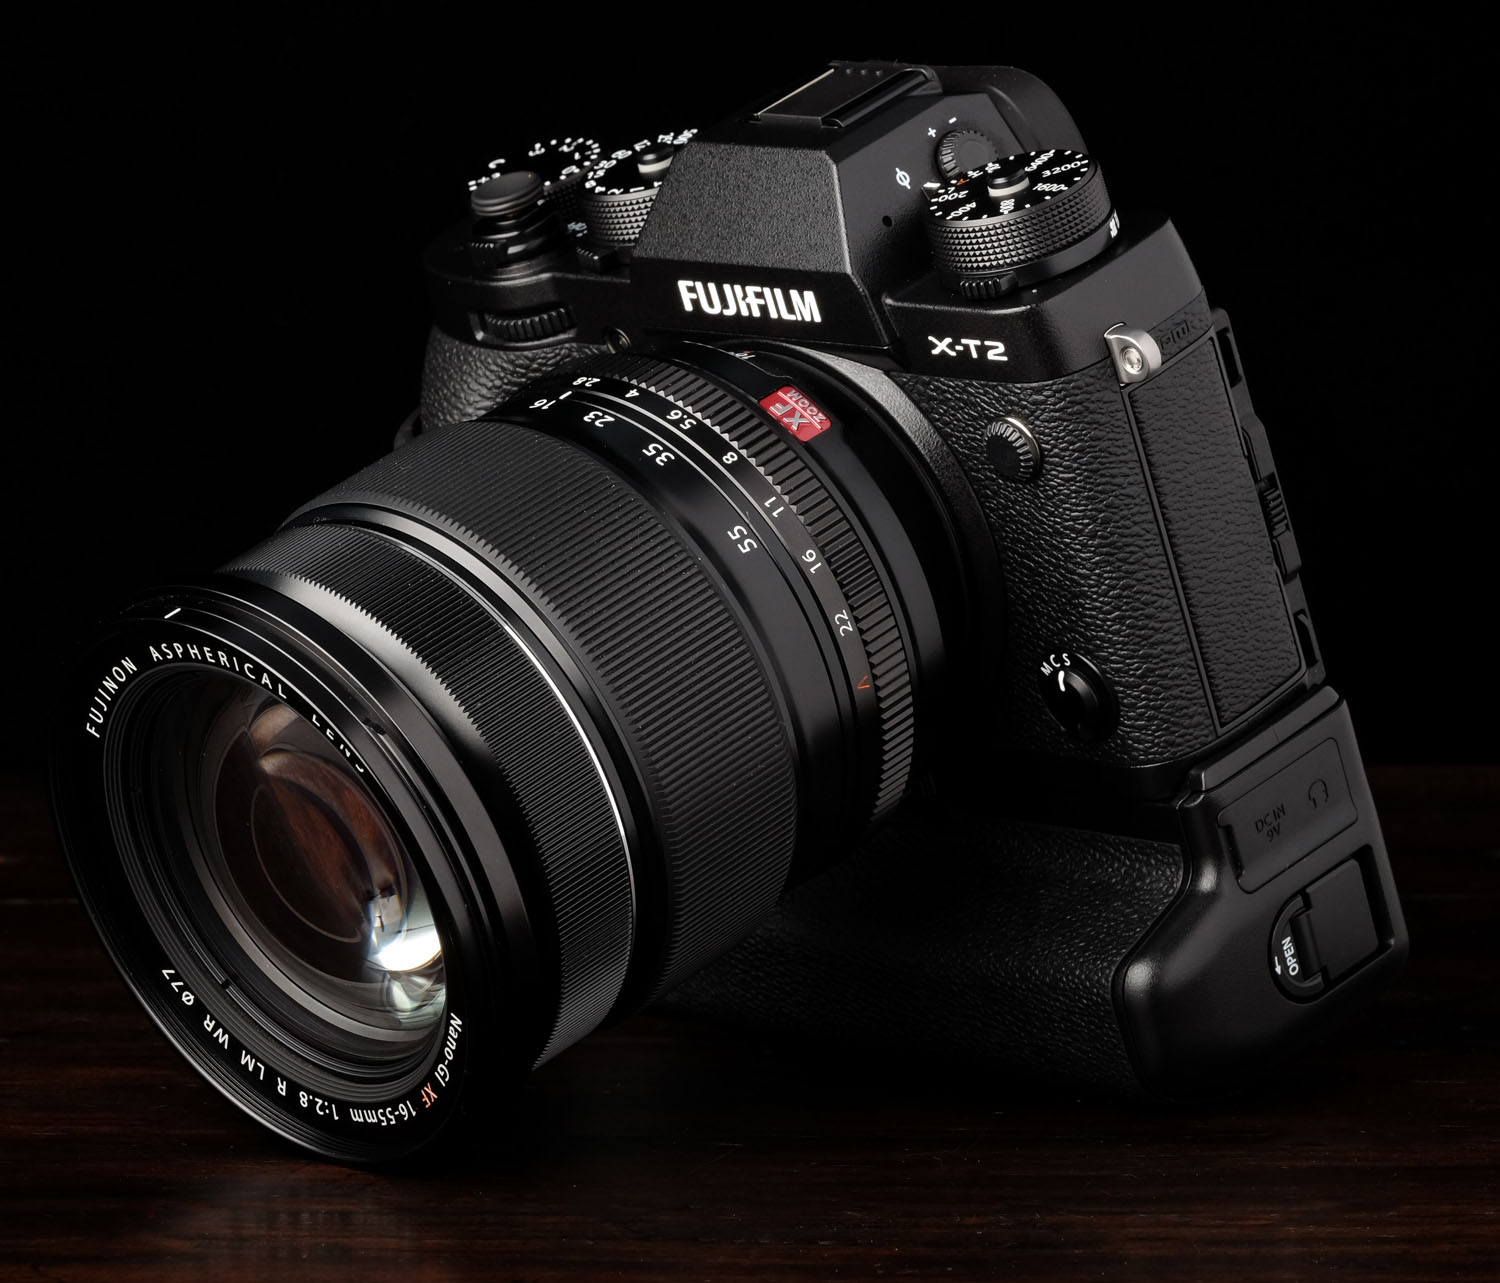
The X-T bodies balance perfectly with lenses like the XF 23mm F1.4 and XF 56mm F1.2. Smaller lenses are fine too of course, but when getting into XF 16-55mm F2.8 WR territory, I like having the VPB-XT2 Vertical Grip attached to not only counterbalance the larger lens, but also add more girth to the grip portion of the camera.
Command Dials
We get the new menu access via the Command Dials. It used to bother me that it’s not quite the same as Nikon’s menu navigation, but I think I would prefer Fuji implementation if they just made one small change; when navigated the menu, pressing the rear command dial behaves as pressing the “OK” button. But once you’re a second level deep in the UI, there no way to get back outside of pressing the “DISP/BACK” button. The front Command Dial press—which currently does nothing in menus—should be the same as pressing “DISP/BACK.” That way one could fully control the menus without ever leaving the dials.
The front dial is strangely overlooked when it comes to camera controls in general. As I’ve griped about before, the front dial still can’t be used for Q Menu selection as it could on the X-T1, as far back Firmware Ver.1.31. Selecting items with the front dial is quicker as you aren’t moving your thumb to and from the rear dial. I’m still hoping Fuji will correct this in an upcoming update.
Exposure Compensation
Two additional stops of exposure compensation are accessible by spinning the Exposure Compensation Dial to the C position, and spinning the front dial to control how much, or little exposure is compensated. What would be awesome is if the dial was intelligent enough to pick up where you left off in spinning the dial. So if you get to -3EV and want to go darker, switching to C would pickup from -3. Instead, you start back at zero, and spin the wheel a few times.
For P Mode users, pressing the front dial button will switch between controlling exposure and exposure compensation.
Button Arrangement
Outside of the Focus Stick positioning mentioned above, the controls on the camera are as well placed as one could expect from a camera this small.
I wonder if future iterations of these flagship cameras should just label all these buttons, including the Q Menu as “Fn” and let the user decide whether they want to change them from their defaults. I might move Q Menu access to the current AF-L button position to compensate for one-handed use becoming more awkward with heavier lenses while holding the AF-L button.
Speaking of the AF-L button, its position can make adjusting the position of your camera on a ballhead frustrating when manually focused. It’s all too easy to hit the AF-L button with your thumb, focusing the camera on something else.
A tiny dot that lights up in low light in the middle of each button would also be helpful.
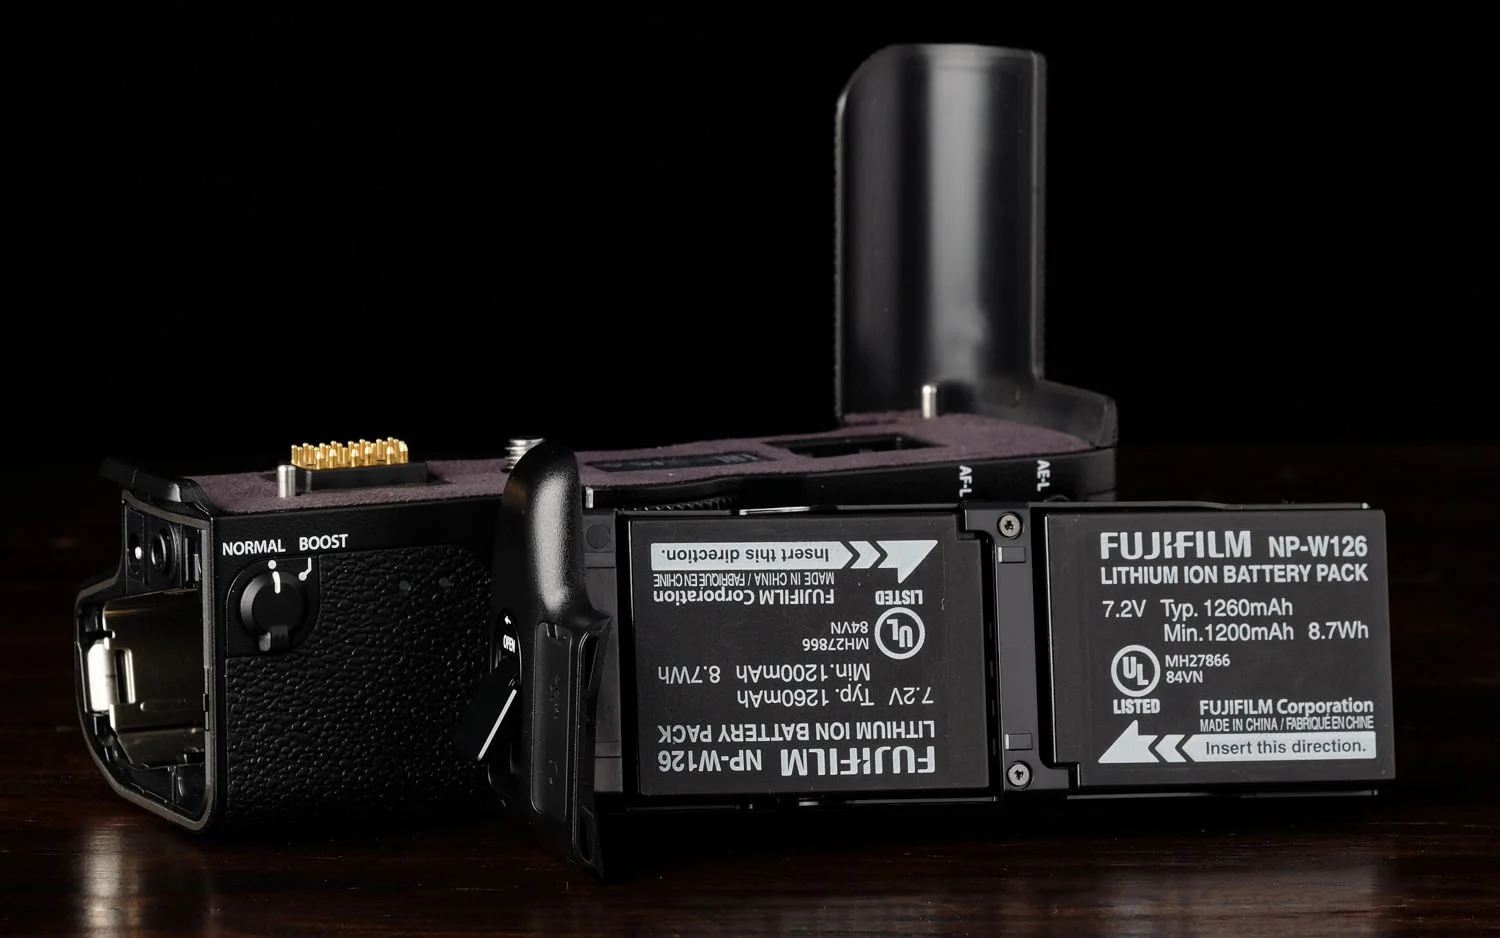
Dual SD Cards
The best of both worlds here; two slots unlike the X-T1, and both are UHS-II ready, unlike the X-Pro2.
Fuji has provided a number of options under the Set Up Menu > Save Data Set-up:
- Sequential: Once card 1 is filled to capacity, the camera will write to the card in slot 2.
- Backup: This provides redundancy of all your captures.
- RAW/JPEG: RAFs are written to one slot one, JPEGs are written to the other.
I typically select RAW/JPEG so I can copy JPEGs to my iOS devices, and both JPEGs and RAFS to my Mac, but I choose backup when on a big trip.
Viewfinding
Lots more refining here. All the way in which we compose with the X-T2 have effectively seen a spec bump for the already excellent X-T1.
Twice As Bright
As compared to its predecessor, the X-T2’s EVF is rated as being twice as bright. This is immediately evident when pointing the camera at something bright and noting how much brighter the UI elements are.
Now, this could be just my astigmatism talking, but the UI elements are so bright I am seeing aberrations around them. I notice it to a lesser degree with my mildly corrective glasses on, but I can still see it. It could just be me though, and it’s not a big issue.
100 Frames Per Second – Boost Mode Only
At the expense of battery life, you’ll be treated to significantly faster refresh rate with Boost Mode turned on. In low light the frame rate does appear much higher in my testing—much less blur and smearing to the image—but the frames do drop when the light gets low enough and your aperture is small enough once focus has been acquired.
Your Aperture Matters
With the XF 16-55mm F2.8 WR set to f/2.8, I can look through the viewfinder with an ISO of 12,800 and the frame rate stays nice and smooth. If I stop down to f/5.6 and especially f/8 in the same setting, the frames drop like crazy. This isn’t exclusive to the X-T2 or this lens even, but it’s something to be aware of if you look through your viewfinder and wonder where your frames at.
Less Black Out
Substantially reduced blackout periods during continuous shooting at high frame rates. It was common for me to lose my subject because of the X-T1’S blackout times when trying to track everything from jumping leopards to family and friends Bunji Jumping. I struggle less with the X-T2.
Eyecup
More dome-shaped, the standard Eyecup on the X-T2 makes it easier to compose in bright sunshine. It’s a bit shallower than the EC-XT L Long Eyecup,→ and I haven’t had any trouble using it with my glasses on.

LCD
The otherwise standard 3 inch LCD features an additional tilt angle. Using the toggle on the left of the LCD, it can be tilted when shooting in portrait. I prefer tilt and swivel LCDs from other manufacturers, but this gets the job done.
Inexplicably, the UI on the LCD still doesn’t rotate like the EVF’s does. This is long overdue.
Image Quality
This will be mostly a rehash from my X-Pro2 review as the internal components are identical between these two cameras.
New Sensor
Fuji’s 24.3MP APS-C CMOS III makes its way into the X-T body. As I have been using the X-Pro2 more, the difference in image quality gets more and more apparent. I had a hard time reaching for any camera that wasn’t X-Trans III since I started shooting with it.
Image Size
Maximum image size has been bumped from the 16.3 MP and 4896 × 3264 to 24.3 MP and a nice round 6000 × 4000.
ISO Sensitivity
The new sensor delivers an ISO sensitivity bump, bringing native ISO up to 12,800. Grain is still present, but its more pleasing than other cameras I’ve used.
Compressed RAFs
With the bump in resolution, lossless compression is even more welcome. Uncompressed RAFs weigh in at around 50.5 MB and compressed RAFs have been anywhere from 17.7 MB to 32.3 MB. That’s quite a savings, and impressive considering FINE JPEGs can run anywhere from 10 to 17 MB.
ACROS
Everyone’s favourite black and white Film Simulation Mode makes is no longer an X-Pro2 exclusive. I still plan to do some more in depth testing between it and Monochrome.
Film Grain Effect
For those who like a grainy look to their photos, Fuji offers a “Grain Effect.” In my testing, the grain quality does appear to be quite good. I’m personally be hesitant to destructively add grain to my images in camera so perhaps this calls for another bracket type, Film Grain Effect Off, Weak, and Strong.
Analysis
For much more on image quality, see my X-Pro2 vs. X-Pro1 comparison.
Video
4K has been added to video. As regular readers know, I’m not big on the video, however I did capture some video for real estate with some narration using the Vertical Power Booster Grip with my trusty Sennheiser PX 200-II i headphones.→ They, and their mic worked perfectly with the X-T2, but man, those 4K files are not small.
Conclusion
For whatever reason, I haven’t been anywhere near as excited about the X-T2 as I was the X-Pro2. Maybe that’s because it’s so much we’ve already seen, but I think there’s more to it. The X-Pro2 elicits an emotional response for me. I look at that camera and I want to (try to) make art with it. The X-T line of cameras is all about utility in my mind. This is a camera for getting shit done. No nonsense, no gimmicks, just get out there, shoot and (maybe) get paid. And for that, it absolutely excels. This camera will let you set up and shoot faster than ever before.
The contradiction is that—until GFX is within reach—the X-T2 is the camera I choose when it’s time to make fine art landscapes.
Would I Buy One?
I already have, along with the VPB-XT2 Vertical Power Booster Grip. It’s never going to find itself in my daily carry, but when I wake up early to shoot landscapes and the sunrise near Lake Ontario, I no longer have superior image quality as a reason to consider compromising with another form factor for that kind of shooting.
Should You Buy One?
If you’re just getting into the Fuji ecosystem, and you have the means, this is the camera I would recommend you buy. The only other consideration might be the new X-T20, especially, but not exclusively, for novices. It matches the X-Pro2 and X-T2 in many ways. For the seasoned photographer who doesn’t want to worry about the elements and needs an interchangeable body, this is the one camera to rule them all.
If you already have another camera, or are trying to decide between this and the X-Pro2, watch for my X-T2 Versus articles, which are next in the queue.
If you’d like to purchase the X-T2, or anything else for that matter please consider using one of the affiliate links below. The price is the same for you, but a small percentage of the purchase price goes to me, which helps keep this site going. Thank you.
Bonus Vertical Power Booster Grip Review
While not quite as kitted out the X-T1 was, the X-T2 is still the camera to get for those who like their accessories. The star of the accessory show this time around is the VPB-XT2 Vertical Power Booster Grip. This is not a typical grip. It adds a lot more than the usual extra battery life and portrait orientation. It offers so much that I think any review that doesn’t cover it extensively is incomplete, so I’ve chosen to include a full review of the VPB-XT2 Vertical Power Booster Grip as part of my overall X-T2 review.
At the weight of another camera, and pretty significant cost when not on sale, the decision to buy this accessory shouldn’t be taken lightly. I have purchased one myself, but because I have the luxury of owning other cameras, I intended to leave it permanently attached to my camera, and I would if it weren’t for what I feel is a pretty big bummer of a flaw.
Flaw
Let’s get this out of the way. The VPB-XT2 Vertical Power Booster Grip ships with an AC-9VS Power Adapter, great for plugging in and charging your X-T2 without having to futz with batteries. The problem is the grip does not offer pass-through charging to the battery that’s in the camera. This means you have to unscrew the grip to charge the battery that’s in the camera, or bring a second cable for USB charging along with something to plug it into.
Adding insult to injury, the camera seems to prefer chewing through the battery in the camera first by default when in “Boost Mode,” so you’re that much more likely to find it drained than if the camera intelligently prioritized the accessory power like some other “Smart” battery add-ons I know.→
I was really hoping that when I dug into the menus with the grip attached I’d find a setting under “Power Management” where I could set the camera to use the grip’s battery power first, but I didn’t.
I suppose I could just leave the body’s battery chamber empty to save a little weight, but I sure would like to have 1,000 shots at my disposal. Sadly, grip removal is going to be part of my photographic routine when I want to shoot with the X-T2.
Weight
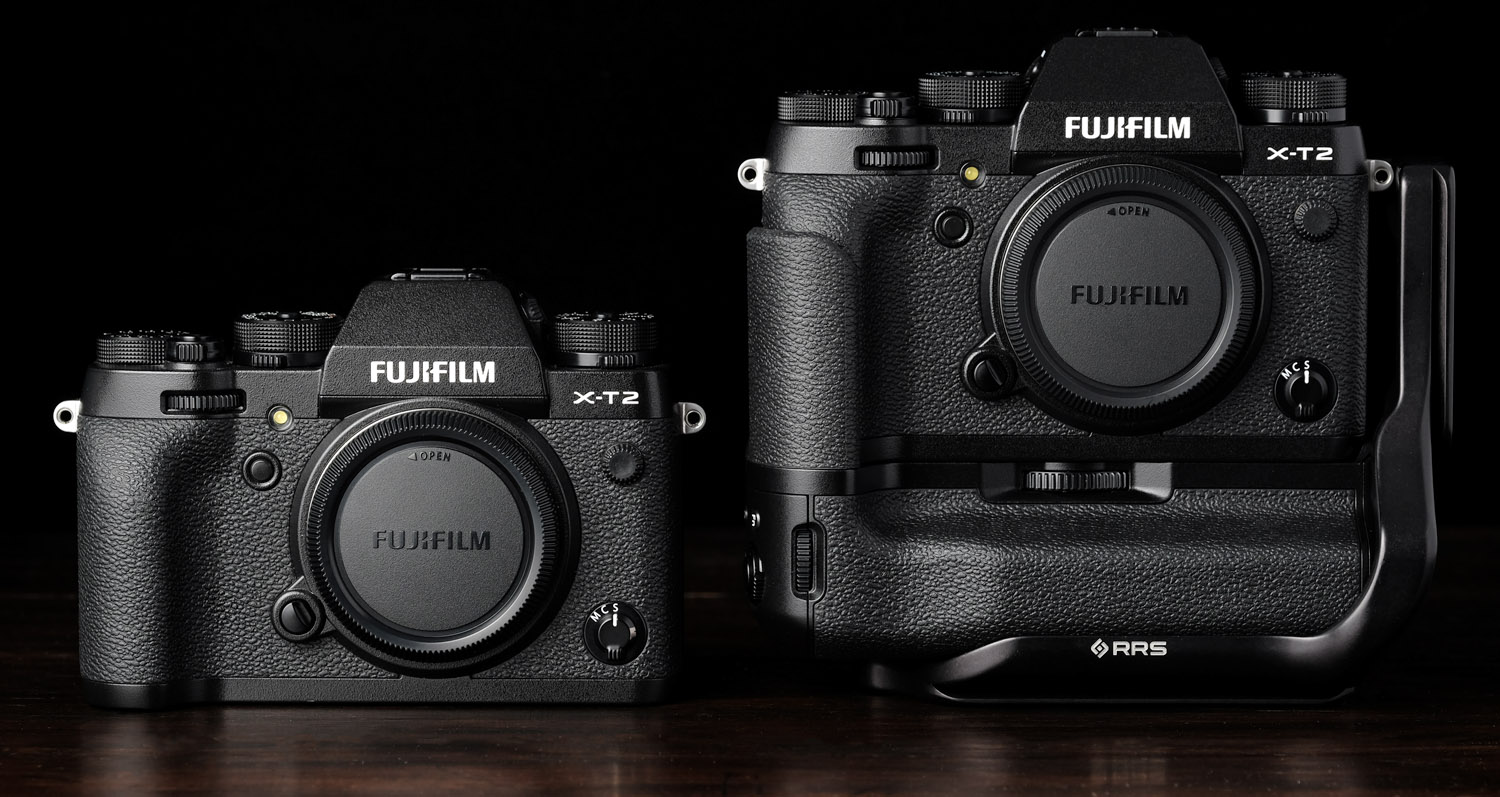
Back to weight, with three batteries loaded, and the XF 16-55mm F2.8 WR attached, the total package weighs in at 1.6 kilograms, or over 3.5 pounds. And that’s before adding an L-plate.→ For anyone who entered the Fuji ecosystem via the X100, that’s a shit ton of camera. Again, because I have other cameras at the ready, I’m willing to make the sacrifice, but for the single camera owner out there, you’ll want to take weight into consideration.
Size
This grips adds a lot more to the size than grips before it. With the incremental increase in size of the body, and the significant increase in size of the grip, the gripped X-T2 package is quite a bit larger than a gripped X-T1. Something for potential upgraders to keep in mind.
As an extreme example, here’s the difference in size you can expect between a stock X-T2, and one with the grip, and an L-plate.
VPB-XT2 Vertical Power Booster Grip Features
So what does on this weight actually get you? It takes the performance of the whole camera up a notch by drawing extra juice from multiple batteries simultaneously.
Literally Up To Eleven
High-speed continuous shooting jumps from 8 to 11 frames per second with the mechanical shutter. For sports photographers who can have an assistant or editor to wade through their frames, this could certainly be a good thing. For me, when shooting wild life for instance, 8 frames per second ended up being too much and I wish I had knocked my frame rate down.
Setting this thing to 11 and holding the shutter release down is an impressive sound.
Faster Autofocus
From 0.08 seconds to just 0.06 seconds. 0.02 seconds doesn’t sound like much, but that’s 25% faster, and something you can feel.
Faster EVF Refresh Rate
While not exclusive to the grip, the EVF refresh rate is very noticeable in lower light situations, and will eat through batteries quickly, and this is a feature it could be easy for lowlight shooters to get used to.
Faster Shooting Interval
From 0.019 sec. to 0.017 sec. A 0.002 second difference.
Faster Shutter Lag
From 0.05 sec. to 0.045 sec. A 0.005 second difference.
Even Less Blackout Time
From 130 milliseconds to 114 millisecond. A 16 millisecond difference.
VPB-XT2 Vertical Power Booster Grip Handling
In my X-T1 Review, I started the Grip section with a problem as well, albeit, with tongue pressed firmly in cheek:
There is one huge, glaring problem with the vertical grip. It feels better in the hand than the camera’s built-in horizontal grip.
This isn’t the case for me with the VPB-XT2. I need to strain my index finger ever so slightly to reach the shutter release. It’s not a deal breaker by any means, but I notice it.
The vertical grip will also alter the handling in landscape orientation, similar to, but not as much as, the MHG-XT2 Metal Hand Grip.→ The added grip serves double duty by adding some rigidity to the the grip.

Second Stick
Fuji incorporated a second Focus Stick on the VPB-XT2, which is really nice. This is a no-compromise implementation. In the three copies I’ve handled, I haven’t noticed any difference between the body and grip Focus Sticks.
Second Q-Menu
This button is actually impossible for me to get at without adjusting my grip, but I have small hands, so I don’t think I should be a reference point. It’s way better than reaching for the on-body Q-Menu button, and I’m super happy I don’t have to worry about poking myself in the eye with my thumb.
Second Set of Command Dials
The X-T1 had this too, but the Command Dials weren’t also buttons. I suspect the Vertical Grip played a role in Fuji’s decision there. Here, I actually like the dials better on the grip. The front one especially is an easier press for me.
One hiccup I’ve experienced with the rear command dial on the grip is it doesn’t have palm rejection, and can be inadvertently pressed when find tuning your composition while mounted on a ballhead/tripod. Not a huge deal, and mostly avoidable with a little attention.
Function-ish Buttons
The grip also provides one additional function button which mimics the setting of Function Button 1, the button on the body between the Exposure Compensation and Shutter Speed Dials. This is unfortunate as that button is so inaccessible, I set to something I don’t need access to when I’m actually shooting.
Confusingly, the AE-L and AF-L buttons do not mimic the user’s settings for the body equivalents.
What I would really like to see is the the grip intelligently added to a second page the SET UP > BUTTON/DIUAL SETTING > Fn/AE-L/AF-L BUTTON SETTING Menu when connected. It’s a bit of a user experience blunder the way it is now.
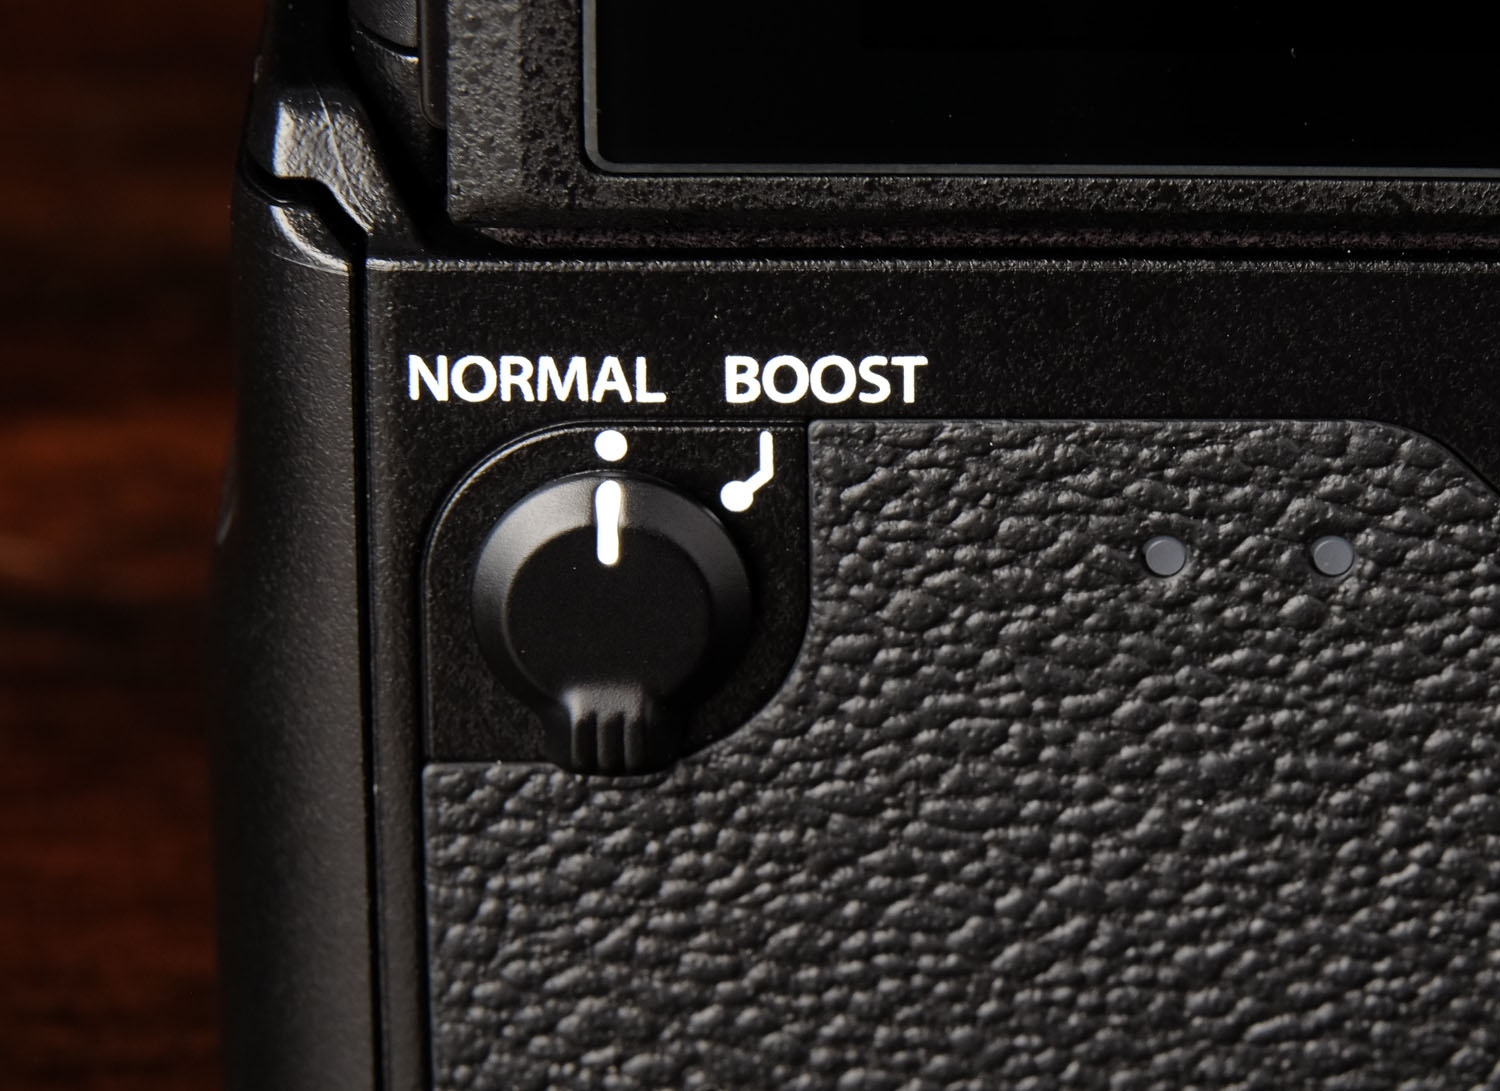
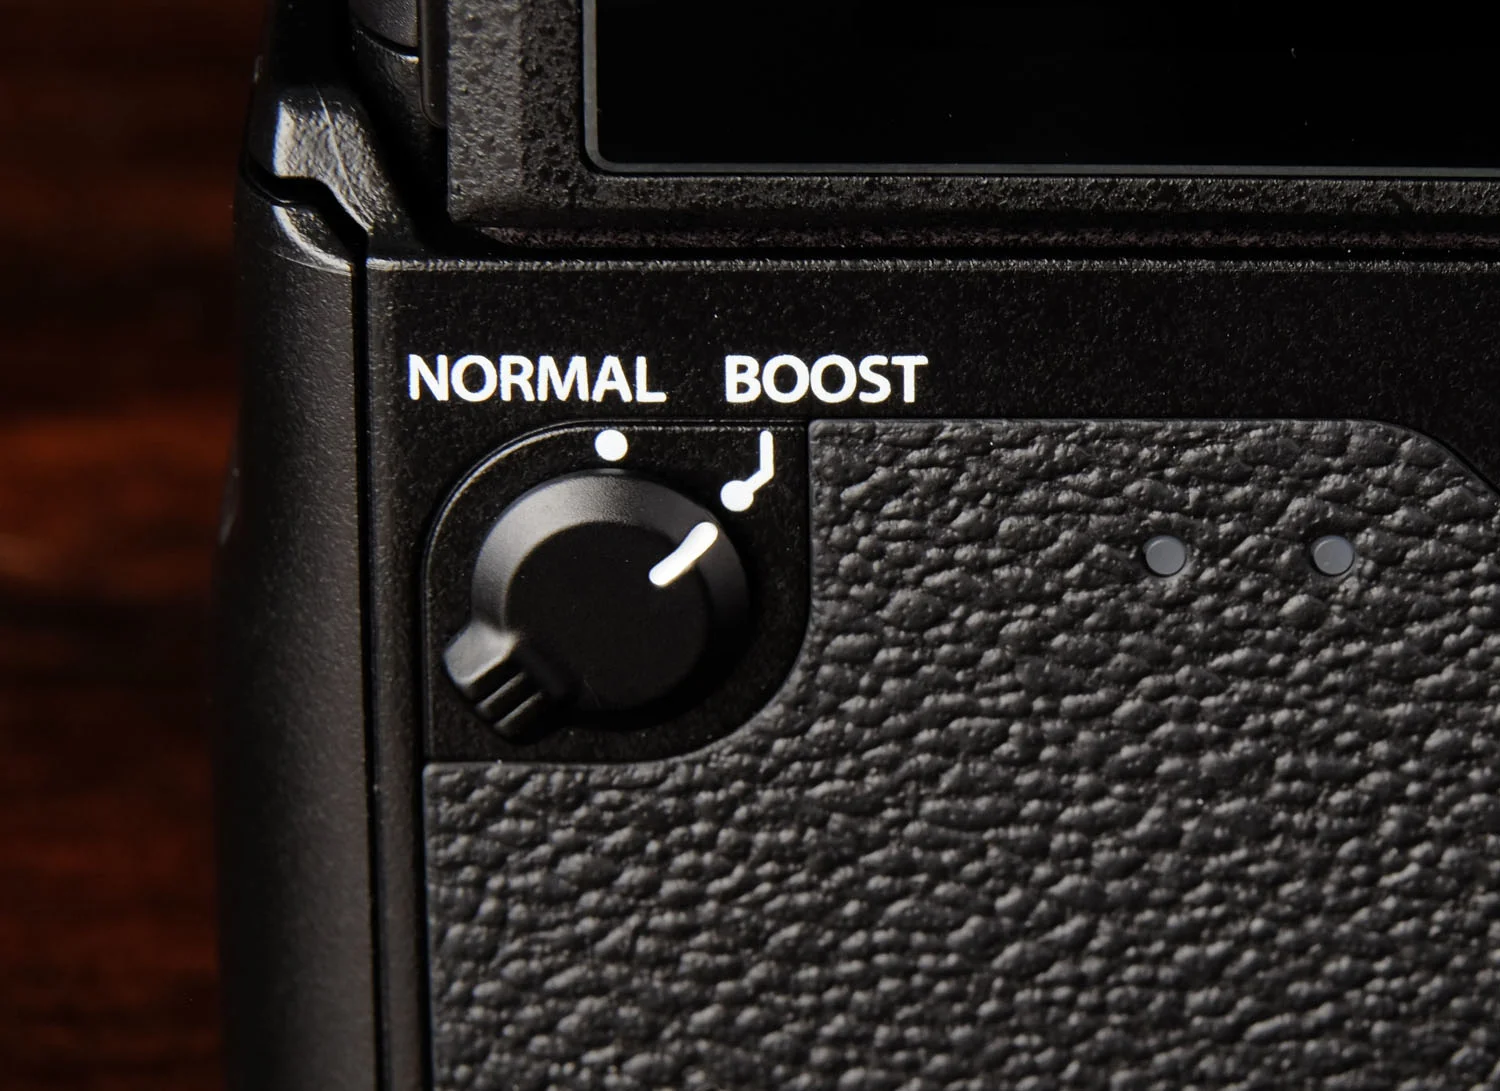
Boost Switch
Convenient access for when you don’t require the performance increases the VPB-XT2 provides, and/or don’t want the added battery drain.
Is It Worth It?
I’m mostly interested in the battery life, handling, and occasionally the autofocus performance.
At the MSRP of $329, it’s a tougher sell for a lot of people, but easier than the VG-XT1 when it was first released which added far less functionality to the camera. Fortunately, the grip is already getting listed on sale for $284.85→ and discounted as part of the kit for just $100 more than the body-only→ at the time of writing. In short, don’t pay MSRP for this accessory, and with that in mind, I think it’s actually a pretty good buy so long as you don’t mind the significant increase in size and weight.
- They would have been much more helpful as little videos; think Apple’s trackpad setting demonstrations. ↩︎