Breathing New Life Into Early X-Trans With Capture One
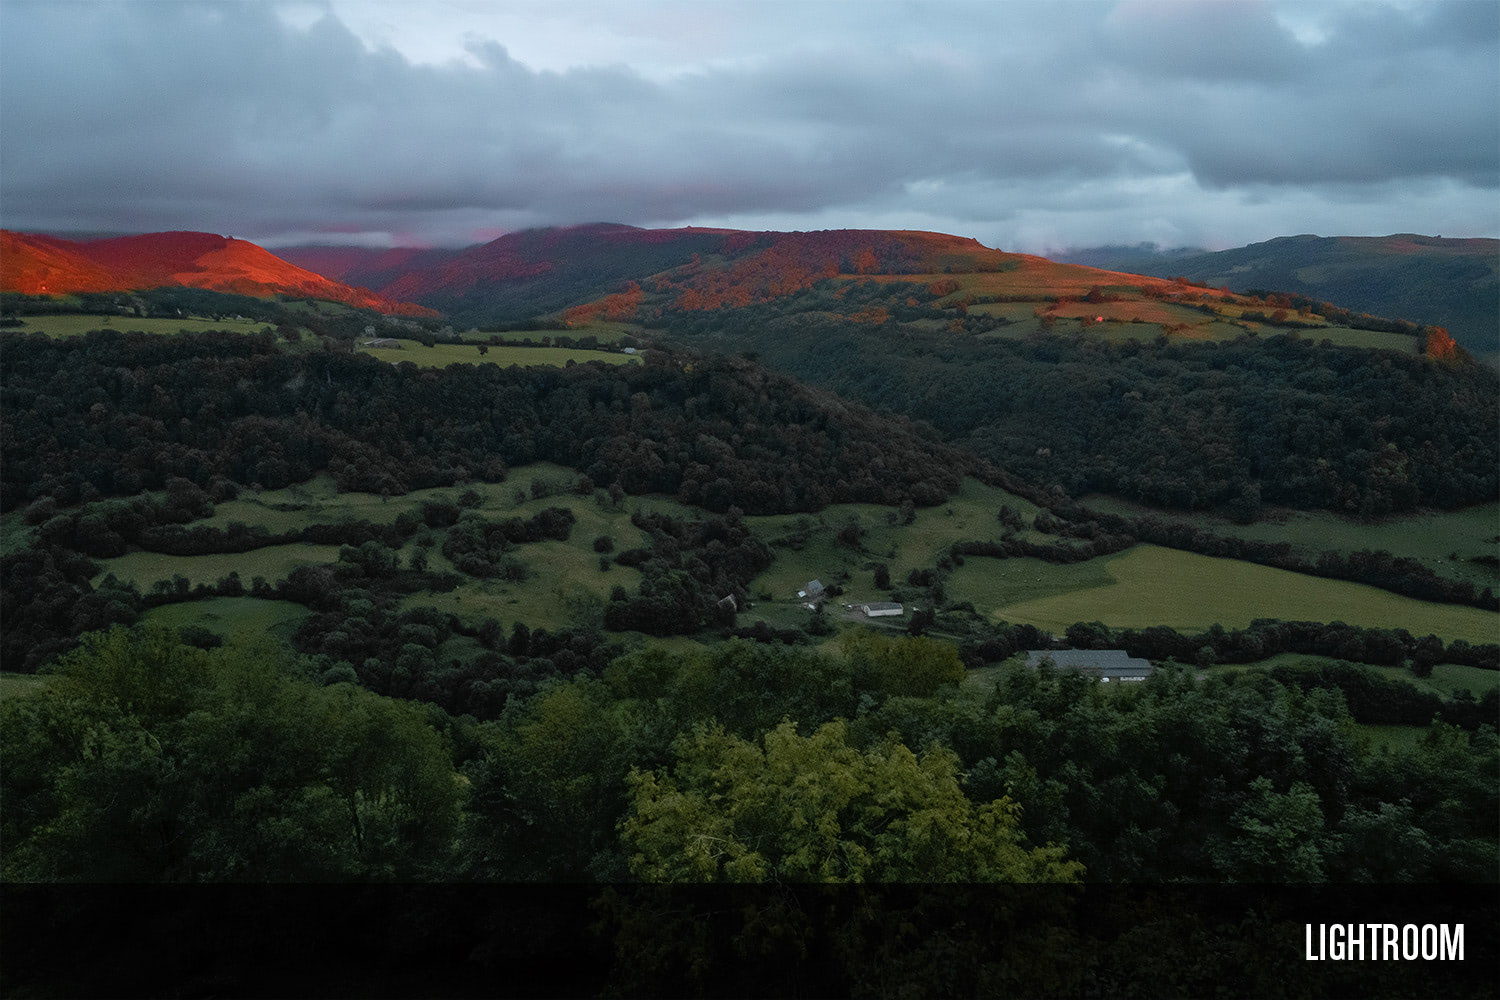
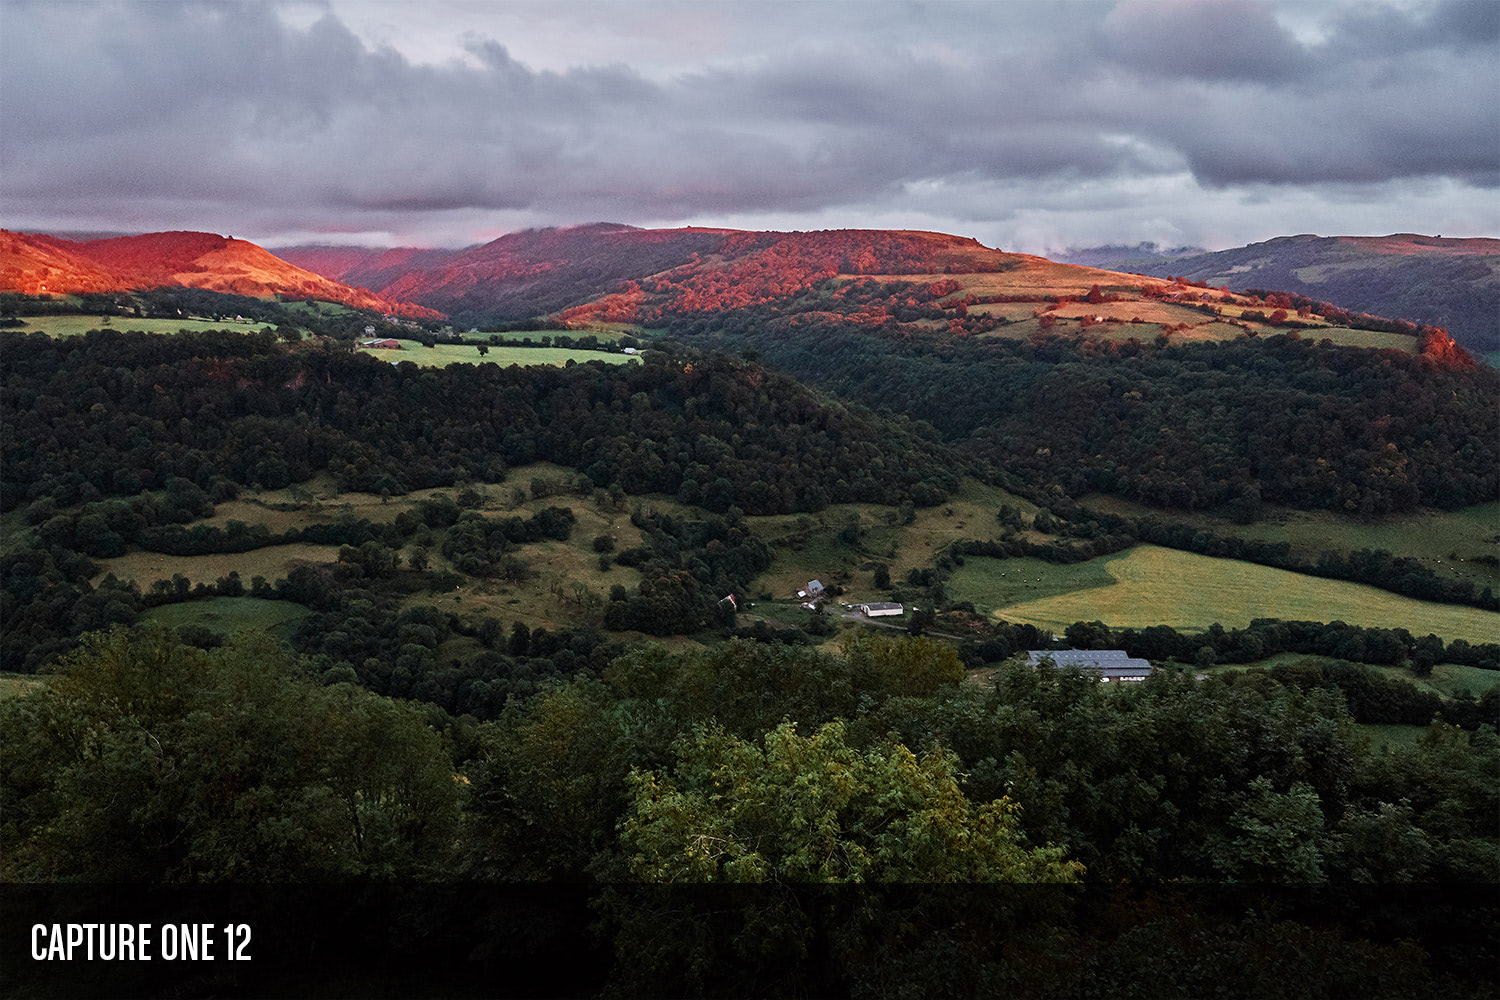
/Following up on my last post, I’ve been going through some old RAFs in Capture One. The difference I’m seeing compared to what I can get out of Lightroom is shocking. Check out this terribly underexposed sunset image, captured with an X-E1 in 2013.

My exposure compensation was still set at -2.0 from a previous shot, so I’m certainly not hoping to get anything useful out of that shot, but look at the difference in what I’m able to pull out of the exposure in Capture One 12 compared to Lightroom Classic (or whatever the hell they’re calling it these days).
Now check out this crop.
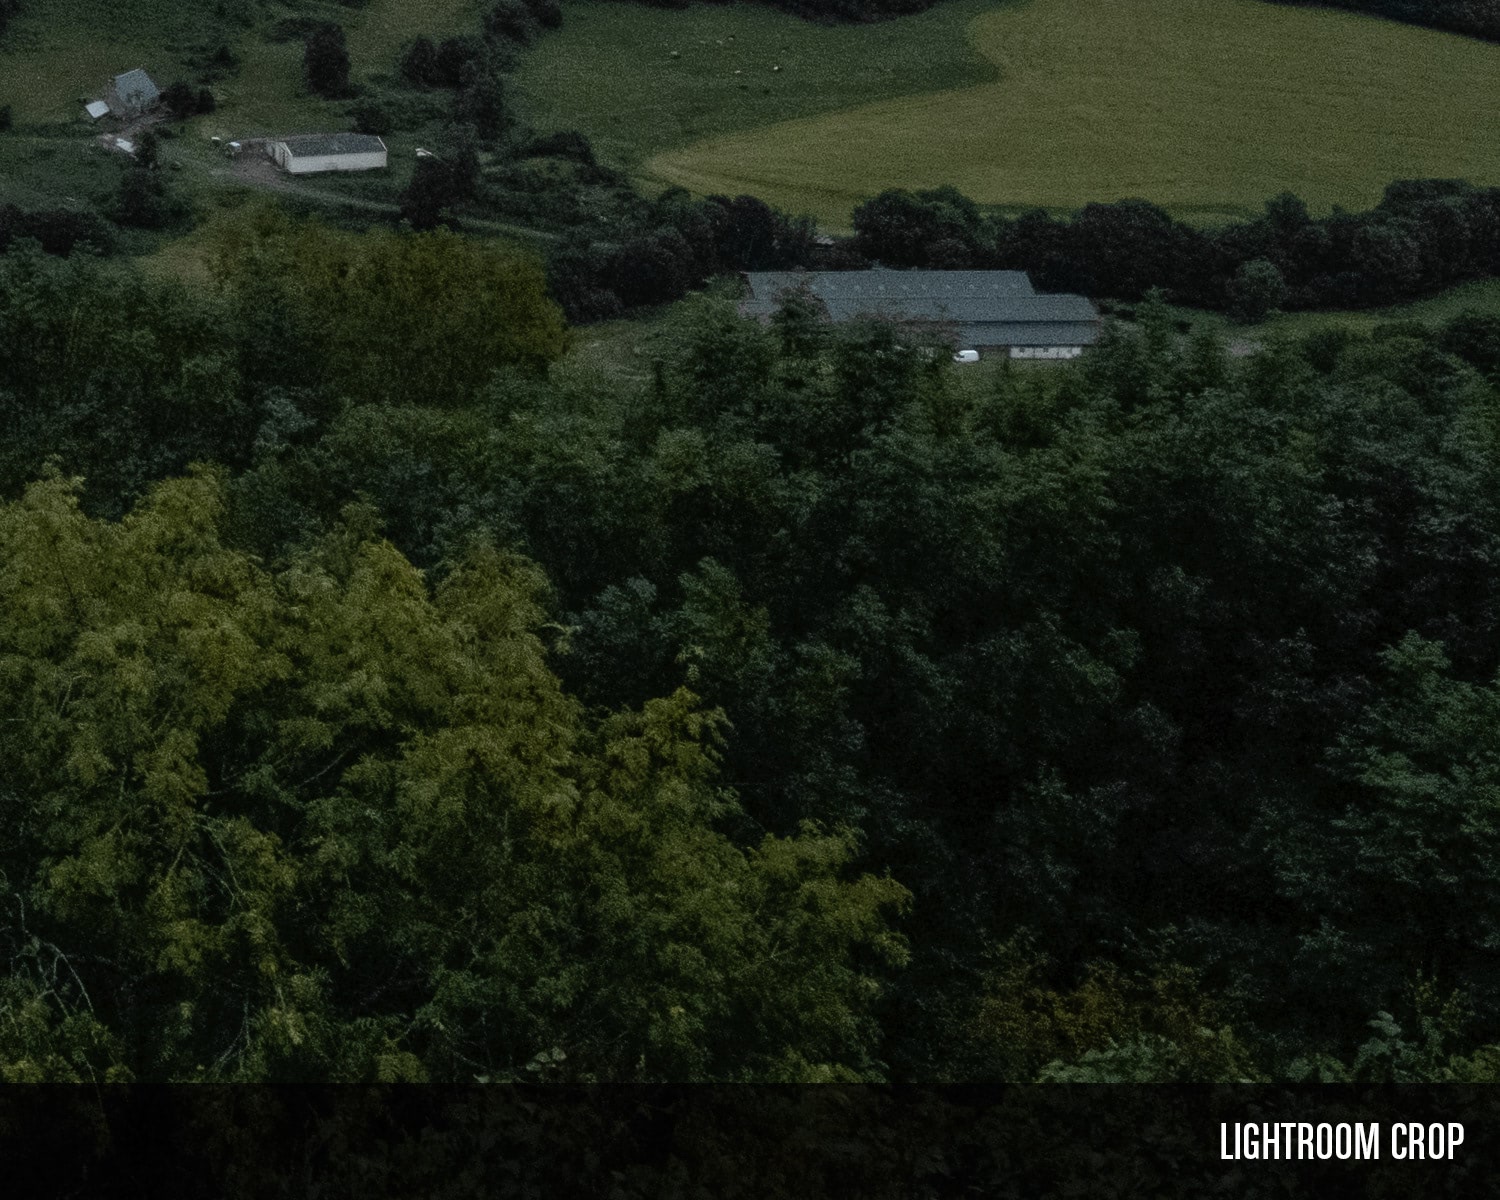
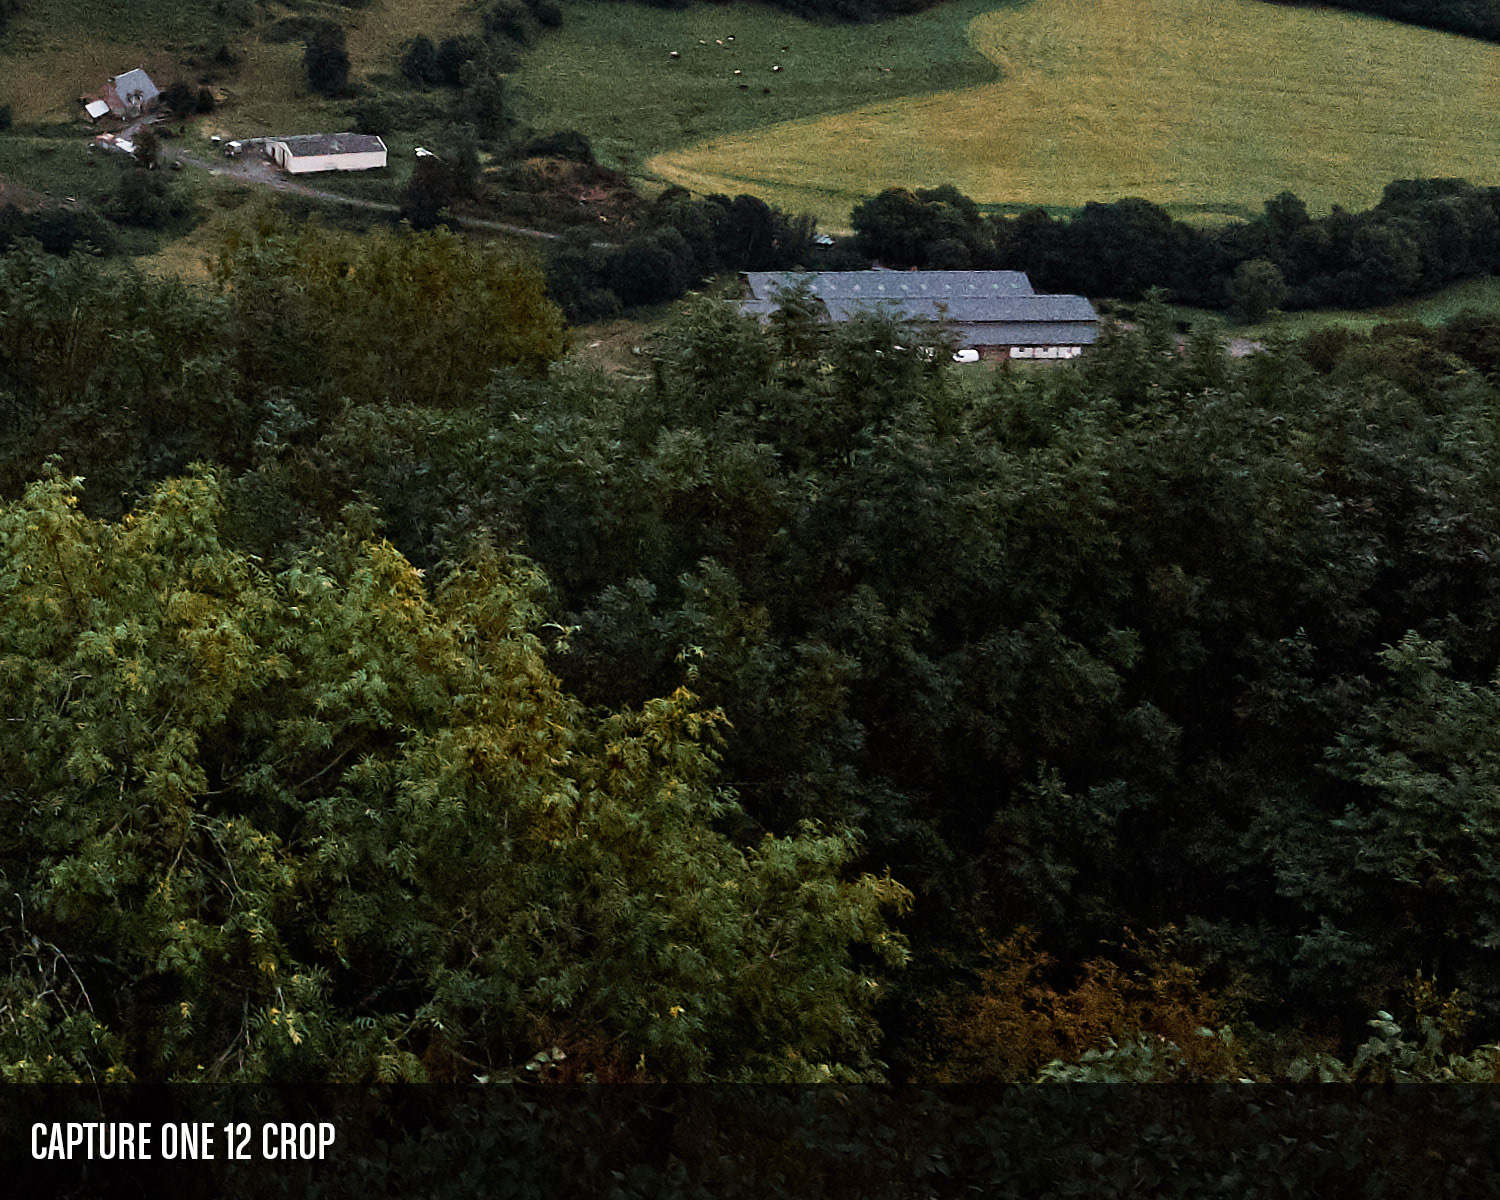
Capture One sharpening settings are at their defaults ( I would typically reduce them slightly). In Lightroom, I used the oft advised high Detail slider at 85, and relatively low Amount of 25. Any higher on the amount and Lightroom starts sharpening noise. Increasing the Luminance Noise Reduction blurs detail.
From the farm buildings, the detail in the foliage, the bizarre 8-bit-looking grass, Lightroom’s limitations with these older sensors is astounding. No wonder I decided to shoot JPEG.
Fuji have come a long way with their sensors, and I have already acknowledged that Lightroom started doing a lot better when X-Trans III came out. The point is, if you’ve decided to make the jump yourself and you’ve got some older X-Trans 1 RAFs in the archives,1 it could well be worth reprocessing them in Capture One.→
Luckily I got my exposure set a little better on my next attempt.

- Or you’re simply happy with an older body. For a lot of people, 16 megapixels is plenty. ↩︎